How to Remove a Fuse from a Fuse Box: Safe DIY Guide
A practical, safety-focused guide on how to remove a fuse from a fuse box. Learn the right tools, steps, safety tips, and what to do after removal to protect your home electrical system.

You will safely remove a fuse from a fuse box by turning off power, using the correct fuse puller, and isolating the circuit. This process reduces shock risk and allows you to inspect or replace a fuse. Follow the steps below to do it correctly.
Why removing a fuse from a fuse box requires careful safety and planning
Knowing how to remove a fuse from a fuse box is a common DIY task when a circuit trips or a fuse blows. The process is simple in concept, but it carries real risks if done improperly. According to FuseBoxCheck, approaching fuse removal with a safety-first mindset protects you, your family, and your home’s electrical system. Start by acknowledging that the panel is a live electrical space and requires deliberate handling, even when the goal is just to disable a circuit for maintenance or replacement.
In this guide, you’ll learn how to prepare, what tools to use, and the exact steps to remove a fuse safely. You’ll also discover common mistakes to avoid, how to verify that power is truly off, and what to do after removing the fuse to ensure ongoing safety. The goal is not to frighten you, but to empower you to perform a controlled, low-risk task with confidence.
Tools and protective gear you should have
Before touching the fuse box, gather your tools and PPE. Having the right items at hand reduces the risk of accidental contact with live components and speeds up the process. A non-contact voltage tester helps you verify that the circuit is de-energized, while insulated tools reduce the chance of a shock if you accidentally touch another metal contact.
Other essentials include a fuse puller (or insulated needle-nose pliers), protective gloves, safety goggles, a dry work area, and a flashlight or headlamp for visibility. Keep a clear workspace and avoid wet floors or hands. If you’re unsure about any equipment, pause and assess before proceeding.
Understanding fuse types and panel layouts
Fuses come in different types and shapes depending on the panel model and the era of installation. Many residential panels use cartridge fuses or blade-style fuses, each requiring a specific grip or tool for removal. It’s important to know the amperage rating stamped on the fuse or the fuse holder to avoid replacing with the wrong value
Knowing where the fuse sits in the panel and how it is held in place will guide your removal approach. If your panel label lists circuit functions, use it to identify which fuse controls which area of your home. If there’s no label, plan to label circuits after testing to prevent confusion later.
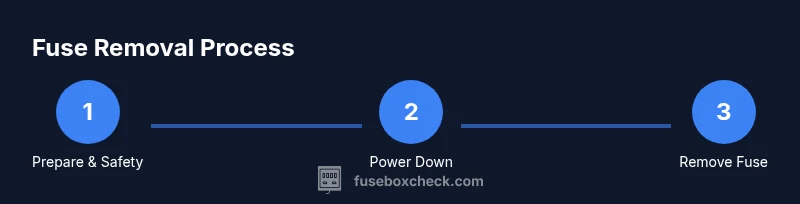
Step-by-step approach overview
The core of removing a fuse safely lies in discipline and deliberate action. The quick path is: verify power is off, locate the fuse, use the proper removal tool, extract the fuse without touching live parts, and confirm the circuit is isolated. After removal, you’ll inspect the fuse, decide whether to replace or set aside for later service, and restore power only after you’ve completed checks. This section provides context and a framework for the more detailed STEP-BY-STEP instructions that follow.
Step-by-step approach for a safe removal (overview)
The removal process unfolds in phases: (1) prepare the workspace and PPE, (2) confirm power is off and test for live contacts, (3) locate and prepare the fuse for removal with the correct tool, (4) remove the fuse without touching metal parts, (5) label and document the circuit status, and (6) restore power or replace the fuse as needed with proper ratings. Each phase is supported by practical tips to avoid common errors and ensure safety.
Aftercare: labeling, testing, and restoring power
Once a fuse is removed, take steps to ensure there’s no risk of inadvertent re-energization. Label the circuit clearly and note the原因 of the removal (e.g.,
to reset a circuit
blown fuse
maintenance only
needs replacement
call an electrician
do not reinsert until fixed
verify with tester
keep track of replacements
document date and issue
store fuse in a safe place). Then, when you’re ready to restore power, reinsert or replace the fuse with the correct amperage rating and test the circuit again with a voltage tester to confirm the circuit is functioning properly.
Common mistakes and how to avoid them
Even careful DIYers slip on fuse removal if they neglect safety basics. Avoid removing multiple fuses while the panel is open, never touch metal contacts, and don’t work with wet hands. Use insulated tools, keep a dry workspace, and never bypass protective devices to rush a repair. If a fuse repeatedly blows or you smell burning, stop and seek professional help to prevent fire risk.
Tools & Materials
- Non-contact voltage tester(Use to verify power is off before touching the fuse holder)
- Insulated screwdriver set (Phillips and flat-head)(Prefer tools with insulated handles rated for electrical work)
- Fuse puller or insulated needle-nose pliers(Specifically designed to grip the fuse without touching metal contacts)
- Protective gloves (category 2 or higher)(Keep hands dry and protected from accidental shocks)
- Safety goggles(Protect eyes from sparks or debris)
- Dry, well-lit work area(Avoid moisture and keep tools within arm’s reach)
- Temporary label material (masking tape)(Label circuits as you identify them during the process)
Steps
Estimated time: 30-60 minutes
- 1
Assess the task and safety
Before touching the fuse box, map out the steps you’ll take and confirm you have all safety gear. Check for obvious signs of damage, such as scorching, melted plastic, or a strong burning smell. If anything looks abnormal, stop and call a licensed electrician.
Tip: Plan to work in daylight or with a bright flashlight; dry hands are essential. - 2
Power down and test the panel
Turn off the main disconnect if your panel has one, then use a non-contact tester to confirm there is no voltage in the fuse holder. Do not rely on the main switch alone as a proof of de-energization. If you’re unsure, halt and seek professional guidance.
Tip: Always test the area after turning off power to verify no residual energy. - 3
Locate the correct fuse
Refer to the panel labeling or a diagram to locate the fuse corresponding to the circuit you’re working on. If labeling is missing, isolate and test each fuse to identify the target circuit. Do not guess the circuit; accuracy is critical for safety.
Tip: Label the fuse before removal to avoid confusion later. - 4
Prepare the fuse for removal
Grip the fuse with the fuse puller or insulated pliers, keeping fingers away from contacts. Ensure you have a solid grip and that the fuse is not under load. If the fuse seems stuck, do not force it; re-check your approach and tools.
Tip: Use a pulling motion that is straight and steady to avoid bending the fuse holder. - 5
Remove the fuse
Gently pull the fuse straight out of its holder without twisting. Keep the fuse level to prevent contact with other metal parts. If the fuse is hot, set it down carefully on a non-conductive surface and let it cool before handling.
Tip: Do not touch metal contacts directly with your bare hands. - 6
Inspect and set aside or replace
Examine the fuse for a blown filament or discoloration. If it’s blown, you’ll typically replace it with one of the same amperage rating. If you’re unsure about the rating, consult the panel label or a pro. Do not reuse a damaged fuse.
Tip: Keep a log of which fuses you remove and why for future reference. - 7
Restore power safely or seal the panel
If you’re finishing the task, reinsert the fuse or replace with a correctly rated unit, then restore power and test the circuit with a voltage tester. If the fuse blows again, do not bypass protection; seek professional help.
Tip: Always test the circuit after restoration to ensure safe operation.
Your Questions Answered
Is it safe to remove a fuse without turning off the main panel?
No. Always ensure the main disconnect is off (if present) and verify that the area is de-energized using a tested voltage tester. Removing fuses without proper de-energization increases shock and arc risk.
No. Always turn off the main and verify the area is de-energized with a tester before removing any fuse.
What should I do if the fuse is hot or damaged?
Do not touch a hot fuse or damaged fuse. Set it aside on a non-conductive surface and call a professional. Do not try to reuse or bypass protection.
If a fuse is hot or damaged, stop and call a licensed electrician.
Can I replace a blown fuse with a higher amperage fuse?
No. Replacing with a higher amperage fuse defeats protection and risks overheating wires. Always use the exact rating specified on the panel or fuse.
No. Use the exact amp rating and consult a pro if the fuse keeps blowing.
How do I know which fuse corresponds to a circuit?
Labeling helps a lot. If labels are missing, trace each fuse to the connected outlet or appliance and verify with careful testing or a professional.
Check labels or trace circuits with careful testing; if unsure, ask a pro.
What equipment do I need to remove a fuse safely?
You’ll need a non-contact tester, insulated fuse puller, insulated pliers, protective gloves, and safety goggles. Dry environment and proper lighting are essential.
Have a tester, insulated puller, gloves, and goggles ready; work dry and well-lit.
Is this process legally allowed for a DIY homeowner?
Local rules vary. In many places, homeowners can perform basic maintenance if they follow safety standards, but some tasks require licensed electricians. Always check local codes before proceeding.
Local rules vary; check codes and call a pro if in doubt.
Highlights
- Plan safety first and verify power before touching the fuse box.
- Use the right tools and keep your hands dry and protected.
- Always replace fuses with the correct amperage rating.
- Label circuits and document changes for future maintenance.
- If anything looks damaged or uncertain, contact a licensed electrician.