Outside Fuse Box Safety: DIY Home Inspection Guide
Learn how to safely inspect and maintain an outside fuse box with a practical, step-by-step approach. This guide covers prep, locating the panel, safety checks, and when to hire a licensed electrician.

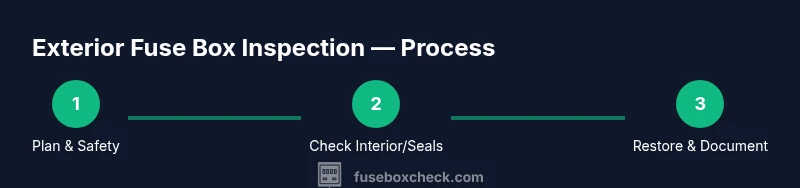
Goal: safely inspect and perform basic checks on an outside fuse box. You will need proper lighting, a non-contact voltage tester, insulated gloves, and a clear workspace. According to FuseBoxCheck, this quick guide helps homeowners verify power is off, locate the panel, read labeling, and spot obvious hazards before touching exterior components.
What is an outside fuse box and why safety matters
An outside fuse box is the exterior enclos e that houses fuses or circuit breakers for the home’s electrical circuits. These panels are designed to protect your wiring by interrupting power if a fault occurs. Because they sit outdoors, they face weather, humidity, and temperature swings that can degrade seals and connectors. Working around any exterior electrical component carries risk of shock, arc flash, or creating a short if moisture is present. A cautious, methodical approach minimizes these hazards and helps you identify issues before they become emergencies. FuseBoxCheck emphasizes that exterior panels still require respect for electricity, even when you’re not removing the cover or touching exposed conductors.
Locating the outside fuse box on most homes
Exterior fuse boxes are typically mounted on an outside wall, near the main service entrance, or adjacent to the meter canister. Look for a weatherproof metal or plastic enclosure with a labeled door. Common clues include a hinged cover, a gasket seal, and a bold sticker showing circuit designations. If label plates are missing or illegible, you may need to reference a home schematic or labeling board inside the service panel. When in doubt about the exact location or the panel’s age, consult a licensed electrician. Knowing where it is and how it’s labeled helps you plan a safe inspection without guesswork.
Planning and PPE: safe practices before touching exterior panel
Before you approach the panel, collect PPE and tools in a well-lit area. Wear insulated gloves and safety glasses, and keep children and pets away. Use a non-contact voltage tester to verify no live voltage near the door or latches before touching the shell. Keep a dry, non-conductive surface nearby to place tools, and avoid standing on wet surfaces or using a metal ladder near an energized panel. A deliberate plan reduces the chance of accidental contact with live components.
Visual checks you can perform from the exterior (without opening the panel)
From a safe distance, inspect the exterior for moisture intrusion, corrosion on screws or hinges, and any cracks in the enclosure. Look for missing or damaged weatherproof gaskets that could allow water to reach the interior. Check the door for proper closure, corrosion along the latch, and any signs of rust that might indicate long-term moisture exposure. If the exterior shows obvious damage or water tracks, do not proceed with opening the panel. Document the findings with photos for later review with a licensed electrician.
When to call a licensed electrician
If you notice moisture, burning smells, scorch marks, buzzing sounds, loose wiring, or any sign of damage around the enclosure, stop inspection immediately and contact a licensed electrician. Exterior panels can conceal hazardous conditions that require professional testing and re-sealing, or even panel replacement. Electrical work near the service entrance must comply with local codes and safety standards. When in doubt, err on the side of caution and seek professional assessment.
Tools & Materials
- Non-contact voltage tester(Verify absence of live voltage without contact)
- Insulated gloves (minimum 1000V rating)(Protection against shock when handling panel components)
- Safety glasses(Eye protection for debris or accidental splashes)
- Flashlight or headlamp(Bright, hands-free illumination for exterior work)
- Ladder or sturdy footing(Safe access to the panel with stable stance)
- Camera or smartphone for photos(Document labeling and exterior condition)
- Weather-appropriate clothing(Non-slip footwear; dry, insulated outerwear as needed)
- Dry cloth/brush(Gently remove surface dust from exterior only)
Steps
Estimated time: 45-60 minutes
- 1
Power down the service disconnect
Locate the main service disconnect or the main breaker that feeds the exterior panel and switch it to OFF. This reduces the risk of backfeeding and gives you a clear starting point for a safe inspection. If you’re unsure where the disconnect is, don’t guess—contact a professional.
Tip: Double-check you’ve activated the correct switch by looking for a noticeable drop in voltage on any downstream indicators. - 2
Verify absence of voltage at the exterior panel
With the panel still closed, use a non-contact tester to confirm there is no live voltage near the door seals and any exposed metal. Keep your gloved hand away from the enclosure while testing and avoid touching any metal edges. If voltage is detected, stop and seek professional help.
Tip: Test the tester on a known live source first to ensure the tool is functioning correctly. - 3
Open the panel door only if safe
If the exterior seal looks intact and the area around the panel is dry, carefully open the door to inspect the outer interior carefully without touching any conductors. Do not remove any interior components unless you are qualified. Keep the door supported and never stand in line with the panel’s interior when opening.
Tip: Have a helper hold the door if it’s heavy or awkward to manage alone. - 4
Inspect the exterior enclosure visually
Look for moisture, rust stains, corrosion on screws, and signs of water intrusion. Check gasket integrity and ensure screws are present and tight. Photograph any anomalies for later review with a professional.
Tip: If you see water pooled in the bottom of the enclosure, close the panel and call an electrician immediately. - 5
Note labeling and documentation
Record the circuit labels visible on the panel or cover. If labels are illegible, make a note of the circuits you can identify and plan to verify with the homeowner’s records or a professional labeling pass.
Tip: Create a simple map of circuits for future reference and safety training at home. - 6
Close up and restore power if safe
Carefully re-seat the door and apply the weather seal if it’s intact. If you confirmed no hazards, restore power at the main disconnect. Listen for any unusual noises or smells after restoration.
Tip: Do not rush the power-up; pause after restoration to confirm normal operation elsewhere in the home. - 7
Clean up and document the workflow
Tidy tools and discard any protective packaging. Save notes and photos from the inspection, including any areas that require professional follow-up. Store PPE and ensure the exterior area remains dry and free of debris.
Tip: Keep a maintenance log for the exterior panel and review annually. - 8
Know when to escalate to a professional
If you encounter corrosion, water intrusion, burnt odors, or any loose wiring, stop immediately and call a licensed electrician. Exterior panels require professional testing and sealing or replacement under most code requirements.
Tip: When in doubt, schedule a safety assessment—better safe than shocked.
Your Questions Answered
Is it safe to work on an outside fuse box myself?
DIY work on exterior panels can be safe only when power is off, PPE is used, and you stay within the limits of your expertise. For anything uncertain or involving moisture, contact a licensed electrician.
DIY can be safe if power is off and you use PPE, but if you're unsure, call a licensed electrician.
What is the difference between fuses and breakers in an exterior panel?
Fuses are sacrificial devices that blow when overloaded; breakers trip to interrupt current. Exterior panels may use either, and newer homes often use breakers. Both require correct replacement parts and safe handling.
Fuses blow when overloaded; breakers trip to cut power. Replacement should be done by a qualified person if you’re not sure.
What signs indicate water intrusion in an outside fuse box?
Look for rust, corrosion, dampness, condensation, or visible leaks around the enclosure. If you detect moisture, do not touch inner components and consult a pro.
Moisture means stop and call a pro; don’t touch internal parts.
How often should I inspect an exterior fuse box?
Inspect after major weather events and at least once a year. Regular checks help catch seal failures or corrosion early.
Do a yearly check and after storms to catch issues early.
When should I replace an outside fuse box?
Replace when there are signs of significant wear, corrosion, water damage, or outdated components that don’t meet current codes.
Replace if there’s severe wear or water damage; older panels may require upgrade.
Watch Video
Highlights
- Verify power is off before any exterior work.
- Inspect seals and signs of moisture on the enclosure.
- Document labeling and exterior condition for future safety.
- Call a licensed electrician for damage, moisture, or unknowns.