What Size Fuse Box for Garage: A Practical Sizing Guide
Learn how to size a garage fuse box with practical load calculations, code considerations, and a step-by-step approach for safe, compliant upgrades.

To safely power a typical home garage, plan for a dedicated main disconnect and a subpanel sized to your expected loads. A common starting point is a 100-amp subpanel fed from your main service, with 20-amp and 15-amp branch circuits for outlets, lighting, and dedicated tools. Final size should be confirmed by a load calculation and local code requirements.
Understanding Garage Electrical Service Size
Your garage fuse box size is not arbitrary. It hinges on the total electrical load your garage will demand and on how your home’s service feeds that space. In most homes, the garage is either supplied by the main panel or connected to a dedicated subpanel that serves workshop outlets, lighting, and heavy equipment. Common starting points include a 100-amp or 200-amp service, but the exact size depends on your total load, future plans, and local code requirements. Start by identifying your service rating from the main panel label and listing every circuit you plan to run in the garage—lights, receptacles, HVAC, welder, compressor, and power tools. Remember that future projects (a large workshop, EV charging, or portable heaters) may raise the required size, so build in room for expansion. A properly sized fuse box prevents nuisance trips and improves safety for you and your family.
How Loads Determine the Right Fuse Box Size
Loads are the lifeblood of a panel. For a garage, you’ll categorize circuits as lighting, receptacles, and dedicated appliances (like welders or space heaters). Important distinctions include continuous loads (ones that run for more than three hours) vs non-continuous loads. A general rule of thumb is to account for peak demand and apply a demand factor; however, the exact calculation requires measuring or estimating wattage for each device and converting to amps (divide watts by 120V). This process is why you cannot size a panel purely by counting outlets. A properly sized fuse box will have a main disconnect sized to handle the calculated load and branch breakers that protect individual circuits. If the math seems complex, a licensed electrician can perform a formal load calculation using standardized methods, and can also identify any deratings that might apply to garage wiring. The goal is to avoid overloading feeders while leaving room for safe operation.
Common Garage Scenarios and Benchmarks
For many garages, 60–100A is a common starting point for light to moderate usage, including general outlets and lighting. Workshops with multiple power tools, a compressor, or space heaters may require larger service, typically in the 100–200A range, and possibly a dedicated subpanel for the garage to isolate heavy loads from the home’s main circuits. If you anticipate EV charging, welding, or large air compressors, plan for even higher capacity and proper dedicated circuits. Always verify with a load calculation and consult local codes before purchasing or wiring a panel. These benchmarks are guidelines; your exact needs depend on planned equipment and expansion plans.
Step-by-step Approach to Start Sizing (High-Level)
- Start by noting the service rating on your existing main panel and any subpanels. Gather information about planned garage devices and their wattage. Estimate continuous vs intermittent loads and apply a safety margin. Draft a circuit map showing where lights, outlets, and heavy tools will go, and how many 15A and 20A breakers you’ll need. Leave space for future expansion and ensure you have a dedicated circuit for heavy equipment. If the calculation becomes uncertain, consult a licensed electrician or use a formal load calculation tool.
Code and Safety Considerations for Garages
Garages often require adherence to specific electrical code requirements, including proper grounding, GFCI protection for receptacles, and appropriate disconnects. The garage space may demand weatherproof enclosures and correct wire sizing for the planned circuits. While basic knowledge helps, it’s essential to follow local amendments and permit requirements. If you’re upgrading or adding a subpanel, you may need inspection to confirm compliance with the NEC and local code provisions. Prioritizing safety reduces the risk of shock, fire, and nuisance trips.
Upgrading: What to Expect When Replacing a Panel
Replacing or adding a panel is typically not a DIY task. The process involves shutting off service, verifying voltage levels, routing feeders, installing a properly rated main disconnect, and ensuring correct grounding and bonding. Permits and inspections are commonly required. Plan for sufficient clearance, labeling of circuits, and testing after installation. Consider installing a dedicated subpanel for the garage to reduce the load on the home’s main panel and to simplify future expansion. A professional electrician can handle the design, permitting, and safety testing to ensure code compliance.
Getting Started: How to Move Forward with Confidence
Start with a clear plan that includes your current loads and future expansion. Sketch a layout of your garage with planned outlets, lighting, and tool locations. Work backward from these plans to determine whether your existing service can support a subpanel or if an upgrade is warranted. Gather a few quotes from licensed electricians and request a formal load calculation. Maintain labeling for all circuits and keep a written record of the final panel configuration for future maintenance and resale.
Tools & Materials
- Voltage tester(To verify circuit voltage before work)
- Multimeter(For measuring loads and continuity)
- Clamp meter(Helpful for reading continuous loads on feeders)
- Insulated screwdrivers(For safe panel work in tight spaces)
- Circuit breaker finder(Locate and label existing breakers)
- Safety gear (gloves, goggles)(Personal protection)
- Notepad and pen(Document circuits and labeling)
- Reference manuals/permits(Keep documentation handy)
Steps
Estimated time: 2-4 hours
- 1
Audit current service and loads
Locate the main panel and read the service rating. List every device and planned garage circuit, noting approximate wattage where possible. This establishes the baseline for sizing.
Tip: Take clear photos of the panel labeling and wiring before changing anything. - 2
Compute anticipated garage loads
Estimate wattage for lights, outlets, heaters, welders, and compressors. Distinguish continuous loads from intermittent ones and convert watts to amps (divide by 120V).
Tip: Remember to include a safety margin for future expansion. - 3
Decide between a subpanel or main upgrade
If your current service can support it, a subpanel for the garage is a clean solution. If not, plan for a main service upgrade that can handle added feeders.
Tip: Ensure feeder conductors match or exceed the calculated ampacity. - 4
Check code requirements and permits
Consult your local building department for permitted panel upgrades and GFCI/AFCI requirements in garages. Obtain all necessary permits before work begins.
Tip: Per code, some garages require dedicated circuits for specific tools. - 5
Plan circuit distribution and labeling
Create a circuit map: map lighting, outlets, and dedicated tools to appropriate breaker sizes (typically 15A for outlets, 20A for heavy-use devices). Leave space for future circuits.
Tip: Label every breaker clearly and keep a spare slot for expansion. - 6
Verify plan with a licensed electrician
Have a professional review your sizing plan, wiring routes, and permit requirements before purchasing components.
Tip: Ask for a written plan and an estimated timeline for inspection.
Your Questions Answered
What is the minimum size for a garage fuse box?
There isn’t a universal minimum for garage panels; sizing depends on your loads. For simple setups, a small starter may work, but many garages benefit from at least 60-100A, with larger workshops often needing 100-200A. Always perform a formal load calculation to determine the safe size.
There isn’t a universal minimum for garage panels; sizing depends on loads. A load calculation will determine the right size.
Can I size the panel myself?
Sizing and wiring a garage panel involves high voltage and requires permits and inspections. It is strongly advised to hire a licensed electrician to ensure safety and code compliance.
This work is best left to a licensed electrician to ensure safety and code compliance.
What is a subpanel and when should I use one in a garage?
A subpanel is a secondary distribution panel fed from the main, used to split garage loads from the home’s main circuits and allow easier expansion. It helps manage heavy tools without overloading the main panel.
A subpanel is a second panel fed from the main to split garage loads and make expansion easier.
Do I need a permit to upgrade my garage panel?
In most areas, upgrading a garage panel requires a permit and inspection. Check with your local building department and plan for an inspection after installation.
Yes, you’ll usually need a permit and inspection.
How long does a load calculation take?
A quick estimate can be done in minutes if you know the loads; a formal calculation by a professional may take longer, depending on complexity and required documentation.
A quick estimate can take minutes; a formal calculation may take longer.
What are warning signs my garage panel is overloaded?
Frequent tripping, warmth around the panel, buzzing sounds, or a burning smell indicate overload or loose connections. Stop using the affected circuits and seek professional evaluation promptly.
If the panel trips often or feels warm, get it checked by a pro.
Watch Video
Highlights
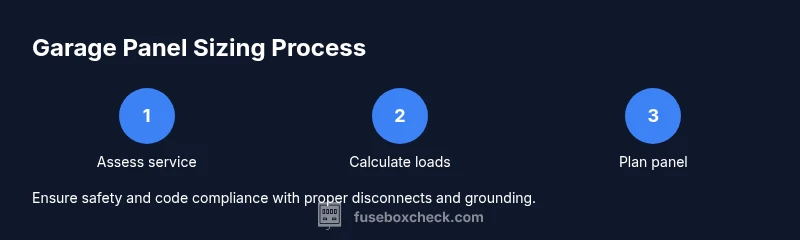
- Assess current service size before planning upgrades.
- Perform a formal load calculation to determine needed amperage.
- Plan circuits with space for growth and safety in mind.
- Follow local codes and obtain necessary permits.
- Consult a licensed electrician to finalize sizing and installation.