Garage Fuse Box Separation: Step-by-Step Guide
Learn to safely separate a fuse box for your garage with a practical, step-by-step guide. Safety, planning, and testing insights from FuseBoxCheck for homeowners.

You will learn how to safely separate a fuse box for a garage, including planning, essential tools, safety checks, and step-by-step actions for a garage subpanel. This guide covers locating the new panel, routing feeders, grounding, labeling, and testing to ensure compliant, reliable operation without compromising home safety and peace of mind.
Understanding why you might want a separate.fuse box.for garage
A dedicated fuse box for a garage is a practical upgrade for homeowners who run heavy appliances, workshop tools, or EV charging away from the home’s living spaces. By giving the garage its own panel, you can minimize nuisance trips, simplify circuit management, and improve safety by keeping wet or dusty environments separate from living areas. The phrase separate.fuse box.for garage captures the core goal: a localized power distribution point that serves the garage reliably without overloading the main service. In many homes, the garage hosts a mix of lighting, a compressor, a heater or space heater, a garage door opener, and power outlets for tools. When these circuits share a common panel with living spaces, a fault or overload can affect the entire home. A dedicated panel offers clarity for labeling, testing, and maintenance, and it can simplify future upgrades. In this guide, we reference FuseBoxCheck recommendations for planning and safe execution, helping homeowners approach the project with confidence.
Regulatory considerations and safety basics
Electrical work that touches the main service or adds a subpanel typically involves code rules and safety practices. Before starting, verify whether your jurisdiction requires a permit or inspection for a new subpanel in a garage. Even when a permit isn’t mandatory, following standard safety practices reduces risk and protects residents. Start with a clear plan, use equipment rated for service panel work, and avoid working in wet conditions. Always lockout the main disconnect and verify there is no voltage present before touching conductors. Keep a clean workspace, store tools safely, and set up a designated area for spares and labeling. FuseBoxCheck emphasizes the importance of grounding and bonding in detached structures, and reminds readers that electrical work is not a casual DIY task when a structure is dedicated to utilities. If in doubt, consult a licensed electrician to review plans and permit requirements. This approach aligns with best practices for safety and compliance.
Assessing existing service and load calculation basics
Understanding the service size and how much load the garage will draw is essential. Start by verifying the main service capacity from the existing panel labeling, a step that helps determine whether a separate.fuse box.for garage is feasible. Evaluate typical garage loads: lighting, outlets for tools, a heater, or a compressor. While precise load calculations are done by a professional, a general sense of circuits helps you plan the number of spaces needed in the new panel. A properly sized feeder between the main panel and the garage ensures resilience and reduces nuisance trips. Remember that the goal is to allocate an appropriate number of circuits for garage use without overcrowding the main service. FuseBoxCheck analyses indicate that planning ahead and keeping the garage's independent circuits can improve reliability and simplify maintenance.
Location, accessibility, and future-proofing
Select a location that offers convenient access for maintenance, safe operation in all weather, and room for expansion. The garage is a common choice, but consider whether the panel will be indoors, in a weather-protected box, or mounted high on the wall for protection. Maintain proper clearance around the panel so you can reach lugs, wiring, and breakers without removing other equipment. A separate.fuse box.for garage benefits from a dedicated route for feeders that avoids tight bends and reduces stress on cables. If you anticipate future upgrades—more circuits, a larger feeder, or a new power tool cluster—plan for extra slots and space for conduit or cable routing. FuseBoxCheck recommends documenting the location and keeping a copy of the plan with electrical permit files. This careful planning helps ensure safe operation and straightforward future maintenance.
Wiring options: feeders, subpanels, and disconnects
There are several ways to implement a garage subpanel, depending on your building and utility service. A common approach is to run a feeder from the main service panel to a dedicated subpanel located in or near the garage. You will typically choose a panel sized to accommodate current and future needs, with separate neutral and ground bars in the subpanel. A main disconnect or fused disconnect may be part of the system depending on local rules and the panel type. In detached garages, you may need a grounding electrode system in addition to the feeder; confirm requirements with your electrician and authority having jurisdiction. This section emphasizes planning, device compatibility, and safety for your wiring strategy, ensuring the garage’s power distribution remains robust and organized.
Step-by-step planning before turning the power off
Before you flip any breakers, finalize a wiring plan, gather required tools, and prepare for a controlled, safe work session. Create a circuit map showing which outlets, tools, and appliances will be served by the garage panel. Gather the required equipment, including proper feeders, conduit, grounding hardware, and labeling materials. Confirm that you have a suitable outdoor-rated enclosure if the garage panel will sit outside, and verify that all components are compatible with one another. Arrange for a second pair of eyes—someone trained to review the plan—as an extra safety measure. Finally, review the local code requirements and permit steps so the work aligns with official standards. This careful preparation is central to a successful, safe installation and reduces surprises during the task.
Installing a garage subpanel: components and connections
Installing a separate garage subpanel involves mounting the panel, securing the feeder, and making circuit connections. Start by selecting a suitable enclosure with adequate space for current and future expansion. Route the feeder cable from the main panel to the garage, using conduit and proper strain relief where required. In the subpanel, keep neutrals isolated from grounds to prevent stray currents, and ensure that only the ground bus is bonded to the enclosure. Install individual breakers for each garage circuit and label them clearly. If a disconnect is required, install it in a location that is accessible but protected from physical damage. Finally, recheck connections for tightness and alignment with manufacturer instructions. This block integrates practical wiring knowledge with safety considerations for a professional-standard result.
Testing, labeling, and ongoing maintenance
With connections complete, power up the system and perform a systematic test. Use a voltage tester to verify each circuit at the panel and receptacles. Label each circuit clearly on the panel and create a simple map for future maintenance. Inspect insulation for signs of wear and ensure that cables have adequate strain relief and protection. Schedule regular checks of breakers and grounding connections, and keep a log of any trips or odd behavior. Establish a maintenance routine that includes periodic cleanouts, weatherproofing checks if the garage is exposed, and updates whenever you add new circuits. This final block reinforces careful, methodical work that helps the garage stay safe and dependable over time.
Tools & Materials
- Voltage tester(Non-contact preferred; verify power at the main disconnect and the panel lugs)
- Insulated screwdrivers(For panel lugs and terminals)
- Wire strippers and pliers(For preparing feeders and conductors)
- Measuring tape(For distances and layout)
- Conduit, fittings, and cable supports(Protect feeders and meet local code)
- Feeder cable (correct gauge)(Size to anticipated load; use proper insulation rating)
- Subpanel or main-lug panel(Rated for indoor/outdoor use as needed)
- Grounding electrode conductor and rods (if required)(Detached structures often require grounding electrode system)
- Lockout/tagout kit(Prevent accidental energization during work)
- Personal protective equipment (PPE)(Gloves, safety glasses, and flame-resistant clothing as needed)
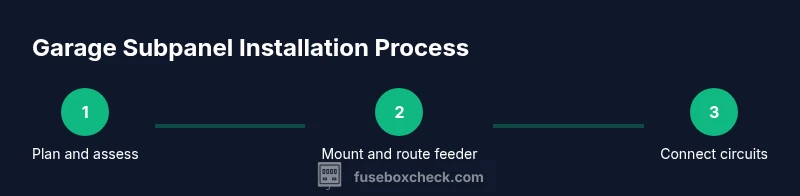
Steps
Estimated time: 3-6 hours
- 1
Isolate power and verify safety
Shut off the main service disconnect and verify there is no voltage on the panel using a tester. This protects you before you touch lugs or feeders. Confirm that all tools and the workspace are dry and free of water exposure.
Tip: Double-check the latch or switch position and test both the main and any sub-feed breakers before starting. - 2
Plan route and obtain permits
Draft a simple plan showing the route for the feeder from the main panel to the garage panel location. Check local code and pull any required permits early to avoid delays. Include a rough bill of materials and estimated timeline.
Tip: Involve a neighbor or family member to review the route for any potential hazards or obstacles. - 3
Select panel location and mount
Choose a location with adequate clearance and protection from moisture. Mount the subpanel or main-lug panel securely, following manufacturer guidelines. Ensure there is room for future expansion and easy access for labeling.
Tip: Avoid installing in areas with high heat buildup or heavy dust where panels can overheat or clog. - 4
Route feeder cable to the garage
Install the feeder from the main panel to the garage using conduit or raceways as required. Protect conductors from physical damage and avoid sharp bends. Leave slack for future adjustments and ensure proper strain relief at both ends.
Tip: Keep feeders shielded from potential damage by vehicles or clutter and use weatherproofing as needed. - 5
Mount and wire the garage subpanel
Secure the garage panel, install the neutral and ground bars (with neutrals isolated in subpanels), and mount breakers for each circuit. Bonding to the enclosure should follow local rules; in most subpanels neutrals are not bonded to grounds.
Tip: Follow the manufacturer’s torque specs for all lug connections to prevent loose, heat-generating joints. - 6
Connect circuits and label
Assign each circuit to a breaker and run appropriate branch cables to outlets, lights, and tools in the garage. Label each breaker clearly and document the circuit map for future maintenance.
Tip: Group related tools or loads together to facilitate easier troubleshooting and load management. - 7
Test operation and safety verification
Restore power and test each circuit with a voltage tester or appropriate load test. Verify grounding continuity and the proper operation of any disconnects. Check for signs of overheating or loose connections and address immediately.
Tip: Perform a quick door-test or nuisance trip check to ensure the system responds correctly to faults. - 8
Document, seal, and maintain
Create a simple circuit map and keep it with permit documents. Inspect the installation periodically, replace worn components, and update labeling if circuits change. Establish a maintenance routine for the garage electrical system.
Tip: Set calendar reminders for annual checks and professional re-inspections if required by code.
Your Questions Answered
Do I need a permit to install a separate fuse box for the garage?
In many areas, a permit is required for any new subpanel or disconnect. Always check with your local authority before starting. This ensures compliance and safety.
Yes, check with your local authority for permit requirements before starting installation.
Is it safe for a confident DIYer to tackle this work, or should I hire a pro?
While a skilled DIYer can handle some aspects, installing a garage subpanel involves high risks and code requirements. Consultation with a licensed electrician is advised, particularly for detached structures.
This work is high risk; consult a licensed electrician for safety and compliance.
What is the difference between a detached garage panel and an attached garage panel?
Detached garages often require a grounding electrode system and a separate feeder, whereas attached garages may have different code requirements. The general aim is a safe, code-compliant power distribution for the garage.
Grounding requirements and feeders differ for detached vs attached garages.
Can I reuse existing wiring or route from the main panel to the garage?
Reusing existing wiring is not always advisable; feeders must meet current code and load requirements. A professional assessment helps determine the safest approach.
feeders must meet current codes; get a professional assessment.
Will a separate garage panel require a grounding electrode?
Detached structures often require their own grounding electrode system in addition to the feeder. Check local code and install accordingly with professional guidance.
Detached garages may need grounding electrodes; verify with code and a pro.
What signs indicate it's time to upgrade or replace a panel?
Frequent trips, corroded bus bars, or a panel that is hot to touch are signs to review with a pro. Consider a dedicated garage panel if convenience and safety demand clearer separation.
Frequent trips or overheating suggest review; upgrade may be wise.
Watch Video
Highlights
- Plan the layout before touching power.
- Label circuits clearly for maintenance.
- Isolate neutrals and grounds appropriately in a subpanel.
- Follow local codes and permit requirements.