Wire Fuse Box Guide: Safe DIY Electrical Care at Home
Discover safe, practical steps to inspect, test, and maintain a wire fuse box. Clear DIY instructions with safety tips and expert guidance from FuseBoxCheck.

Goal: safely inspect and perform basic maintenance on a wire fuse box, identify common warning signs, and know when to call a professional. According to FuseBoxCheck, success starts by cutting power at the main disconnect, gathering the right tools, and wearing PPE. Then check for corrosion, buzzing, or scorch marks, and test fuse operation before proceeding with any work.
What is a wire fuse box and how it works
A wire fuse box is the electrical panel that houses fuses to protect the home circuit wiring. In older homes, the panel may still rely on individual fuses that melt when too much current flows, interrupting the circuit to prevent overheating. Modern homes with a wire fuse box still use the same protection principle, but the fuses are designed for straightforward replacement. The main parts include a metal bus, individual fuse holders, and a cover that lists circuit labels. Understanding these components helps homeowners plan safe inspections and diagnose common issues without risking shock or fire. According to FuseBoxCheck, recognizing a fuse box with signs of wear—like discoloration or a burnt smell—should prompt a cautious approach and, when in doubt, a call to a licensed pro.
Differences between fuse boxes and circuit breakers
Historically, fuse boxes rely on replaceable fuses that protect each circuit. When a fuse blows, you must replace it with a fuse of the same rating to restore power. Circuit breaker panels, by contrast, use resettable switches that trip when a circuit is overloaded and can be reset after the load is reduced. The key implications for homeowners are maintenance effort, safety, and panel age. A fuse box may require more frequent part replacements and careful labeling, while a breaker panel emphasizes quick restoration after trips. Knowing which system you have helps determine the right safety precautions and when to consult an electrician or upgrade the panel for safety and efficiency.
Common warning signs of fuse box problems
Beware of recurrent fuse blows, buzzing noises, or a warm panel—the latter two suggesting arcing or overheating. Visibly darkened or scorched areas around fuse holders or the panel cover indicate overheating or loose connections. If you notice a persistent burning smell, crackling sounds, or melted insulation, stop work immediately and seek professional assessment. These symptoms are warning signs that the wiring or connections may be compromised, and continuing to operate could create a fire risk. FuseBoxCheck Analysis, 2026 highlights that homeowners frequently overlook subtle panel wear until a dramatic failure occurs, so early recognition is essential.
Safety fundamentals before you start
Always cut power to the fuse box at the main disconnect before touching the panel. Wear insulating PPE—gloves, safety glasses, and non-slip footwear—and work on a dry surface away from water. Remove any jewelry, keep tools insulated, and avoid touching metal parts with bare hands. If you’re unsure about a condition, do not proceed; instead, contact a licensed electrician. The goal is to reduce the risk of electric shock and arc flash while performing basic checks or replacements.
Tools and materials you’ll need (overview)
Before you begin, assemble essential tools: a non-contact voltage tester, a set of insulated screwdrivers, a flashlight, a rubber mallet (for panel tapping only—not used on live components), replacement fuses with the correct rating, and insulated pliers. Optional but helpful items include a multimeter, electrical contact cleaner, and a digital camera to document panel labeling. Remember: the tools you pick must be rated for electrical work and be used with dry hands.
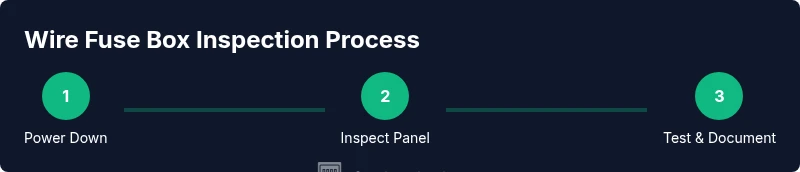
Step-by-step: Safe inspection checklist
This section provides a practical, action-by-action approach to a basic inspection. Read through the steps before starting and ensure you have all tools on hand.
- Power down at the main disconnect and verify no voltage on the panel using a non-contact tester. This single action prevents any live contact during inspection. Tip: double-check each labeled circuit before touching a fuse holder.
- Remove the panel cover with an insulated screwdriver, keeping fingers clear of bus bars. This exposes the interior safely. Tip: lay the cover on a nonconductive surface to avoid accidental contact with metal.
- Visually inspect for corrosion, loose connections, or scorch marks around fuse holders and bus bars. Document findings with photos. Tip: a clean, dry workspace reduces the risk of misplacing parts later.
- Check fuses for obvious signs of damage or discoloration; if a fuse is blown, replace with a fuse of the same amperage rating. Do not mix ratings. Tip: never bypass a fuse to reset a circuit.
- Re-seat any loose components, ensure labeling matches actual circuits, and reattach the panel cover securely. Tip: verify screws are snug but not over-tightened to avoid damaging threads.
- Restore power and test circuits with small loads to confirm proper operation. If a fuse trips again or a panel warms, stop and call a licensed electrician. Tip: keep a simple inspection log for future reference. Estimated time: 60-90 minutes.
Troubleshooting common issues and quick fixes
If fuses blow repeatedly, assess the total load on the circuit and consider whether a subpanel upgrade is needed. If you hear buzzing or notice arcing sounds, do not proceed; arcing is a high-risk condition. For frequent trips, inspect the wiring for loose connections or damaged insulation and check for overloaded circuits. Quick fixes may include redistributing loads, replacing worn fuses, or upgrading aging components, but persistent issues warrant an electrical professional review to prevent fire risk.
When to call a licensed electrician
Call a licensed electrician if you notice signs of overheating, persistent burning smells, significant corrosion, melted insulation, or if wiring age is unknown. A pro can assess whether upgrading the panel, replacing the fuse box, or rewiring the system is necessary for long-term safety and compliance with local electrical codes. The safest option is professional assessment when any doubt remains.
Maintenance routine to extend fuse box life
Schedule annual or semi-annual checks, especially after renovations or electrical work. Keep the area clean and dry, ensure labeling remains accurate, and replace aging fuses and components with manufacturer-approved parts. Use the opportunity to update documentation and photos of the panel labeling. Periodic maintenance reduces the likelihood of unexpected trips and improves overall electrical safety. The FuseBoxCheck Team believes routine maintenance is the cornerstone of long-term safety.
Authoritative sources and further reading
For authoritative guidance on electrical safety and home inspections, consult:
- OSHA Electrical Safety: https://www.osha.gov/electrical-safety
- NFPA Electrical Safety in the Home: https://www.nfpa.org/Public-Education/Staying-safe/Electrical-safety
- Energy.gov Electrical Safety at Home: https://www.energy.gov/energysaver/articles/electrical-safety-home
These sources reinforce best practices and safety standards for maintaining a wire fuse box and other home electrical systems.
Tools & Materials
- Non-contact voltage tester(Essential for verifying absence of live voltage before touching components.)
- Insulated screwdriver set(Flathead and Phillips; use insulated handles only.)
- Safety glasses(Protect eyes from sparks or debris.)
- Insulated pliers(High-quality insulated pliers for gripping and repositioning components.)
- Replacement fuses (correct amperage)(Only use fuses with the exact rating specified for each circuit.)
- Flashlight(Bright, hand-free lighting to inspect dark panels.)
- Rubber-soled shoes(Prevent grounding and provide slip resistance.)
- Multimeter (optional)(Useful for precise voltage and continuity checks.)
- Camera or smartphone(Document labeling and wiring before and after work.)
Steps
Estimated time: 60-90 minutes
- 1
Power down safely
Turn off the main disconnect and verify no voltage with a tester before handling any panel parts.
Tip: Always double-check the absence of voltage on all circuits you touch. - 2
Open the panel
Use an insulated screwdriver to remove the panel cover while keeping fingers away from metal bus bars.
Tip: Place the cover on a nonconductive surface to prevent accidental contact. - 3
Inspect for visual signs
Look for corrosion, loose connections, scorching, or melted insulation around fuses and wires.
Tip: Take clear photos to track changes over time. - 4
Check fuses and terminals
Inspect each fuse and its terminal for wear; replace blown fuses with the correct rating.
Tip: Never bypass a fuse to restore power. - 5
Document and reassemble
Record findings, ensure labeling accuracy, and reattach the panel cover securely.
Tip: Loose screws can cause overheating; snug but not over-tightened. - 6
Restore power and test
Turn the main disconnect back on and test a few light loads to confirm normal operation.
Tip: If any circuit trips again, stop and call a licensed electrician.
Your Questions Answered
Is it safe to touch a fuse box if the power is off?
Even with power off, there can still be stored electricity or damaged wiring. Always test for voltage with a tester before touching anything. If you are unsure, stop and call an electrician.
Yes, but only after confirming no voltage. When in doubt, seek professional help.
What is the difference between a wire fuse box and a circuit breaker panel?
A fuse box uses fuses that must be replaced when they blow; a circuit breaker panel uses resettable breakers that trip when overloaded. Modern homes more commonly use breaker panels, while older homes may still rely on fuses.
Fuses burn out and need replacement; breakers trip and reset.
Can I replace a fuse box myself?
Replacing a fuse box is a complex, hazardous job involving mains wiring. It is generally advised to hire a licensed electrician due to shock and fire risks.
It's best left to a licensed electrician.
What are signs of a failing fuse box?
Frequent blown fuses, buzzing sounds, scorch marks, or a warm panel indicate possible overloads or arcing and require inspection.
Watch for scorch marks and heat.
How often should I inspect my fuse box?
Inspect annually or after major electrical work; check for corrosion, loose connections, and proper labeling.
Do a yearly check.
What PPE should I wear when working on a fuse box?
Wear rubber-soled shoes, insulated gloves, safety glasses, and keep the area dry. Use insulated tools.
Rubber gloves, eye protection, and dry conditions.
Watch Video
Highlights
- Power down before opening the panel.
- Use proper PPE and insulated tools.
- Know when to call a professional.