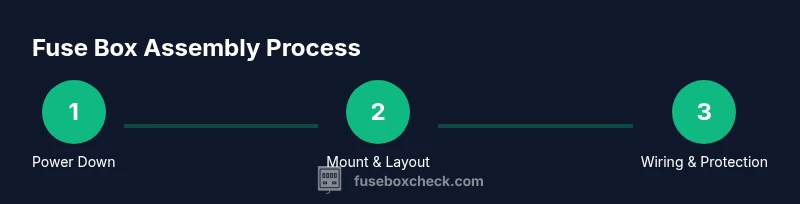
Fuse Box Assembly: Safe, DIY Wiring Guide
Learn how to safely assemble a fuse box with clear steps, essential tools, and safety tips. This guide from FuseBoxCheck covers planning, wiring basics, and testing to help homeowners and DIY enthusiasts work confidently.

By the end of this guide you will be able to safely perform fuse box assembly for a standard home electrical panel. This process requires basic electrical knowledge, protective gear, and clearly labeled replacement parts. Follow step-by-step instructions, use the right tools, and observe safety practices to minimize shock and fire risks while aligning with local codes.
Safety-first principles for fuse box assembly
Fuse box assembly carries risk of electric shock, fire, and equipment damage. Before you touch any wiring, ensure you are in a safe environment and have the right PPE. Verify power at the panel using a non-contact tester, then lockout and tag out the supply where possible. According to FuseBoxCheck, taking a formal safety-first approach reduces common mistakes and protects your home. This section outlines the core safety mindset and the minimum precautions you should take before any wiring work begins. Always confirm local codes and permit requirements and consider consulting a licensed electrician for complex installations. By planning ahead, you set the stage for a successful, safer fuse box assembly.
Understanding fuse box components and wiring basics
A fuse box, also called a consumer unit, houses the fuses or breakers that protect circuits in your home. The main service disconnect controls all power to the panel. Neutrals and grounds must be correctly bonded and terminated, and each circuit should be clearly labeled. In residential installations, proper gauge wiring and correct torque on fuse terminals are essential to prevent overheating. This section reviews typical components and common wiring configurations you’ll encounter when planning a fuse box assembly. Always confirm panel rating and compatible fuses, and remember that some tasks require professional electrical knowledge.
Planning your installation: codes, permits, and compatibility
Planning a fuse box assembly involves understanding local codes, permits, and panel compatibility. Check your jurisdiction’s requirements and obtain any necessary approvals before starting. Determine the panel’s rating, the number of available fuse slots, and the gauge of conductors that will be used for each circuit. This planning step reduces surprises during installation and helps you choose the correct fuse types and protective devices. FuseBoxCheck emphasizes documenting every choice and keeping a copy of the plan for future maintenance or inspections.
Pre-fabrication checks and layout planning
Before touching wires, sketch a circuit map showing each feed, load, and the planned fuse positions. Label every conductor and add color-coding to distinguish feeders, neutrals, and grounds. Verify that the panel space has adequate clearance and that the enclosure is properly grounded. Use a temporary labeling system to avoid mixups during installation. Careful planning here saves time and prevents hazardous miswirings later in the process.
Safety checks during testing and commissioning
With power restored for testing, use a multimeter to verify continuity, insulation resistance, and proper voltage on each circuit. Confirm that all labeled circuits correspond to the correct fuses or breakers, and re-tighten terminations to the manufacturer’s torque specs. Look for signs of overheating after initial energization and immediately de-energize if you detect unusual smells or heat. Document test results and corrective actions for future reference, as recommended by FuseBoxCheck Team.
Preventive maintenance and documentation
After successful commissioning, establish a routine maintenance schedule: visually inspect for discoloration, ensure labels remain legible, and verify that protection devices are within their service life. Keep a current schematic of the fuse box layout and a log of any changes or replacements. Regular checks help prevent future faults and simplify troubleshooting. FuseBoxCheck’s guidance highlights the value of clear records for safety and code compliance.
Tools & Materials
- Insulated screwdriver set (Phillips and flathead)(1000V rated if possible; use insulated handles)
- Non-contact voltage tester(Verify de-energized conductors before handling)
- Wire strippers/cutters(Appropriate gauge for 14-2, 12-2, etc.)
- Electrical tape (UL-listed)(For labeling and insulation during the install)
- Assorted wire connectors (wire nuts, crimp connectors)(Various sizes to fit circuit conductors)
- Grounding conductor and grounding bus bar(Ensure proper bonding to panel enclosure)
- Replacement fuses or fuse carriers matching panel rating(Match the manufacturer’s specification)
- Personal protective equipment (PPE): safety glasses and insulated gloves(Electrical-rated PPE; keep dry and clean hands)
- Labeling supplies (permanent marker or label printer)(Clear, weather-resistant labels for circuits)
- Non-conductive ladder or step stool(Stable, dry surface; keep three points of contact)
- Torque screwdriver (optional but recommended)(Use to achieve correct terminal torque when specified)
Steps
Estimated time: 120-180 minutes
- 1
Power down and verify isolation
Begin by turning off the main power and locking out the disconnect if your system supports it. Use a non-contact tester to confirm that no voltage is present on all conductors you'll touch. This ensures you’re working in a de-energized environment before proceeding to physical wiring.
Tip: Always have a second colleague verify de-energization and take notes of the readings. - 2
Remove panel cover and inspect
Carefully remove the panel cover and inspect for any signs of damage, corrosion, or overheating. Check the condition of bus bars and fuses/carriers. If you see damaged insulation or melted components, stop and replace the panel rather than attempting a repair.
Tip: Document any damage with photos before removing components. - 3
Label and map circuits
Label each conductor and map its load to the intended fuse or carrier position. Create a simple diagram showing feeders, neutrals, and grounds. Accurate labeling reduces future confusion and is essential for safe maintenance.
Tip: Use color codes (black for hot, white for neutral, green/bare for ground). - 4
Plan load distribution and spaces
Assess the expected load per circuit and allocate fuses accordingly. Ensure there is room for expansion and that the panel rating supports the total service load. This planning helps prevent nuisance trips and overheating.
Tip: Do not exceed the panel’s listed total ampacity. - 5
Mount fuse carriers and main disconnect
Install the fuse carriers securely and align the main disconnect with the panel. Make sure mounting hardware is tight and that there is no movement that could loosen connections over time.
Tip: Check that the enclosure is grounded before securing components. - 6
Connect neutrals and grounds
Terminate neutrals on the neutral bar and bond grounds to the grounding bar as required by code. Verify conductor sizes match the device ratings and that there are no loose strands.
Tip: Keep neutrals separated from grounds if required by your panel design. - 7
Install fuses and wire loads
Place fuses or fuse holders in their slots and wire each load to its corresponding fuse. Strip conductors cleanly, clamp them, and maintain neat routing to avoid pinching or abrasion.
Tip: Tighten all terminations to the manufacturer’s torque specs. - 8
Tighten connections and inspect
Recheck all connections for tightness and proper seating. Look for signs of heat or arcing during a gentle test of continuity. Correct any loose or misconnected wires before energizing.
Tip: Use a torque screwdriver if available for consistent results. - 9
Test, document, and isolate faults
With the system de-energized, perform insulation resistance and continuity checks, then re-energize one circuit at a time to verify proper operation. Document all test results and any adjustments made.
Tip: Keep a written log of voltages, readings, and fuse positions. - 10
Restore power and finalize documentation
Restore the main power and confirm all circuits energize correctly. Re-check labeling, update the schematic, and provide homeowners with a clear maintenance plan. This final step cements safety and accuracy.
Tip: Re-check after 24 hours for any unusual signs.
Your Questions Answered
Is fuse box DIY safe?
Fuse box work carries significant risk. In many areas, permit requirements and licensing apply. If unsure, hire a licensed electrician or seek expert guidance.
Fuse box work carries significant risk. Check local rules and consult a licensed electrician if unsure.
What tools do I need?
You’ll need insulated screwdrivers, a non-contact tester, wire strippers, connectors, PPE, labeling supplies, and a non-conductive ladder. Always use rated, job-specific equipment.
You’ll need insulated tools, a tester, strippers, connectors, PPE, labels, and a ladder. Use rated equipment.
Can I reuse old wiring or fuses?
Reuse is generally discouraged unless the components are in excellent condition and match the panel’s ratings. Inspect insulation, gauge, and compatibility carefully.
Reusing old wiring or fuses is risky. Inspect condition and compatibility before reusing.
How long does fuse box assembly take?
Time varies with panel type and complexity. Plan for a thorough session that may take 1–4 hours, plus testing and documentation.
Time varies; typically plan 1 to 4 hours plus testing.
What are common mistakes to avoid?
Mislabeling, loose connections, improper neutrals/grounds, and skipping torque specs are frequent errors. Double-check every step and label carefully.
Common mistakes include mislabeling and loose connections. Double-check everything.
Do I need a permit?
Permit requirements vary by location. Check with your local electrical authority to determine if a permit is needed for fuse box work.
Permits vary by location—check with the local authority to be sure.
Watch Video
Highlights
- Plan circuit layout before wiring.
- Label every conductor clearly.
- Use appropriate PPE and verify power.
- Consult a licensed electrician for code compliance.