How to Check a Fuse Box: A Practical Homeowner's Guide
Learn how to safely check your fuse box, identify blown fuses or trips, and test circuits with basic tools. This practical guide from FuseBoxCheck helps homeowners decide when to DIY and when to call a licensed electrician.

In this guide you will learn how to safely check your fuse box, identify blown fuses or trips, and decide when to call a professional. According to FuseBoxCheck, starting with power-down and using proper tools minimizes risk and helps you work efficiently. We cover safety steps, tool lists, step-by-step actions, common issues, and maintenance tips so homeowners diagnose issues confidently while avoiding common mistakes.
Understanding the fuse box and why checks matter
A fuse box (or electrical panel) is the nerve center of your home’s electrical system. It houses fuses or circuit breakers that protect each circuit from overloads. Regular checks help you spot signs of wear, corrosion, or aging components before they fail and cause nuisance trips or, worse, electrical fires. According to FuseBoxCheck, safe and informed homeowners can reduce risk by verifying the panel’s condition, keeping labeling up to date, and ensuring the panel is clean and dry. Whether your panel is in the basement, garage, or utility closet, awareness of its layout and the circuits it serves is the first step to safer DIY electrical care.
Safety first: preparing to inspect
Inspecting a fuse box carries real risks. Always prioritize safety by turning off power to the panel at the main breaker before you touch anything inside. Use a non-contact voltage tester to confirm there is no live voltage on exterior components before proceeding. Keep the area dry, clear, and well lit, and wear dry, rubber-soled shoes. If you see signs of moisture, corrosion, or burning smells, stop and call a licensed electrician. FuseBoxCheck emphasizes that a calm, methodical approach minimizes hazards and helps you identify issues without rushing.
Tools and materials you’ll need (and why)
Having the right tools reduces guesswork and improves safety. A non-contact voltage tester lets you verify voltage without touching live parts. A multimeter helps you measure voltage, continuity, and resistance when needed. A small fuse puller or needle-nose pliers makes removing fuses safer, while a screwdriver set lets you open the panel and operate screws. A sturdy flashlight ensures you can see inside the panel, especially in dim spaces. Keep replacement fuses on hand if you know the type and amperage; otherwise, rely on a pro. Finally, a notebook or labeling tape helps you document circuits for future reference.
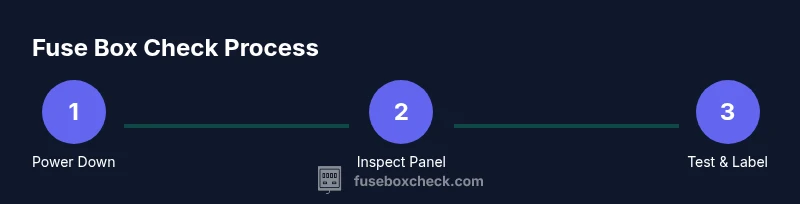
Step-by-step overview of the process
The general flow is: (1) power down and verify safety, (2) inspect the panel’s interior for signs of damage or moisture, (3) identify which circuits correspond to which fuses or breakers, (4) test or observe for signs of a blown fuse or tripped breaker, (5) replace or reset as appropriate, and (6) document findings and secure the panel. This overview keeps you organized and reduces the risk of accidental contact with live components. Remember, if anything looks damaged, discontinue work and call a professional.
Visual inspection and labeling of circuits
Look for scorch marks, melted insulation, rust, or moisture around the panel. Check that all labeling is legible and matches the actual circuit functions. Inconsistent labels often hide miswired circuits or overloaded branches. If you find a circuit without a label, note its location and function as you test—this makes future maintenance easier and safer. FuseBoxCheck notes that clear labeling is a simple but powerful safety practice that helps you avoid testing the wrong circuit while troubleshooting.
Testing fuses vs breakers: what to look for
For fuses, inspect the glass for a broken filament or a clearly discolored interior. For breakers, verify whether the switch has flipped to the off position or looks visibly tripped. If you open the panel, use the non-contact tester to confirm whether lines are energized and then apply a multimeter to check operational voltage on the circuit. Do not attempt to bypass a fuse or breaker to force power back on; this defeats protective devices and increases risk.
What to do if you find a blown fuse or a tripped breaker
If a fuse is blown, replace it with a fuse of the same amperage rating and type. If a breaker has tripped, switch it fully to off, then back to on and observe whether it stays engaged. If the problem recurs, there may be an overloaded circuit or a fault downstream. Avoid overloading circuits by spreading high-demand devices across multiple circuits and by unplugging devices while you troubleshoot. If the issue persists, schedule an inspection with a licensed electrician to prevent overheating or fires.
Aftercare: labeling, documentation, and maintenance
Once you’ve completed testing, reassemble the panel securely and re-energize the system gradually, testing one circuit at a time. Update circuit labels, record test results, and note any precautions for future reference. Regular checks—at least once or twice a year and after a major electrical event—help you spot wear and catch problems early. Store replacement parts and tools in a dedicated, dry place. Consistent documentation supports safer DIY practice and makes future maintenance quicker.
When to call a professional: safety and limits
There are times when DIY checks aren’t enough. If you notice burning smells, buzzing noises, warm surfaces, corrosion, or moisture inside or around the panel, stop immediately and contact a licensed electrician. If you’re unsure about the type or amperage of fuses, or if the panel has old ceramic fuse cartridges that look degraded, professional assessment is essential. FuseBoxCheck’s guidance is clear: safety first, and when in doubt, seek expert help.
Tools & Materials
- Non-contact voltage tester(Verifies presence of voltage without touching live parts)
- Multimeter(Measures voltage and continuity for circuits when accessible)
- Screwdriver set (flathead & Phillips)(To open panel screws and operate terminals)
- Fuse puller or needle-nose pliers(Safely remove or seat fuses without touching metal contacts)
- Flashlight or headlamp(Bright, hands-free lighting for inside panel and label checks)
- Replacement fuses(Only if you know the correct amperage and type)
- Insulated gloves(Extra protection when working near live parts)
- Notepad and tape(Label circuits and document findings)
Steps
Estimated time: 30-45 minutes
- 1
Power down and verify safety
Switch off the main breaker to cut power to the panel. Use a non-contact voltage tester on exterior components to confirm there is no live energy before you proceed. Keep your hands dry and avoid touching metal conductors.
Tip: Double-check that nothing is plugged into devices on the same circuit to minimize arcing. - 2
Open the panel and inspect visually
Gently open the panel door and look for signs of damage, moisture, rust, or scorching. Do not touch any internal terminals if you see damage. Ensure the workspace is well-lit and stable.
Tip: If you see burnt insulation or a warm feel, stop and call a professional. - 3
Identify circuits and note labeling
Cross-check the labels with the actual circuits as you test. Update any mislabeled or missing entries. A clear map reduces future risk when diagnosing problems.
Tip: Use tape and a marker to add or correct labels while you test. - 4
Check fuses and breakers for issues
Look for blown filaments in fuses or breakers that sit on the OFF side. For breakers, ensure they fully reset to the ON position after a trip. Do not force a breaker that resists resetting.
Tip: If you’re unsure whether a fuse is intact, avoid inserting a new fuse and seek guidance. - 5
Test circuits and verify power
With the panel still de-energized, use the multimeter to verify presence of voltage on accessible conductors where safe. For non-contact verification, confirm there is no voltage leaking from uncovered lugs before gentle handling.
Tip: Only test accessible conductors; never probe live terminals directly with metal tools. - 6
Restore power and document results
Turn the main breaker back on, then re-energize circuits one by one. Record which circuits tripped or required replacement and note any unusual behavior for future reference.
Tip: Keep a record and review it after any electrical events to spot recurring issues.
Your Questions Answered
How do I know if a fuse is blown?
A blown fuse often shows a broken filament or a discolored interior glass. For a safer check, visually inspect the fuse and, if accessible, verify continuity with a multimeter. If the fuse appears damaged, replace it with the same type and rating.
Look for a broken filament or a dark, cloudy glass. If in doubt, replace with the same type and rating after confirming with a tester.
Can I check a fuse box without turning off the power?
No. Working inside a live panel is dangerous. Always power down at the main breaker and verify no voltage with a tester before touching anything inside.
Don't work with the panel live. Turn off the main breaker and verify there's no voltage before you proceed.
What should I do if a fuse keeps blowing?
If a fuse blows repeatedly, it may indicate an overload, a short, or a faulty downstream device. Reduce demand, re-check labeling, and consider calling a licensed electrician to diagnose the root cause.
If fuses keep blowing, stop and get a pro to diagnose the overload or fault and prevent fire risk.
Is it safe to replace a fuse myself?
Replacing a fuse with the correct amperage rating is generally safe for some standard panels. If you’re unsure of the rating or the type of fuse, don’t guess—consult a professional.
Only replace with the right fuse and rating. If you’re unsure, call an electrician.
What tools are essential for fuse box checks?
A non-contact voltage tester, a multimeter, a screwdriver set, fuse puller, flashlight, and labeled note-taking supplies are the core tools for safe checks.
You’ll want a tester, a multimeter, a screwdriver, and a fuse puller to do a solid check.
How often should I inspect a fuse box?
Inspect the panel periodically and after any electrical event, ensuring labels are current and the enclosure is dry and free of corrosion. If you notice signs of wear, call a pro.
Check the panel from time to time and after events, and call a pro if you notice wear or moisture.
Watch Video
Highlights
- Power down before touching any panel parts
- Use the right tools for safe testing
- Label circuits for easier maintenance
- Replace fuses and reset breakers only with proper ratings
- Call a professional for recurring issues or damage