Troubleshooting a Fuse Box Switch That Won’t Stay On
Learn practical steps to diagnose and fix a fuse box switch that won’t stay on. Safe, expert guidance from FuseBoxCheck with a clear diagnostic flow, step-by-step fixes, and prevention tips.

The most common reason a fuse box switch won’t stay on is a weak or loose contact inside the switch or a loose wire connection. Start by turning off power at the main breaker, then inspect the switch terminals and the feed conductors. If you see corrosion or looseness, reseat or replace the switch and retest with a voltage tester.
What it means when a fuse box switch won’t stay on
From the homeowner’s perspective, a switch that refuses to stay on can indicate a loose contact, a worn component, or an overload condition. According to FuseBoxCheck, the most common culprits are mechanical wear at the switch terminals or a loose feed connection. If the switch flicks off after a moment, the issue is often electrical rather than cosmetic and should be treated with caution. This problem is not just a nuisance; it signals potential safety risks such as arcing, overheating, or hidden damage deeper in the panel. A careful, methodical approach helps you identify whether you can safely fix it yourself or if professional help is necessary. Remember: never bypass safety features to force a switch to stay on.
Common causes you should check first
- Loose or corroded terminal screws on the switch
- A worn or damaged switch that cant reliably make contact
- An overloaded circuit sharing a feed with other high-draw devices
- Damaged or frayed conductors near the panel or inside the conduit
- Moisture intrusion or corrosive oxidation at connections
- A tripped or failing main or branch breaker that intermittently resets
These causes are interrelated; for example, a loose screw can cause arcing and heat buildup, accelerating wear. Start with the simplest checks and progress to more involved tests only if the issue persists. Keeping a log of which circuits seem affected can help you see patterns over time.
Safety first: essential precautions before you troubleshoot
Power down is non-negotiable. Shut off power at the main service disconnect before touching any panel components. Use insulated tools and wear safety gloves and eye protection. Do not touch live terminals; keep water away from the workspace and ensure children are clear of the area. If you smell burning, see visible scorching, or notice melted insulation, stop immediately and seek professional help. For homeowners, knowing when to call a licensed electrician is crucial to prevent dangerous shocks or fires. This guidance emphasizes caution and respects local electrical codes. According to FuseBoxCheck, following established safety steps reduces risk during troubleshooting.
Tools and measurements you’ll rely on
- Non-contact voltage tester for a quick live-check (confirm power is off before any contact)
- Digital multimeter to test continuity and voltage across terminals
- Screwdrivers with insulated handles and the appropriate bit
- Wire stripper/pliers for careful reseating
- Flashlight and a notepad to document findings
Having the right tools makes the diagnostic process smoother and safer. Always test each connection after you tighten or reseat to verify improvement.
Diagnostic mindset: symptom → diagnosis → solutions
When a switch won’t stay on, start with observable symptoms: does the switch pop out, flicker, or fail to latch? If the issue repeats across multiple loads, the problem could be in the switch assembly or the feed. Diagnosis proceeds from simplest, least invasive fixes to more involved steps. FuseBoxCheck recommends a flow that prioritizes safety and verification: confirm power-off, inspect for obvious damage, test continuity, reseat connections, then replace components if signs of wear or corrosion appear. Document findings so you can assess progress over time.
Step-by-step: reseating connections and replacing the switch (overview)
This section outlines the typical repair path for a switch that won’t stay on. It covers safety, verbalized checks, and the decision point for replacement. Expect to remove the switch cover, verify the terminal screws, and inspect the conductors for damage. If corrosion or burn marks are present, replacement becomes the safer option. The goal is a reliable latch and clean, tight connections that stay secure under load.
Advanced fixes and when to stop
If the issue persists after reseating and replacing the switch, the problem may lie deeper in the panel: a damaged bus bar, degraded feed wires, or a failed main breaker. At this stage, further testing requires specialized equipment and expertise, and professional service is advised. Persistently hot or discolored components are warning signs; never force a fix that involves bypassing breakers or altering wiring paths. A licensed electrician can perform a full diagnostic and ensure compliance with safety codes.
Prevention and maintenance tips for a healthy fuse box
- Schedule annual inspections of the panel and breakers to catch wear early
- Keep the panel clean and dry; address moisture ingress promptly
- Label circuits and maintain a wiring map to track changes over time
- Replace damaged components rather than patching transient symptoms
- Use surge protectors and avoid overloading outlets on a single circuit
Implementing these habits reduces the chance of future switches failing to stay on and promotes long-term electrical safety.
Quick homeowner checks you can perform safely
- Confirm the main disconnect is fully engaged and the related branch breakers are firmly reset
- Look for obvious signs of damage such as burnt smells or melted insulation (if present, stop and call a pro)
- Verify that high-load appliances are not cycling on and off repeatedly on the same circuit
- Keep notes of which loads are attached to the suspect switch to identify potential overload patterns
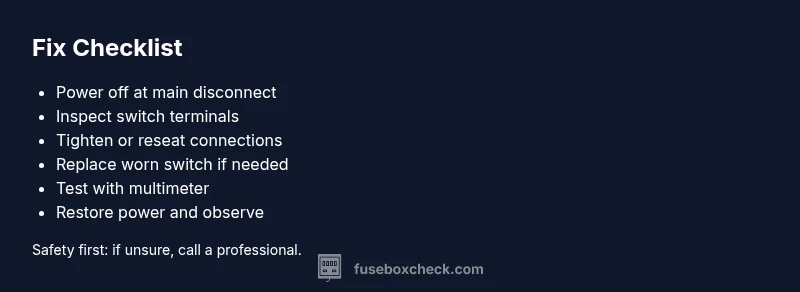
Steps
Estimated time: 60-90 minutes
- 1
Power down and verify no live voltage
Shut off the main disconnect and use a non-contact tester to confirm there's no power in the panel before touching any components.
Tip: Always verify with two tools if available; never rely on a single test. - 2
Open the panel and inspect visually
Carefully remove the switch cover and look for signs of looseness, corrosion, or burn marks around terminals.
Tip: Take photos of the wiring before you touch anything for reference. - 3
Tighten and reseat connections
Firmly tighten the terminal screws and reseat any loose wires, keeping conductors neat and properly stripped.
Tip: Do not over-tighten; snug is enough to prevent arcing without damaging the terminal. - 4
Test the switch with a multimeter
With power still off, test continuity across the switch and then with power applied, verify the expected voltage on the feed side.
Tip: Document readings to compare against baseline values you record for future reference. - 5
Replace the switch if symptoms persist
If corrosion, pitting, or mechanical wear is evident, replace the switch and re-test after reassembly.
Tip: Use the same amperage rating as the old switch and ensure proper panel clearance. - 6
Restore power and observe
Turn the main back on and monitor the circuit; ensure the switch remains engaged under normal load.
Tip: If it trips again, stop and reassess or seek professional help promptly.
Diagnosis: Fuse box switch won't stay on
Possible Causes
- highLoose or corroded terminal screws
- highWorn or defective switch mechanism
- mediumOverloaded circuit or shared load
- lowDamaged conductors or insulation
Fixes
- easyTighten all switch terminal screws and reseat any loose conductors
- easyReplace the faulty switch if wear or corrosion is evident
- mediumReduce load on the circuit or relocate high-draw devices to separate circuits
- hardRepair damaged wiring or replace affected cables/panels by a professional
Your Questions Answered
Why does my fuse box switch keep turning off?
Common causes include a loose connection, a worn switch, or an overloaded circuit. Check the terminals, replace worn parts, and reduce loads if needed before calling a pro.
Common causes include a loose connection, a worn switch, or an overloaded circuit. Check terminals, replace worn parts, and reduce loads if needed before calling a pro.
Is it safe to fix a fuse box switch myself?
DIY can be safe for simple tasks with the power fully off and proper tools. However, if you encounter corrosion, damage, or uncertain readings, seek a licensed electrician.
DIY can be safe for simple tasks when power is off, but if you see damage or aren’t sure, call a licensed electrician.
What tools do I need to troubleshoot a fuse box switch?
A voltage tester, a digital multimeter, insulated screwdrivers, and basic hand tools are commonly used to diagnose and repair switch issues.
You’ll typically need a voltage tester, a multimeter, insulated screwdrivers, and basic hand tools.
When should I replace the whole fuse box or panel?
If the panel shows signs of widespread damage, age, corrosion, or persistent problems after replacement attempts, professional evaluation is advised. Replacing the panel is a major safety decision.
If the panel is damaged or aging, or problems persist after fixes, have a professional evaluate whether panel replacement is needed.
How can I prevent this issue in the future?
Schedule regular inspections, avoid overloading circuits, and maintain clear labeling and documentation. Proactive maintenance reduces the chance of a switch failing to stay on.
Regular inspections and avoiding overloads help prevent this issue in the future.
Watch Video
Highlights
- Turn off power before inspection
- Loose contacts are the top cause
- Replace worn switches rather than patching
- Call a professional for major wiring or panel issues
- Maintain regular panel checks to prevent future trips