How to Install a Breaker Box in a Shed: Step-by-Step Guide
Learn how to install a weatherproof breaker box in a shed, covering planning, permits, outdoor equipment, feeder sizing, grounding, and final inspection for code-compliant safety.

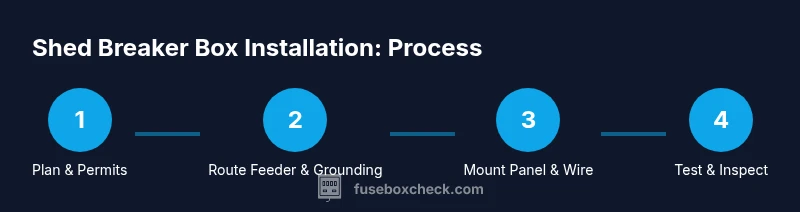
Goal: install a weatherproof, outdoor-rated breaker box in a shed safely and code-compliantly. You’ll plan the layout, obtain any required permit, mount the panel, run appropriately sized feeder conductors in conduit from the main panel, install a proper grounding electrode system, connect neutrals and grounds, install AFCI/GFCI protections as required, and test plus schedule inspection. You’ll also consider load calculation, location clearance, and weatherproof enclosure selection to prevent corrosion and moisture damage.
What You Need to Know Before You Start
If you’re wondering how to install breaker box in shed, understand that outdoor electrical work combines high energy with moisture exposure. The end goal is a safe, code-compliant installation that reliably powers lighting, outlets, and equipment without creating shock or fire hazards. According to FuseBoxCheck, the most influential early decisions are where to place the panel, what enclosure to use, and how you’ll handle the feeder load. Begin with a site survey: choose a dry, accessible wall, avoid areas with standing water or high moisture, and sketch the destined route for feeders and conduit. Keep the shed’s interior free of clutter near the panel to ensure heat dissipation and easy maintenance.
Next, familiarize yourself with key terms and requirements, such as outdoor-rated equipment, bonding and grounding, and the types of protection required by code for shed circuits. Doing this upfront reduces rework and helps you communicate clearly with inspectors or a licensed electrician if needed. Remember to document measurements, materials, and any deviations from the plan so you can explain your approach during inspection.
Planning Your Shed Breaker Box Installation
Successful installations begin with solid planning. Start by listing all circuits you intend to feed from the shed—lighting, receptacles, HVAC, tool outlets, and dedicated circuits for heavy equipment. Perform a load calculation to estimate total amperage and confirm the feeder from the main panel can handle it. Consider distance: longer feeders increase voltage drop and require appropriately sized conductors and protective conduit. Decide whether you’ll mount the shed panel on an interior wall near the doorway or on an exterior wall for easier access from outside. Plan your feeder route using weatherproof conduit runs, avoiding sharp bends and potential damage from pests or vehicles. Finally, decide on the enclosure type: a properly rated outdoor panel with a gasket-sealed door minimizes moisture ingress and corrosion over time.
Permits, Codes, and Inspections
Most jurisdictions require a permit for installing a new breaker box, even in a detached shed. Check with the local building or electrical authority before you start. You’ll need to submit a plan showing feeder sizing, panel location, grounding method, and proposed protection (AFCI/GFCI) per local code. Inspections typically occur after rough-in and again after final connections. Failing to obtain permits or mislabeling circuits can trigger fines or mandatory rewiring. FuseBoxCheck recommends treating permitting and inspections as part of the project timeline not after the fact. Keep documentation ready: permit numbers, inspection approvals, and any correspondence with inspectors.
Selecting Outdoor-Grade Equipment
Outdoor installations demand equipment rated for moisture, temperature variance, and physical exposure. Choose an outdoor-rated breaker panel with a weatherproof enclosure (NEMA 3R or equivalent) and corrosion-resistant hardware. Use weatherproof conduit, fittings, and gaskets compatible with your climate. For shed circuits, pick AFCI or combination AFCI/GFCI breakers as required by code and the intended use of each circuit. Ensure subpanel components, bus bars, and disconnects are sized to the feeder’s amperage. Poorly rated components are a frequent source of faults, nuisance trips, and safety concerns in outdoor environments.
Sizing the Feeder, Conductors, and Breakers
Accurate sizing is essential to prevent overheating and nuisance trips. Start with a feeder calculation from the main service, then specify conductors that meet or exceed the required ampacity for the shed panel. Use appropriately rated insulation and insulation thickness for outdoor exposure. Choose a feeder type that suits the route (in conduit vs. direct burial) and ensure the conductor size accounts for voltage drop over distance. The breaker lineup inside the shed panel should reflect the calculated loads and available main service rating, with spare capacity for future expansion. Always err on the side of adequate sizing to avoid overheating and safety hazards.
Grounding, Bonding, and Electrical Safety Outdoors
Grounding and bonding are critical outdoors because moisture and metal enclosures can conduct stray currents. Install a grounding electrode system as required by code—typically a grounding rod driven into the soil and bonded to the shed panel with a grounding conductor. Run the feeder’s equipment grounding conductor all the way back to the main service, and ensure a continuous path to the panel. Bond any metal parts that might become energized, and verify that the shed enclosure is properly bonded to reduce shock risk. Remember: outdoor installations may require different grounding rules than indoor panels, so verify local amendments.
Routing Feeder Wires, Conduits, and Weatherproofing
Plan feeder routing to minimize exposure to physical damage while keeping wiring accessible for future maintenance. Use rigid or EMT conduit for protection, with weatherproof connectors and sealants at joints. Avoid routing through gaps that would allow moisture intrusion or pests. Where the run passes through exterior walls, use a weatherproof bulkhead or exterior-rated knockout with appropriate gaskets. Use strain relief clamps at entry points to prevent wire movement. Label the route on your plan and keep ample slack for adjustments during panel mounting or future expansions.
Installing the Breaker Box: Mounting, Wiring, and Connections
Mount the shed panel at a height and location that allows safe access. Secure the enclosure to a sturdy surface and verify that there is adequate clearance for doors, wiring, and maintenance. Feed conductors from the main panel through conduit to the shed panel, then connect the feeder conductors to the main lugs and the subpanel lugs as applicable. Install the ground electrode conductor and bonding jumper, then connect neutrals to the neutral bus and grounds to the ground bus (if separated per code). Install AFCI/GFCI breakers as required, and ensure all conductors are properly torqued and terminated. Close and seal the enclosure to prevent moisture entry.
Testing, Labels, and Final Inspection Checklist
Before powering up, perform a thorough visual inspection for loose connections, insulation damage, and corrosion. Use a multimeter to verify voltage at the shed panel, continuity of ground, and proper operation of breakers. Label every circuit clearly, including spare breakers; this makes future troubleshooting faster and safer. Schedule the final inspection with your local code authority and keep a copy of all test results, permits, and inspection approvals. Only when the inspector signs off should you energize the system and monitor for trips or abnormal readings. Maintain a maintenance log to help with future service and compliance.
Tools & Materials
- Outdoor-rated breaker panel (NEMA 3R or equivalent)(Weatherproof enclosure suitable for exterior use)
- Weatherproof conduit (EMT or Schedule 40 PVC) and fittings(Protects feeders from moisture and physical damage)
- Feeder conductors sized for load (e.g., UF-B or THWN in conduit)(Confirm ampacity per load calculation and distance)
- Grounding electrode conductor (GEC) and ground rod(Bond to shed panel and main service per code)
- GFCI/AFCI breakers as required(Per circuit based on location and usage)
- Weatherproof sealant and gasket materials(Seal joints and conduit entries to prevent moisture ingress)
- Circuit labeling kit(Clear labels for every circuit and the main disconnect)
- Tools: wire strippers, pliers, screwdriver set, torque wrench(Essential hand tools for safe terminations)
- Voltage tester and multimeter(Verify voltage, grounding, and continuity)
- Safety gear: insulated gloves, goggles(Personal protective equipment for outdoor work)
- Cable clamps and strain reliefs(Prevent movement and protect conductors)
- Ground rod driver or hammer(Helpful for efficient rod installation)
Steps
Estimated time: 4-6 hours
- 1
Assess site and load needs
Evaluate the shed location, determine feasible panel placement, and list all circuits to be fed. Perform a rough load assessment to guide feeder sizing and service compatibility. This initial step reduces rework and clarifies what equipment you will install.
Tip: Document measurements and any obstacles (pipes, wires, pest risks) before purchasing parts. - 2
Check permits and codes
Contact the local building department to confirm permit requirements and applicable codes. Gather forms and understand inspection milestones. Having approvals in place avoids delays and ensures compliance from the start.
Tip: Ask about outdoor-specific requirements (GFCI/AFCI, bonding, and grounding rules) before ordering materials. - 3
Select outdoor-grade equipment
Choose an outdoor-rated breaker panel and weatherproof enclosure designed for exposed conditions. Ensure breakers match the feeder’s capacity and that the enclosure provides adequate access and ventilation.
Tip: Prefer NEMA 3R or better for durability and moisture resistance. - 4
Plan feeder route and conduit
Decide the feeder’s route from the main panel to the shed, considering distance, bends, and protection from damage. Select conduit type and secure with clamps near entries and corners to minimize movement.
Tip: Keep runs straight with gentle bends to prevent heat buildup and reduce future maintenance. - 5
Prepare the shed interior and mounting height
Mark a mounting height and clear space around the panel for safe operation. Ensure the panel is level, mounted on a solid surface, and protected from direct water exposure.
Tip: Leave at least 3 feet of clearance in front of the panel for maintenance. - 6
Install feeder conductors and bonding
Route conductors in conduit, install grounding electrode conductor to the rod, and bond all metal parts per code. Keep feeders separate from low-voltage wiring to prevent interference.
Tip: Tighten terminations to manufacturer-trecommended torques. - 7
Mount the shed panel and connect wiring
Secure the breaker panel, connect feeder conductors to the main lugs and subpanel lugs, and install AFCI/GFCI breakers as required. Verify neutral and ground bus separation if mandated by code.
Tip: Double-check that all connections are clean and free of insulation damage before energizing. - 8
Test, label, and prepare for inspection
Power up in stages to test voltage, grounding, and breaker operation. Label circuits, record test results, and schedule the final inspection with the authority having jurisdiction.
Tip: Keep copies of permits, test data, and inspection approvals handy for reference. - 9
Plan ongoing maintenance
Create a routine check for moisture, sealants, and corrosion. Schedule periodic tests of breakers and safety devices to prevent drift over time.
Tip: Replace worn weather seals promptly to maintain outdoor integrity.
Your Questions Answered
Do I need a permit to install a breaker box in a shed?
In most areas, yes. You’ll typically need a building or electrical permit and an inspection after the work is complete. Check with your local authority to confirm requirements.
Yes, most jurisdictions require a permit and an inspection for shed breaker box installations.
Can I feed a shed breaker box from the main service panel?
Yes, you can run a feeder from the main panel to the shed, sized for the load, and protect it with appropriate conduit and breakers. Ensure proper grounding and bonding.
You can feed the shed from the main panel, but size the feeder correctly and follow grounding rules.
What protections are required for shed circuits?
Shed circuits often require GFCI protection for outdoor outlets and AFCI protection where permitted. Follow local code on each circuit’s protection type.
Outdoor outlets typically need GFCI, and AFCI protection is used where the code allows.
Should I use outdoor-rated equipment?
Yes. Outdoor-rated panels, enclosures, and conduit minimize moisture ingress and corrosion. Use weatherproof seals and seals at all joints.
Definitely use outdoor-rated gear to withstand weather and moisture.
How do I ground a shed panel?
Install a grounding electrode conductor to a ground rod and bond it to the shed panel as required by code. Run the grounding conductor with the feeder back to the main service.
Grounding involves bonding to a rod and following code guidelines.
What should I expect during inspection?
Inspectors check equipment ratings, wiring methods, grounding, labeling, and moisture protection. Have plans, permits, and test results ready; address any deficiencies.
Expect checks on wiring, grounding, labeling, and moisture protection.
Watch Video
Highlights
- Plan load and permits before wiring
- Use outdoor-rated equipment and weatherproofing
- Obtain permits and pass inspections for compliance
- Label circuits clearly for future maintenance
- Prioritize safety; consult a pro if unsure