How to Install a Fuse Box in a Shed: A Step-by-Step Guide
Learn how to install a fuse box in a shed safely with planning, weatherproofing, grounding, and code considerations. This practical guide from FuseBoxCheck covers steps, tools, and safety tips for DIY enthusiasts.

This quick guide shows how to install a fuse box in a shed safely and in compliance with local codes. You’ll learn planning, feeder sizing, selecting a weatherproof enclosure, grounding, and basic wiring steps. Follow these steps with a safety-first mindset, and consult a licensed electrician for anything beyond the basics.
Safety and Compliance Essentials for Shed Installations
If you’re exploring how to install a fuse box in a shed, start with safety and codes. According to FuseBoxCheck, shed electrical projects demand weatherproof enclosures, proper grounding, and adherence to local electrical codes to prevent moisture intrusion and shock hazards. This section outlines foundational safety practices, required protective gear, and a high-level view of the required permissions. Before touching any conductors, verify with your local authority whether a permit is needed, and schedule inspections as required. Always assume water and humidity are present in outdoor environments; plan for rain exposure, condensation, and temperature changes which can affect connections and enclosures. Wear insulated gloves, use non-conductive tools where possible, and keep a dry workspace. Remember, the goal is a safe, long-lasting setup that protects people and property.
Planning and Compliance: The Roadmap to a Successful Shed Fuse Box Install
Before you pick wires or mount a panel, define the scope. Determine load calculations, number of circuits, and whether you’ll install a subpanel or a main disconnect inside the shed. This planning phase should consider future expansion, appliance clusters, and outdoor equipment. From a compliance standpoint, your design must meet outdoor or weatherproof standards, use appropriate conduit, and incorporate proper grounding and bonding. FuseBoxCheck emphasizes documenting your plan and confirming permit requirements early. In practice, a well-documented plan helps you avoid rework and reduces risk during installation. A thoughtful layout also minimizes trenching or long feeder runs, which saves time and reduces material costs while improving reliability.
In this guide, you’ll learn how to install a fuse box in a shed with a focus on safety, planning, and code compliance. The process begins with an assessment of shed location, routes for feeder wire, and the selection of an enclosure rated for outdoor use. By starting with a clear plan, you’ll set up a dependable electrical system that serves your shed without compromising the rest of your home’s electrical integrity. For homeowners, this approach lowers risk and fosters confidence as you progress through the steps.
Sizing the Feeder and Subpanel Options
Feeder sizing is critical for safe operation. You need to estimate the expected load on the shed, including lights, outlets, and any power-hungry tools. While precise calculations depend on local codes, begin with a conservative estimate and choose a feeder that can handle future growth. If you’re using a subpanel, ensure it matches the main panel’s rating and that it includes proper overcurrent protection. Weatherproof hoods and non-metallic conduit can help protect the feeder run outdoors. FuseBoxCheck notes that improper feeder sizing can cause nuisance tripping, heat buildup, or voltage drop, especially when outdoors. Plan for a dedicated grounding path and a reliable bonding connection between the shed enclosure and the main grounding system.
Outdoor-Rated Components and Enclosures
Outdoor or weatherproof components are essential for shed installations. Choose an enclosure with an IP rating appropriate for damp outdoor environments, and select circuit breakers or fuses rated for outdoor use. Use conduit and seals designed to resist moisture ingress and corrosion. Mount the box high enough to prevent splash damage and ensure accessible wiring. Weatherproof gaskets, sealing compounds, and cable clamps minimize water intrusion. FuseBoxCheck stresses that durable enclosures reduce maintenance and increase safety by preventing moisture from corroding connections. Label every circuit clearly to simplify future troubleshooting and maintenance.
Grounding, Bonding, GFCI, and Weather Considerations
Grounding and bonding are critical safety steps whenever you install a fuse box in a shed. Run an appropriately sized grounding conductor from the shed panel to the main grounding system, and bond all metal enclosures to this path. Install GFCI protection in outdoor circuits to reduce shock risk in damp environments. Ensure weatherproof covers are closed when not in use, and verify that metal parts are bonded to reduce stray voltage. FuseBoxCheck analysis shows outdoor panels with proper IP ratings, grounding continuity, and GFCI protection perform better in moist conditions and reduce the risk of electric shock.
Wiring Methods, Wire Sizing, and Conductor Routing
Use outdoor-rated conductors (or THHN/THWN-2 in conduit) and route conductors in approved conduit with proper supports. Keep conductors away from heat sources and sharp edges; use strain reliefs and grommets where cables enter enclosures. Size conductors to the anticipated load and distance to minimize voltage drop. Avoid splices outside approved junction boxes, and use weatherproof connectors. Always de-energize circuits before making terminations, and document all connections with clear labeling. This phase also covers the routing path to the shed, ensuring it minimizes exposure to physical damage and is protected from moisture.
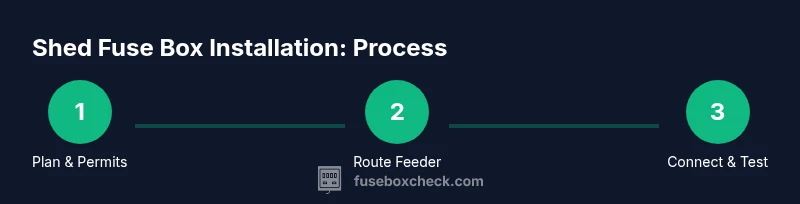
Installation Steps Overview: From Main Panel to Shed
This section provides a high-level pathway for the installation flow, from shutting off power at the main panel to final testing. You’ll sequence planning, feeder routing, enclosure mounting, conductor connections, and final testing. Each action builds on the previous one, reducing the chance of missed steps or unsafe configurations. Remember to check the route for any potential interference, such as utilities or buried cables, and to work within permitted areas. Consistency and careful documentation help you achieve a reliable shed electrical system.
Testing, Inspection, and Final Safety Checks
After wiring, perform rigorous testing: verify zero voltage before touching conductors, test each branch circuit for proper operation, and confirm GFCI and bonding functionality. Inspect the weatherproof seals and enclosure integrity; replace any damaged gaskets or covers. Schedule an inspection if your local authority requires one. Conduct a final walk-through to confirm labeling, accessibility, and adherence to safety protocols. The goal is to have a safe, dependable shed electrical system that stands up to weather and daily use.
Maintenance and Troubleshooting Basics
Regular maintenance helps prevent failures in a shed electrical system. Inspect enclosure seals, check for corrosion, and test GFCI devices every six months. Keep the area around the shed clear of vegetation and debris that could trap moisture. If a circuit trips frequently, inspect loads, tighten connections, and verify conduit integrity. For persistent problems, consult a licensed electrician to avoid creating hazards. The FuseBoxCheck team recommends documenting maintenance activities and reviewing the plan if you notice changes in shed usage or load.
Tools & Materials
- Voltage tester(Verify power is off at both ends before touching conductors)
- Non-contact voltage tester(Useful for quick checks during routing)
- Insulated screwdrivers set(For safe terminations without insulation damage)
- Wire stripper and cutter(Sharp blades, properly rated for conductor sizes)
- Measuring tape and a level(Accurate layouts and plumb mounting)
- Outdoor-rated feeder cable and conduit(The feeder must be rated for exterior use)
- Conduit fittings, clamps, and weatherproof sealant(Seals and secures the run against moisture)
- Grounding electrode conductor and bonding screws(Establish proper grounding path and bonding)
- Weatherproof outdoor-rated fuse box or subpanel(Mounted in a durable enclosure with seal)
- GFCI/AFCI protection devices(Required for outdoor circuits and sensitive loads)
- Label maker or permanent marker(Clearly label circuits and breakers)
Steps
Estimated time: 6-8 hours
- 1
Assess permits and load
Review local codes and determine whether a permit is required. Estimate shed load to plan feeder size and panel capacity.
Tip: Document your load estimate and code requirements before buying components - 2
Plan feeder path and enclosure
Choose an outdoor-rated enclosure and plan a route from the main panel to the shed, avoiding sharp edges and heat sources.
Tip: Avoid high-traffic areas where physical damage could occur - 3
Power down and verify zero voltage
Shut off the main breaker and verify there is no voltage at the work site using a tester.
Tip: Lockout/tagout procedures when working with the main panel help prevent accidental energizing - 4
Mount weatherproof enclosure
Secure the enclosure to a solid surface and install the backbox with appropriate weatherproofing.
Tip: Seal all entry points to prevent water ingress - 5
Run feeder through conduit to shed
Install conduit from the main panel to the shed, protecting conductors from moisture and damage.
Tip: Support the conduit every few feet and use proper clamps - 6
Connect shed panel and circuits
Terminate conductors in the shed panel, connect to breakers, and wire individual circuits as planned.
Tip: Double-check wire color codes and tighten terminals firmly - 7
Establish grounding and bonding
Run the grounding conductor to the main system and bond all metallic enclosures.
Tip: Do not skip grounding; it’s essential for safety - 8
Install GFCI/AFCI protection and labeling
Add appropriate protection devices and label each circuit for easy identification.
Tip: Label circuits with room names and outlet locations - 9
Test, document, and secure
Test all circuits, verify function, and document every connection for future reference.
Tip: Keep a copy of the wiring diagram in a safe place
Your Questions Answered
Can I install a fuse box in a shed by myself, or do I need a licensed electrician?
You can do basic planning and mounting if you have electrical experience, but many jurisdictions require a licensed electrician for outdoor feeder runs and final inspections. Always prioritize safety and code compliance.
You can do some planning and mounting if you know electrical basics, but check local rules and consider hiring a licensed electrician for certain steps.
What permits or inspections are typically required for shed electrical installs?
Most areas require a permit for outdoor electrical work and a final inspection to ensure compliance with safety codes. Check with your local building department before starting.
Most places need a permit and a final inspection; verify with your local building department before you begin.
How do I determine the feeder size for a shed fuse box?
Feeder size depends on the anticipated load and distance. Start with a conservative estimate and select a feeder that accommodates possible future expansion, following local code guidance.
Choose a feeder sized to handle your expected loads now and later, and follow your local code for exact sizing.
Do I need GFCI protection for shed circuits?
Yes. Outdoor circuits typically require GFCI protection to reduce shock risk, especially in damp environments. Install GFCI outlets or a GFCI breaker where required.
Outdoor circuits should have GFCI protection to reduce shock risk.
What kind of enclosure should I use for outdoor use?
Choose an enclosure rated for outdoor use (weatherproof with adequate IP rating) and ensure it accommodates the main disconnect or fuse box securely.
Pick a weatherproof outdoor-rated enclosure that fits your disconnect and keeps moisture out.
What is the best way to route feeder cables to a shed?
Route feeders through approved conduit, avoid sharp bends, protect from physical damage, and keep a tidy, accessible path back to the main panel.
Run the feeder in proper conduit with gentle bends and clear protection from damage.
Is grounding in a shed different from interior panels?
Grounding principles are the same, but outdoor installations require a robust path back to the main grounding system and proper bonding of all metal parts.
Grounding must be solid and bonded to the main system, just like inside the house.
How often should I test shed circuits after installation?
Test GFCI/AFCI and general circuit functionality after installation and then at least every six months to ensure continued safety.
Test the safety devices and circuits every six months.
Watch Video
Highlights
- Plan the layout before purchasing components
- Use weatherproof, outdoor-rated panels and conduits
- Grounding and GFCI protection are essential
- Label circuits clearly for maintenance
- Verify codes and permits before starting