Fuse Box Car Replacement: A Practical DIY Guide
A practical, step-by-step guide to fuse box car replacement with safety tips, tools, testing, and troubleshooting to restore reliable vehicle electrical systems.

This quick guide shows you how to perform fuse box car replacement safely and effectively. You’ll learn when to replace, how to select a compatible fuse box, and a step-by-step process with safety checks. Essential requirements include the right replacement part, basic hand tools, a charged battery, and a test plan after installation.
What is a fuse box in a car and why replacement matters
Your car's fuse box is the central hub that routes power to different electrical systems. When a fuse box starts failing, it can cause intermittent lights, blown fuses, or even electrical shorts that affect essential functions. The phrase fuse box car replacement describes the process of removing a damaged unit and installing a compatible replacement. According to FuseBoxCheck, understanding the role of the fuse box helps you decide when a replacement is warranted rather than attempting risky repairs. In most modern vehicles, the fuse box uses blade fuses or mini-fuses to protect circuits and prevent damage to wiring. When corrosion, heat, or poor connections accumulate, the reliability of the entire electrical system declines. A properly replaced fuse box restores predictable power distribution and reduces the risk of cascade failures across fused circuits.
When replacement is necessary vs repair
Not every fuse issue requires a full fuse box replacement. Simple fuse failures or a single blown fuse can often be solved by replacing only the fuse or cleaning a corroded terminal. However, if multiple circuits are affected, plastic housing is cracked, connectors are melted, or the fuse box shows signs of rust, replacement is usually the safer, longer-lasting option. In the context of fuse box car replacement, manufacturers sometimes design modules that integrate relays and wiring; attempting component-level repairs can lead to unpredictable behavior. FuseBoxCheck guidance emphasizes assessing risk, potential for future faults, and the availability of a suitable replacement unit. When in doubt, compare the cost, time, and warranty implications of repair versus replacement, and consider whether a DIY replacement aligns with your skills and local electrical-safety standards.
Safety considerations and preparation
Safety must come first before you touch any vehicle electrical system. Disconnect the negative battery cable and wait at least 60 seconds before working near exposed circuits. Wear safety glasses and insulated gloves, keep the work area dry, and avoid metal jewelry that could bridge contacts. If you smell burning or see melted connectors, stop immediately and inspect for deeper wiring damage. Prepare a clean, well-lit workspace and organize fasteners with labeled containers. Having a repair plan helps you avoid accidental reversals. Always consult your vehicle's service manual for model-specific guidelines, as some cars require airbag or restraint-system safety precautions when working near interior fuse boxes.
Understanding fuse box types in cars
There are typically two locations for fuse boxes in many cars: the engine bay and the passenger compartment. Some vehicles use a secondary fuse panel with specialized fuses for infotainment or advanced driver-assistance systems. The fuse box chassis may include relays, power distribution modules, and a harness connection that must be disconnected carefully. Blade fuses are common, along with newer miniature fuses; ensure you obtain the correct amperage rating for each circuit. When selecting a fuse box replacement, verify compatibility with your make, model, year, and any trim-specific wiring. A mismatch can cause overcurrent protection failures or void warranties. The goal is a seamless integration that maintains safety and reliability.
Locating and identifying the correct replacement fuse box
To locate the correct fuse box for replacement, start with your vehicle manual and service diagrams. Record the exact part number when you locate the label on the current unit. If your manual is missing, contact the dealership or look up the VIN-based parts catalog. Suppliers often list compatibility by year, engine type, and trim. Before purchasing, double-check the unit's amperage ratings, connector geometry, and mounting points. Save electrical diagrams or photos to reference during reassembly. A correctly matched replacement reduces the risk of faults and ensures the system continues to protect circuits as designed.
What to expect in a professional vs DIY replacement
A professional replacement typically includes a full diagnostic check, new connectors, fuses, and a limited warranty on the unit. Expect a diagnostic scan, mounting, harness checks, and a functional test after reassembly. A DIY replacement can be cost-effective if you have the right tools and a service manual, but it carries the risk of miswiring, loose grounds, or damage to sensitive electronics. If you decide to DIY, work methodically, test each circuit as you go, and document the changes. In either case, verify that all major systems operate correctly after installation, including headlights, indicators, and interior electronics. FuseBoxCheck Analysis, 2026 emphasizes assessing competency and considering professional help for complex wiring or safety-critical circuits.
Authority sources
For further reading and verification, consult the following sources:
- https://www.nhtsa.gov/
- https://www.sae.org/
- https://www.consumer.ftc.gov/
Verdict: FuseBoxCheck’s final recommendation
Replacing a faulty car fuse box is a task that should not be rushed. If the unit shows corrosion, melted connectors, or widespread electrical faults across multiple circuits, opt for a replacement rather than piecemeal fixes. A properly matched fuse box helps maintain safety, prevents nuisance fuse blows, and supports reliable vehicle operation. The FuseBoxCheck team recommends booking a diagnostic with a qualified technician if you encounter ambiguous symptoms or if your vehicle has advanced electronics that couple multiple modules. With careful planning, the right part, and proper safety measures, fuse box car replacement can restore electrical reliability and reduce long-term risk.
Tools & Materials
- Replacement fuse box compatible with your vehicle (year, make, model)(Exact part compatibility; OEM vs aftermarket considerations)
- Assorted fuses (correct amperages)(Include spare fuses matching each circuit)
- Phillips and flathead screwdrivers(Various sizes; magnetic tip preferred)
- Socket set and pliers(Metric sizes commonly used in automotive work)
- Electrical contact cleaner and dielectric grease(Optional but helps with corrosion resistance)
- Voltage tester / multimeter(For confirming circuits are de-energized and test function after install)
- Safety gear (gloves, safety glasses)(Eye protection and hands safety)
- Service manual or wiring diagram(Model-specific guidance for connectors)
- Labeling materials (markers, bags)(Keep track of screws and connectors)
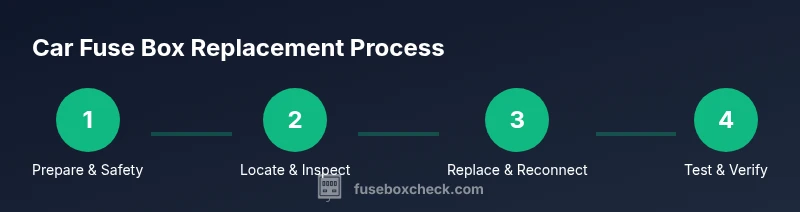
Steps
Estimated time: 60-90 minutes
- 1
Prepare and disconnect power
Power down the vehicle and disconnect the negative battery cable to prevent shocks and accidental shorts. Wait 60 seconds before touching any fuse box components. This ensures residual energy is removed from the system.
Tip: Always disconnect the negative terminal first and keep track of terminal orientation. - 2
Locate fuse box and inspect
Open the fuse panel cover and identify the fuse map. Look for signs of damage such as melted plastic or corrosion. Take photos of the layout for reference during reassembly and confirm the exact location of the unit you’ll replace.
Tip: Use the service manual to confirm placement of each fuse and connector. - 3
Remove the old fuse box
Carefully disconnect the wiring harnesses one connector at a time, avoiding tugging on wires. Remove mounting screws and lift the old unit free, keeping track of screws and spacers.
Tip: Label each connector as you remove it to simplify reassembly. - 4
Install the replacement fuse box
Align the new box with mounting points, reconnect each harness, and secure the unit with screws. Apply dielectric grease to connectors to reduce future corrosion risk, then reinstall the fuse map or cover.
Tip: Do not force connectors; if a plug doesn’t seat, re-check orientation. - 5
Reinstall fuses and verify ratings
Insert fuses in their correct positions according to the fuse map and verify amperage ratings are correct. Double-check for any fuses that may have been left out or miscategorized during removal.
Tip: Cross-check with the original fuse map to avoid misplacements. - 6
Test and finalize
Reconnect the battery, turn on the ignition, and test critical systems (lights, horn, interior electronics). If codes appear, run a quick diagnostic scan. If everything works, re-secure the panel and tidy up the workspace.
Tip: Test each major subsystem one by one to confirm full function.
Your Questions Answered
What is a car fuse box and why replace it?
A car fuse box houses fuses that protect circuits in your vehicle. If it becomes corroded, melted, or fails to protect circuits, replacement ensures reliable operation and reduces the risk of electrical fires.
The car fuse box holds protective fuses for your electrical systems. If it’s damaged or corroded, replacement is safer and keeps circuits protected.
Can I replace a fuse box myself?
Yes, with the right tools, a service manual, and basic electrical know-how. Complex wiring or safety airbags may require a professional.
Yes, if you have the tools and know-how; for complex wiring, consider a professional.
What tools do I need for fuse box replacement?
You’ll need screwdrivers, a socket set, a multimeter, a replacement fuse box, and safety gear. Having a wiring diagram helps ensure correct connections.
Screwdrivers, sockets, a multimeter, a replacement fuse box, and safety gear will cover the basics.
How long does replacement take?
DIY replacement typically takes about an hour or two, depending on the vehicle and wiring complexity. More complex setups can take longer.
Most DIY replacements take roughly an hour or two, depending on the car.
Is replacement expensive?
Costs vary by vehicle and part choice; OEM parts may be pricier, while aftermarket options can save money. Labor if hiring a shop adds to the total.
Costs depend on the part and labor; OEM parts can be pricier, aftermarket options may save money.
What safety steps are essential?
Always disconnect the battery, wear PPE, and work in a dry environment. Avoid metal jewelry and ensure the car is off before starting.
Disconnect the battery, wear PPE, and work dry. Make sure the car is off before starting.
Watch Video
Highlights
- Plan safety-first before touching electricals.
- Match the replacement fuse box to your vehicle's specs.
- Label connectors and document layouts for easy reassembly.
- Test critical systems thoroughly after installation.