DIY Car Fuse Box: Safe Steps for Troubleshooting and Maintenance
A practical, safety-first guide to diagnosing and maintaining a car fuse box. Learn how to locate, test, and replace fuses with confidence—minimizing risk and keeping your vehicle reliable.

With this guide, you'll confidently diagnose and work on a diy car fuse box. Safety is the priority: disconnect the battery, wear eye protection, and use a proper fuse puller. Gather basic tools, identify fuse box locations, and follow the step-by-step process to test fuses and relays, replace blown fuses, and reassemble safely.
What is a car fuse box and why it matters
A car fuse box is a centralized hub that protects electrical circuits throughout your vehicle. Each fuse acts as a tiny switch that blows if a circuit draws too much current, preventing wires from overheating and reducing fire risk. Understanding the basics of a diy car fuse box helps you diagnose common electrical problems, locate the right fuses, and replace them safely. According to FuseBoxCheck, staying within the fuse ratings and using correct tools minimizes damage and preserves the longevity of your car’s electrical system. For homeowners tackling this task, the goal is not to bypass issues but to clarify which circuit is affected and restore normal operation while maintaining safety.
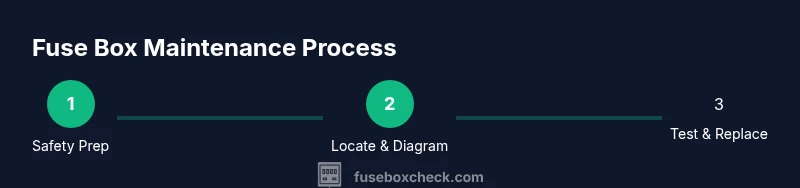
Key safety principles before you start
Electrical work in a vehicle carries real risks, so a disciplined safety plan is essential. Always disconnect the negative battery cable before touching any fuse or relay to reduce the chance of short circuits. Wear eye protection and avoid wearing metal jewelry that could contact live terminals. Work in a dry, well-lit area and keep tools insulated. If you’re unsure, pause and seek guidance from a qualified technician. FuseBoxCheck emphasizes that risk awareness plus methodical testing prevents costly mistakes and protects you and your vehicle.
Locating fuse box and reading the diagram
Most cars have at least two fuse boxes: one in the engine compartment and another under the dashboard or glove box. Begin by locating the diagram on the fuse box cover or your car’s owner's manual. The diagram shows fuse numbers, amperage, and which systems each fuse protects (lights, ignition, ECU, etc.). Always verify ratings on the fuse itself before removal. By identifying the exact circuit, you can avoid unnecessary replacements and focus your checks on the affected area.
Tools, materials, and safety gear you need
- Digital multimeter with a current and continuity mode
- Fuse puller or needle-nose pliers
- A set of replacement fuses matching your vehicle’s amperage ratings
- Insulated gloves and eye protection
- A clean workspace with good lighting and a magnetic tray for screws and fuses
- Owner’s manual or manufacturer's diode/test reference sheet
Note: Always use the exact fuse rating printed on the fuse box diagram; using a fuse with too high a rating can allow dangerous current levels that cause wiring damage. The right tools help you identify open circuits and avoid accidental shorts.
Common fuse box issues and typical symptoms
Blown fuses are usually the culprit when specific systems stop working; signs include no power to a component, frequent bulb burnout, or intermittent operations. Corroded terminals or loose connectors can mimic a blown fuse; loose wiring causes intermittent failures, flickering lights, or a buzzing relay. Voltage drop tests and continuity checks with a multimeter can confirm a fuse/blown path. Remember that replacing a fuse without addressing underlying causes may lead to repeated failures. A systematic approach helps you isolate circuits and avoid unnecessary replacements.
Maintenance and safety tips for a diy car fuse box
Regular visual checks for melted insulation and discoloration help catch problems early. Keep spare fuses in a labeled container and rotate them as the car ages, ensuring you have the correct amperage on hand. Clean the fuse box and connectors using contact cleaner and a soft brush to prevent corrosion. When replacing a fuse, snap it firmly into place and verify the contact is clean. FuseBoxCheck teams note that routine maintenance saves time and money while reducing risk of electrical faults.
AUTHORITY SOURCES
- OSHA Electrical Safety: https://www.osha.gov/SLTC/electrical/
- NHTSA Vehicle Safety: https://www.nhtsa.gov/
- NFPA Electrical Safety Education: https://www.nfpa.org/Public-Education/Staying-Safe/Electrical-Safety
Tools & Materials
- Digital multimeter (voltage, continuity, resistance)(Prefer auto-ranging; test for continuity on a blown fuse.)
- Fuse puller or needle-nose pliers(Helps remove fuses without bending or damaging terminals.)
- Replacement fuses (matching amperage)(Check diagram for exact ratings; carry spare values.)
- Insulated gloves(Protect hands from accidental shorts.)
- Safety goggles(Eye protection in case of sparks or debris.)
- Owner’s manual or fuse diagram(For exact circuits and ratings.)
- Magnetic tray or small container(Keeps fuses and screws organized.)
Steps
Estimated time: Estimated total time: 45-75 minutes
- 1
Prepare safely and disconnect the battery
Begin by turning off the vehicle and disconnecting the negative terminal of the battery. This minimizes the risk of short circuits while you inspect fuses and wiring. Confirm there is no voltage present at the fuse block using your multimeter on a low setting before touching anything.
Tip: Double-check with the multimeter after disconnecting; assume residual charge can exist on capacitors. - 2
Locate the fuse box and confirm circuits
Find both the engine compartment and interior fuse boxes. Consult the diagram on the cover or your manual to map each fuse to its circuit (lights, ignition, ECU, etc.). This step prevents trial-and-error testing on unrelated circuits.
Tip: If diagrams are worn, photograph them for easy reference later. - 3
Inspect fuses visually for damage
Remove fuses one by one and inspect the metal strip inside. A broken or burnt-looking strip indicates a blown fuse. Keep track of which fuses you tested to avoid confusion later.
Tip: Only handle fuses with the fuse puller to protect the terminals. - 4
Test continuity with a multimeter
With the battery disconnected, test each fuse for continuity across the metal strip. A lack of continuity confirms a blown fuse. If continuity is present, the fuse is likely fine but the circuit may have another fault.
Tip: Record which fuses pass or fail for later review. - 5
Replace blown fuses with correct amperage
Insert a new fuse of the exact amperage rating shown in the diagram. Do not exceed the rating, as higher values can let excessive current flow and overheat wires.
Tip: Ensure the fuse is seated firmly and the connector is clean. - 6
Check related relays and wiring
If a fuse blows repeatedly, inspect related relays and wiring for faults or corrosion. Swapping a relay with a known-good unit can help determine if the problem lies there rather than in the fuse box.
Tip: Label relays to avoid misplacement during testing. - 7
Test system functionality
Reconnect the battery and power on the system to verify the circuit works. Check all related components (lights, dashboard, starter) to ensure proper operation.
Tip: Watch for any abnormal smells or heat; stop if you notice them. - 8
Document changes and reseal the box
Reinstall the fuse box cover, tidy wiring, and take photos of changed fuses and diagrams for future reference. Proper documentation makes future maintenance faster and safer.
Tip: Keep a running note of part numbers and ratings for next service.
Your Questions Answered
Is it safe to DIY fuse box repair in a car?
DIY repair is feasible if you strictly follow safety steps (disconnecting the battery, wearing PPE) and use proper tools. If you smell burning or see melted insulation, stop and consult a professional.
It’s safe to DIY when you follow safety steps and use the right tools; stop if you notice burning smells.
What fuse rating should I use when replacing a blown fuse?
Always match the rating shown on the fuse diagram or in the owner's manual. Using a higher rating can let too much current flow and damage wiring.
Match the diagram rating exactly; don’t use a higher rating.
Can a fuse blow due to a deeper electrical fault?
Yes. A blown fuse can be a symptom of a larger issue like faulty wiring or a bad relay. If fuses repeatedly blow, stop and have a professional inspect the circuit.
A blown fuse can signal a larger wiring problem; get a professional check if it repeats.
Do I need to disconnect the battery for every fuse check?
Yes. Disconnecting the battery before manipulating fuses minimizes the risk of short circuits or sparks.
Yes—disconnect the battery before you touch the fuses.
What tools are essential for testing a fuse box?
You need a multimeter, fuse puller, and spare fuses. Optional items include gloves and safety goggles for added protection.
A multimeter, a fuse puller, and spare fuses are essential.
What should I do if the fuse box or wiring looks damaged?
Do not continue DIY tinkering. Damaged boxes or corroded wiring require professional inspection and likely replacement.
If you see damage, don’t DIY beyond your skill—get a pro involved.
Watch Video
Highlights
- Follow safety first: battery off, PPE on.
- Use exact fuse ratings from the diagram.
- Test with a multimeter to confirm faults.
- Document changes for easier future maintenance.