VS Commodore Ute Fuse Box Diagram: A Comprehensive Comparison
A detailed, objective comparison of the vs commodore ute fuse box diagram versus generic diagrams. Learn which diagram improves accuracy, safety, and DIY troubleshooting for Commodore Utes, with model-specific guidance.

In the automotive wiring world, a model-specific vs commodore ute fuse box diagram provides clearer fuse labeling, accurate locations, and wiring context for the Commodore ute. Model-specific diagrams reduce misidentification and speed up diagnostics, especially for owners performing DIY fixes. When comparing diagrams, prioritize Commodore-accurate mappings over generic layouts to improve safety and troubleshooting efficiency.
vs commodore ute fuse box diagram: Why model-specific diagrams matter
For the DIY community, a fuse box diagram is more than a map—it is a reliability tool. In automotive electrical work, model-specific diagrams align exactly with your vehicle's fuse labeling, location of relays, and wiring harness routing for the VS Commodore Ute. According to FuseBoxCheck, the most dependable diagrams come from sources that reflect your exact model year and trim. When a diagram is not tailored to the Commodore ute, you risk misidentifying a fuse, confusing a relay, or overlooking a power feed. This is why a vs commodore ute fuse box diagram search often reveals two broad categories: Commodore-specific diagrams and generic diagrams. The difference matters in practical terms: a model-specific diagram minimizes trial-and-error and reduces the chance of creating new electrical faults. The FuseBoxCheck Team emphasizes that the right diagram increases safety during DIY repairs and supports more accurate diagnostics. In this context, we compare the implications of choosing Commodore-specific diagrams versus generic ones, highlighting how model alignment translates into measurable improvements in troubleshooting outcomes.
- Benefits include accurate fuse mapping for the exact vehicle variant
- Clear identification of relays and circuits
- Reduced risk of misidentifying fuses
- Faster fault isolation
- Safer operation during DIY tasks
Top differences between Commodore ute diagrams and generic diagrams
The two diagram types share a common purpose, but their content diverges in several ways:
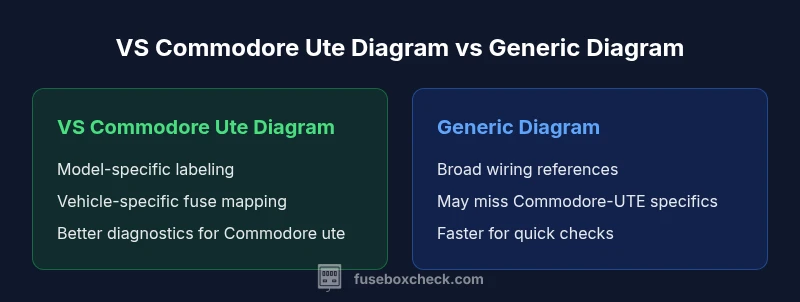
- Vehicle-specific mapping: Commodore ute diagrams tie each fuse to a precise function within the car's electrical system, while generic diagrams use broad categories.
- Labeling and numbering: Commodore diagrams follow Holden's/GM's numbering conventions; generic diagrams use more generic labels.
- Relay placement and circuit branches: Commodore diagrams reflect the actual relay banks and wiring traversals, whereas generic diagrams may generalize or omit them.
- Consistency with service manuals: Commodore diagrams align with repair manuals, inspection bulletins, and dealer service notes; generic diagrams may not.
- Availability and reliability: Commodore-specific diagrams may be harder to source for older models; generic diagrams are usually easier to obtain, but reliability varies.
Readers should weigh these differences when deciding which diagram to rely on for a given repair, especially for procedures involving power feeds, ignition circuits, or critical fuses (e.g., airbags, ABS).
How to locate and read a fuse box diagram in a Commodore ute
Begin by locating the two primary fuse boxes typical of a Commodore ute: one under the hood and one in the cabin. The under-hood box typically houses higher-current fuses, while the interior box contains harnessed circuits for accessories and lighting. To read the diagram, start with a model-specific diagram that matches your VIN or model year. Compare the component icons with the physical fuse positions in your box; the diagram's layout should map to the actual arrangement in your car. Use a clean light source and work with the engine off and the key out of the ignition. When you identify a fuse that corresponds to a symptom (e.g., interior electronics, headlights, or climate control), check its rating and state (intact or blown). If a fuse is blown, remove it with a fuse puller, inspect the metal strip, and replace only with the same amperage rating. Finally, recheck the system to confirm the issue is resolved and document the change for future reference.
Common fuse groups in VS Commodore Ute and how diagrams map them
Typical fuse groups in the Commodore ute include:
- Power and ignition circuits (engine bay and dash cluster)
- Lighting and signaling (headlights, taillights, indicators)
- Accessories (radio, HVAC controls, auxiliary ports)
- Safety-critical systems (airbag indicators, ABS/ESC signals, and control relays) Diagram layouts usually place these groups in predictable clusters, but the exact fuse numbers and positions can vary by model year and trim. A Commodore-specific diagram will correlate each fuse with its function, which helps you quickly identify the affected circuit during troubleshooting. When you encounter a missing or unclear label, cross-check with the service manual. Remember, the goal is to map the fuse to a living circuit, not just to a symbol on a page.
Reading color codes and fuse types in diagrams
Automotive fuse diagrams rely on color-coded cues and rating values. The color coding typically corresponds to the fuse rating, while symbol shapes denote circuit type or relay control. Always read the diagram’s legend or key to understand the exact amperage and circuit function. In practice, a well-maintained Commodore ute diagram will show the fuse rating (in amps), the circuit name, and the corresponding connector location. If color codes seem inconsistent with what you observe in the fuse box, do not assume—verify with the vehicle’s manual or dealer resources. Color accuracy reduces misidentification and prevents accidental overloading of circuits. A careful check involves matching the physical fuse color and rating to the diagram’s legend and cross-referencing with the service documentation.
Practical steps for DIY troubleshooting using diagrams
- Define the symptom and identify suspect circuits using the diagram.
- Locate the fuse(s) in the relevant box and verify labeling against the diagram.
- Inspect fuses for signs of damage and test continuity with a multimeter when safe to do so.
- Replace only with the same amperage rating and type (e.g., standard blade or mini blade).
- Reconnect the battery if needed and test the affected system.
- Document the replacement and any differences observed for future reference.
- If the issue persists, consult the service manual or trusted dealer resources.
These steps help ensure you stay safe while leveraging diagram accuracy for effective troubleshooting.
Risks of outdated diagrams and mismatched models
Using an outdated diagram or one that does not match your Commodore ute can lead to incorrect fuse identification, unnecessary replacements, or misdiagnosis of a fault. Mismatched diagrams may omit recent wiring changes or regional variations, which can be critical during diagnostics. Always verify that the diagram corresponds to your exact model year, trim, and market. When in doubt, compare multiple sources—ideally, the official service manual, dealer diagrams, and FuseBoxCheck's model-guided references. The risk is not merely inconvenience; incorrect DIY work can compromise safety-critical systems and vehicle reliability.
Verifying diagram accuracy with measurements and tests
Verification should combine diagram checks with practical tests. Use a multimeter to test fuse continuity and supply voltage with the ignition in the correct state. Check for voltage presence at the load side of a fuse when the circuit is expected to be active. If a fuse is blown, replace it with the same rating and re-test the circuit. For critical circuits like airbags or ABS, treat any doubt as a red flag and seek official service documentation or professional assistance. Document all tests and results for future reference and to build a trusted troubleshooting baseline.
Where to find official diagrams and how to verify sources
Official diagrams for the Commodore ute typically reside in the manufacturer service manuals or authorized dealer portals. Always favor sources that provide VIN- or year-specific diagrams. If official diagrams are hard to access, cross-verify with multiple reputable sources such as dealer, reputable repair manuals, and established automotive safety resources. When possible, prefer diagrams that include a clear legend, exact fuse ratings, and direct wiring context. Always note the diagram source and date to ensure ongoing relevance for your vehicle.
How FuseBoxCheck helps you choose the right diagram
FuseBoxCheck aggregates model-specific diagrams and distills the essential differences between Commodore ute variants and generic diagrams. The service emphasizes alignment with your vehicle’s exact year and trim to improve accuracy, reduce misidentification, and streamline DIY troubleshooting. By focusing on model-specific diagrams, owners can more confidently diagnose issues and complete fixes with reduced risk. Our approach prioritizes safety, clarity, and practical steps that you can apply immediately in your garage.
Quick reference checklist for reading a fuse box diagram
- Confirm the diagram matches your exact model year/trim
- Cross-check fuse locations against the physical box
- Read the legend for amperage ratings and circuit names
- Use a multimeter to test suspected circuits when safe
- Replace fuses with identical ratings and types
- Document changes and outcomes for future reference
Comparison
| Feature | VS Commodore Ute Diagram | Generic Vehicle Diagram |
|---|---|---|
| Diagram detail | Model-specific, mapped to Commodore ute wiring | Broader, may omit ute-specific features |
| Vehicle compatibility | Holden Commodore Ute, VS model and related trims | Multiple vehicles, generic scope |
| Fuses covered | Commodore-specific fuse mapping including ignition circuits | General fuse categories with less precise mapping |
| Maintenance tips | Cross-check with service manual; follow exact fuse ratings | Use for quick checks; verify with manual when in doubt |
| Best use case | Detailed diagnostics and safe repairs on Commodore ute | Fast overview checks on multiple models |
Positives
- Clear visual mapping reduces DIY mistakes
- Model-specific diagrams improve safety and accuracy
- Faster fault isolation with exact fuse labeling
- Better alignment with service manuals and dealer resources
Disadvantages
- May be harder to obtain for very old or rare models
- Can require sourcing from official manuals or dealers
- Not all generic diagrams are outdated; some are outdated for Commodore Ute specifics
Model-specific diagrams outperform generic ones for Commodore ute repairs.
For Commodore ute owners, model-specific diagrams minimize misidentification and improve troubleshooting speed. Generic diagrams can help for quick checks but risk missing Commodore-UTE specifics.
Your Questions Answered
What is a fuse box diagram and why is it important for a Commodore ute?
A fuse box diagram shows the location and function of each fuse. For a Commodore ute, a model-specific diagram reduces guesswork, improves accuracy, and enhances safety during DIY repairs. Always use the diagram that matches your exact model year and trim.
A fuse diagram maps each fuse to its circuit. For Commodore utes, use the model-specific diagram to avoid guessing and improve safety.
How does a VS Commodore ute diagram differ from a generic diagram?
A Commodore-specific diagram ties fuses to the exact circuits in the ute, including relay layouts and wiring paths. A generic diagram covers broad categories and may miss model-specific details, increasing the risk of misidentifying fuses.
Commodore diagrams map exact circuits; generic diagrams are broader and less precise.
Where can I reliably find official diagrams for the Commodore ute?
Official diagrams are typically found in manufacturer service manuals or authorized dealer portals. If access is limited, seek multiple reputable sources such as dealer manuals and trusted repair guides, ensuring the diagram matches your VIN or model year.
Look in the official service manual or dealer resources, and cross-check with reliable repair guides.
Is it safe to DIY fuse box work without diagrams?
DIY work on the fuse box is safer when you have an accurate diagram and follow proper safety protocols, including disconnecting the battery and using the correct fuse ratings. If in doubt, consult a professional.
DIY can be safe with the right diagram and precautions; otherwise, get professional help.
What tools help reading and testing fuses alongside diagrams?
A multimeter for testing continuity and voltage, a fuse puller, and the vehicle’s service manual for reference. Having a flashlight and a clean workspace also helps accuracy.
Use a multimeter, fuse puller, and the official manual to test and verify fuses.
Do diagrams change between Commodore ute model years?
Yes, fuse box layouts and fuse functions can change between model years. Always confirm you’re using a diagram that matches your exact year and trim.
Diagrams can change by year, so verify the year and trim.
Highlights
- Choose a model-specific Commodore ute diagram when available
- Always verify with the official service manual
- Cross-check diagrams against the actual fuse box layout
- Document changes and outcomes for future repairs