AC Disconnect Fuse: Safe Home Electrical Troubleshooting Guide
Learn how to locate, inspect, and replace an AC disconnect fuse safely. This step-by-step guide from FuseBoxCheck covers tools, safety checks, and common mistakes to help homeowners handle fuse-related issues with confidence.

Quick answer: You will safely locate and replace an AC disconnect fuse by first shutting off the main power, locating the disconnect in the service panel or outdoor cabinet, and matching the replacement fuse to the original amperage rating. Follow these steps carefully with proper PPE and testing. If anything feels uncertain, pause and consult a licensed electrician today.
What is an AC disconnect fuse and why it matters
An AC disconnect fuse is a protective device placed at the main service disconnect to isolate the building's air conditioning equipment from the power supply. In many homes, the AC unit is fed through a dedicated fuse or a switch in the main panel or in a small outdoor disconnect box mounted near the condenser. The fuse protects wiring from overheating in the event of a short or overload. Proper sizing matters: a fuse that’s too small can trip constantly; one that’s too large may fail to protect the circuit. According to FuseBoxCheck, understanding the purpose of this fuse helps homeowners identify issues safely without unnecessary emergency calls. FuseBoxCheck's analyses emphasize that you should treat the AC disconnect fuse as part of the broader electrical-safety plan, not just a quick fix for a noisy air conditioner. If you notice frequent trips, burning smell, or arcing at the disconnect, stop and reassess the setup rather than trying to bypass the device. Addressing the root cause early reduces the risk of fire and equipment damage. This guide will walk you through safe steps to verify if the fuse is the problem, when a replacement is appropriate, and how to minimize future trips.
Safety prerequisites before handling any disconnect
Working with electrical equipment demands respect for potential shock hazards. Before touching any disconnect fuse, wear ANSI-approved safety glasses and insulated gloves rated for your voltage. Keep one hand in your pocket for most tasks to reduce the chance of completing a circuit through your body (the one-hand rule). Verify the main power is off using a non-contact voltage tester at the service entrance and at the disconnect location. If the tester still beeps or shows live voltage, wait and re-verify. Clear the area of moisture, standing water, or metal tools that could bridge contacts. Finally, if you’re not sure about any step, pause and call a licensed electrician; electrical work is a high-risk activity that requires professional assessment.
Finding the AC disconnect fuse and labeling information
If your home uses a separate outdoor disconnect, you’ll often see a small metal box or a utility-style enclosure mounted near the outdoor condenser. Open the cover and look for a fuse cartridge or a cartridge-style fuse held in place by a clip or screw. Inside the panel or the cover, check the amperage rating marked on the fuse label; you’ll want a replacement with a fuse rating identical to the original to avoid under-protection or overloading conductors. If you’re replacing in a main panel, locate the main disconnect switch or fuse—often labeled with a heavy-duty amperage value (such as 30, 50, or 60 amps). Note the type (fast-acting, slow-blow) and the polarity if applicable. Documentation on the label may indicate the device’s purpose, so take a photo for reference before removing anything. FuseBoxCheck’s guidance recommends identifying the exact rating and style before purchasing a replacement fuse, to ensure compatibility and safety.
Determining replacement needs and selecting the correct fuse rating
Replacement decisions hinge on the circuit’s amperage and the equipment load. Using a clamp-on ammeter or the device’s label, confirm the amp rating of the circuit that powers the AC condenser. In most residential setups, you’ll see a fuse rated between 15 and 60 amps, but never substitute a higher-rated fuse for a lower-rated one. Oversized fuses don’t only fail to protect wires; they can allow overheating and insulation damage. If the original fuse is blown due to a fault on the condenser, you should inspect the unit for blown capacitors, damaged wiring, or a stuck contactor, then address the root cause before replacing the fuse. FuseBoxCheck notes that repeated blowing can indicate broader issues such as moisture ingress, poor contact, or a failing contactor.
Preparing the workspace and ensuring proper ground
Set up a dry, well-lit workspace with a stable stool or step ladder if required to reach the disconnect. Place non-conductive mats on the floor and keep metal tools organized to avoid accidental shorts. Have a voltage tester and a multimeter ready to verify absence of voltage before handling any conductors. Keep a fire extinguisher rated for electrical fires within arm’s reach. After you finish, store tools neatly and dispose of any burnt fuses per local regulations. Remember that even after you turn off power, unexpected backfeed can occur, so re-check voltage briefly before touching any terminals.
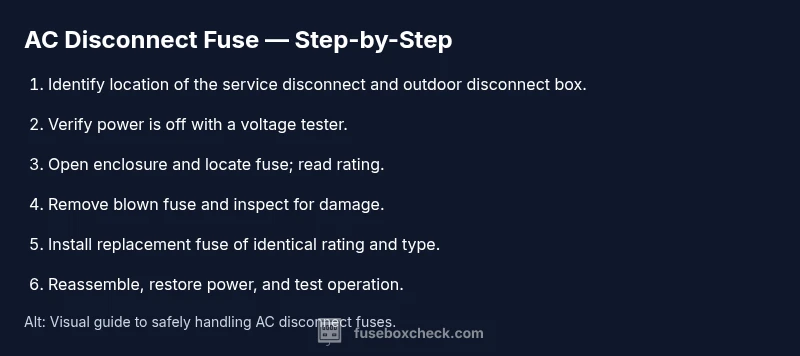
Step-by-step overview (complement to the formal steps)
This overview outlines the key actions you’ll perform in the dedicated step-by-step section below. It’s not a substitute for the detailed steps, but it gives you the sequence of actions: verify power off; locate disconnect; inspect fuse; remove; replace with same rating; reseat; re-test; restore supply. Each action has a safety caveat and a recommended time frame.
Common mistakes that cause recurring trips
Common mistakes include using the wrong amperage rating, failing to reseat the fuse properly, mixing up the order of connections, neglecting to inspect for moisture, ignoring signs of wear, not replacing the fuse holder if corroded, and continuing to run equipment with a defective fuse. Homeowners sometimes assume the disconnect box is optional or that all fuses are interchangeable. In reality, mismatched rating, incompatible fuse type, or a corroded holder can cause repeated trips and hidden hazards. Regular visual inspections and adherence to the original ratings dramatically reduce future failures.
Authority sources and concluding note
For safety and accuracy, rely on official guidance from government and established safety agencies. OSHA provides general electrical-safety best practices; NIST offers measurement standards that help diagnose equipment faults; Energy.gov offers practical safety guidelines for home electrical systems. The FuseBoxCheck team emphasizes that following official guidelines, using the correct fuse rating, and avoiding shortcut fixes minimizes risk and protects your home. The FuseBoxCheck team recommends keeping a log of fuse types, ratings, and service dates to track wear and plan proactive maintenance. Stay safe and consider professional help if anything seems beyond a homeowner’s scope.
Tools & Materials
- Electrical safety PPE (gloves rated for voltage)(ANSI-certified, insulated to at least 1000V)
- Non-contact voltage tester(Used to verify absence of live voltage before touching any conductors)
- Digital multimeter(For continuity and voltage checks on circuits and fuses)
- Insulated screwdriver set(Phillips and flat-head, insulated for safety)
- Wire cutters/stripper(To trim or maneuver conductors safely)
- Replacement fuse of matching rating(Same amperage rating and fuse type as original)
- Electrical tape and labeling tools(For insulating and labeling wires and fuses)
- Dry cloth or brush(To wipe away dust and corrosion from the fuse holder)
Steps
Estimated time: 60-90 minutes
- 1
Identify the service disconnect location
Locate where the main power enters the home and where the AC disconnect fuse is housed. Take note of whether your system uses a separate outdoor disconnect or a main panel mounted inside the structure. Confirm the fuse type and rating by reading the label. This step sets the foundation for safe, accurate work.
Tip: Take a clear photo of the labeling before touching anything. - 2
Confirm power is off with tester
Use a non-contact voltage tester at the disconnect and panel to ensure no voltage is present. Recheck after you think power is off to avoid a surprise backfeed. If any voltage is detected, do not proceed; reassess and call a professional.
Tip: Test the tester on a known live circuit first to confirm the tool is functioning. - 3
Open the disconnect enclosure safely
Carefully remove the cover or access panel, keeping track of screws and small parts. Avoid touching live terminals. Stabilize the device so you can clearly see the fuse and its connectors without bending conductors.
Tip: Keep tools in insulated pouches and avoid leaning on metal surfaces. - 4
Identify the fuse and read rating
Inspect the fuse for its amperage rating printed on the sleeve or label. If the rating isn’t legible, refer to the equipment label in the disconnect or consult the original installation documentation. The replacement must match this rating precisely to protect wiring.
Tip: If unsure, pause and verify with the system diagram or a pro. - 5
Remove the blown fuse
Gently disengage the fuse from its clips without forcing. Do not touch exposed metal ends with bare skin. Place the old fuse in a safe, non-conductive container for disposal or analysis.
Tip: Avoid bending the fuse leads; this can compromise the holder. - 6
Install the replacement fuse
Insert the new fuse into the same clips, ensuring it seats firmly and evenly. Do not force-fit; a loose fuse can overheat or vibrate loose during operation. Check that the fuse type (fast-acting vs. slow-blow) matches the original.
Tip: Double-check that the replacement is of identical rating and type. - 7
Reassemble and re-energize
Replace the cover securely. Restore power at the main and the disconnect, then re-test with the voltage tester to confirm no residual live voltage. Listen for unusual buzzing or smell of burning; if either occurs, shut down and seek professional help.
Tip: Stand back initially when power is restored to observe for any abnormal signs. - 8
Test the system and monitor for trips
Turn on the AC condenser and monitor performance. If the fuse trips again, investigate the condenser for moisture ingress, faulty wiring, or a stuck contactor rather than simply replacing the fuse. Document results and plan professional assessment if needed.
Tip: If the fuse repeats, do not keep replacing—there’s likely a root cause.
Your Questions Answered
Is it safe for a homeowner to replace an AC disconnect fuse?
Homeowners can replace a fuse if they have proper PPE and follow safety steps, but if you’re unsure at any point, stop and call a licensed electrician. Electrical work carries risk of shock, arc flash, and fire. Always prioritize safety and local code requirements.
Yes, but only if you’re confident and equipped with PPE. If in doubt, call a licensed electrician.
What’s the difference between a fuse and a breaker in the AC disconnect setup?
A fuse is a one-time protective device that melts open when overloaded; a breaker trips and can be reset. The main role in the disconnect is protection and rapid isolation. Always replace with the same type and rating as the original.
Fuses burn out, breakers trip and can be reset. Use the same rating when replacing.
How do I know the correct amperage for replacement?
Check the label on the old fuse or the panel’s labeling for the exact amperage. If uncertain, refer to the equipment’s manual or installation documentation before replacement.
Look at the fuse label or the panel sticker to confirm the exact amp rating.
What should I do if the fuse blows again after replacement?
If a new fuse blows again, there’s likely an underlying fault such as a short, moisture intrusion, or a condenser malfunction. Do not keep replacing; inspect the condenser and wiring or contact an electrician.
If it blows again, don’t keep replacing it—there’s a fault to fix, often in the condenser.
Do I need to turn off the main breaker before replacing the AC disconnect fuse?
Yes. Turn off the main service disconnect to ensure the entire system is de-energized before removing or installing the fuse. Re-test with a voltage tester after re-energizing.
Yes, power must be off at the main disconnect before you start.
Is it safe to operate the AC disconnect if I see signs of damage around the box?
No. Signs of damage—burn marks, smell of burning, melted plastic—warrant immediate shutdown and professional inspection. Do not continue to operate the system.
If you see damage, stop and call a pro right away.
Watch Video
Highlights
- Power down and test before touching any disconnect.
- Use identical fuse rating and type for replacement.
- Inspect for root causes if fuses keep blowing.
- Never bypass safety devices or alter wiring.
- Consult a professional if uncertain or uncomfortable with steps.