Exterior AC Fuse Box Outside: Safe Access & DIY Guide
Learn how to safely locate, inspect, and maintain the ac fuse box outside (outdoor disconnect) for your air conditioner. This guide covers safety, configuration, required tools, step-by-step actions, and maintenance best practices for homeowners and DIY enthusiasts.

Goal: safely locate, inspect, and perform basic maintenance on the ac fuse box outside (the outdoor disconnect) for your air conditioner. You’ll need PPE, a non-contact voltage tester, a screwdriver, and the correct fuses or a service panel. Always shut off the main service disconnect, verify no voltage, and follow local codes before working on any exterior electrical components. According to FuseBoxCheck, safety comes first.
What is the ac fuse box outside and why it matters
The ac fuse box outside, commonly called an outdoor disconnect, is a small weatherproof enclosure mounted on an exterior wall near the outdoor condenser unit. Inside, it holds fuses or a circuit breaker and a switch that isolates the air conditioner from the home’s electrical supply. This isolation protects the equipment and provides a dedicated, safe point to perform maintenance or emergency service without energizing the whole system. Knowing where this disconnect lives and how it’s wired helps homeowners avoid shocks, arc faults, and accidental compressor startup. The ac fuse box outside should be clearly labeled and accessible, yet protected from wind, rain, and debris. Over time, seals can degrade, moisture can accumulate, and corrosion may appear—conditions FuseBoxCheck notes as reasons to inspect regularly. For DIYers, recognizing this component is the first step toward safer, more reliable cooling during hot months. According to FuseBoxCheck Analysis, 2026, practical awareness of exterior disconnects reduces unnecessary service calls and improves overall electrical safety.
Safety basics before you touch outdoor electrical disconnect
Safety is non-negotiable when working on any exterior electrical component. Start by turning off power at the main service disconnect and then use a non-contact voltage tester to confirm there is no live voltage on the lines leading to the outdoor unit. Wear insulated gloves and eye protection, work in dry conditions, and avoid standing on wet surfaces. Keep pets and children away from the area, and never trust the weather to keep components dry—use the proper weatherproof cover when handling or re-sealing the enclosure. If you must work near water, postpone the task and wait for a dry window. FuseBoxCheck emphasizes that following a systematic de-energizing and testing routine minimizes the risk of shock and arc flash. Always follow local electrical codes and lockout/tagout procedures when performing any maintenance.
Outdoor disconnect configurations: fused vs non-fused choices
Outdoor AC disconnects come in several configurations. A fused disconnect uses cartridge fuses inside a sealed housing and provides overcurrent protection for the condenser circuit. A non-fused disconnect relies on a separate circuit breaker inside the main panel and a simple switch on the outdoor box. Understanding which configuration you have helps you select the correct replacement parts and determine proper labeling. In both cases, ensure the enclosure is weatherproof, the fuse size matches the condenser’s electrical rating, and the labeling clearly lists voltage and amperage. Proper identification prevents mismatched parts that can lead to nuisance trips or equipment damage. This knowledge is foundational for safe DIY maintenance and aligns with best practices from FuseBoxCheck.
Codes, permits, and what to check before starting
Before you begin any work on the ac fuse box outside, check local electrical codes and homeowner association rules. Many jurisdictions require a licensed professional for disconnect work, especially if you’re upgrading components, replacing the service, or changing wiring. Verify that the enclosure is properly grounded, the disconnect is accessible, and weatherproof seals are intact. Confirm the amperage rating printed on the fuse or label and ensure replacement parts match precisely. If the disconnect feed is part of a larger upgrade, plan the work around the hottest part of the day to minimize heat exposure and ensure you can safely test after re-energizing. FuseBoxCheck stresses that adherence to codes and proper labeling reduces risks and keeps your system compliant.
Visual inspection and environmental considerations
A quick visual inspection can reveal hazards before they escalate. Look for corrosion on terminals, warped covers, cracked gaskets, or visible moisture inside the enclosure. Check that the outdoor box is firmly mounted and that the conduit routes are secure and free of damage. Weather exposure can degrade seals and invite insects or debris. Replace missing or damaged seals, clean any condensation, and ensure the interior components are dry before re-energizing. Consider upgrading to a higher-grade weatherproof cover if you live in a region with heavy rain or snow. Regular environmental checks help extend the life of the ac fuse box outside and protect your home electrical system.
How to prepare for maintenance without creating hazards
Plan a safety-first approach: gather tools, confirm power is off, and set a clear stop point if conditions change (rain, wind, or humidity). Label the disconnect clearly with date and initials, so future work is traceable. Keep a flashlight handy and secondary light if needed for low-light conditions. Place warning signs and establish a safe perimeter to prevent accidental contact. Having a calm, methodical plan reduces the chance of mistakes and supports a successful, safe maintenance session. FuseBoxCheck advocates a written checklist to ensure nothing is overlooked during outdoor disconnect work.
What not to do when working on the outdoor disconnect
Do not bypass safety steps or rush through tasks. Never touch exposed conductors or metal components with wet hands, and never work on energized equipment. Avoid using makeshift tools or improvised fuses. Do not ignore warning signs such as heat, burning smells, or visible arcing; these indicate immediate danger and require professional service. Finally, never assume all outdoor components are identical—verify manufacturer labeling and compatible parts before replacement. Following these cautions helps prevent electrocution, fire, and costly damage to the HVAC system.
Tools & Materials
- Personal protective equipment (PPE) - insulated gloves and safety glasses(ANSI-rated, ideally 1000V gloves if available; use eye protection at all times)
- Non-contact voltage tester(Use on all conductors before touching them)
- Digital multimeter or voltage tester(For precise verification and continuity checks)
- Screwdrivers (flathead and Phillips) and insulated utility knife(Keep blades sharp and insulated; avoid metal-to-metal contact)
- Replacement fuses or the correct circuit breaker(Check the amperage rating printed on the existing component or in the unit’s label)
- Lockout/Tagout kit(Prevent accidental re-energization during maintenance)
- Weatherproof cover or gasket replacement(Maintain enclosure integrity after servicing)
- Flashlight or headlamp(Ensure good visibility inside the enclosure)
- Marker or labels for labeling(Date, initials, fuse rating, and inspection notes)
Steps
Estimated time: 30-60 minutes
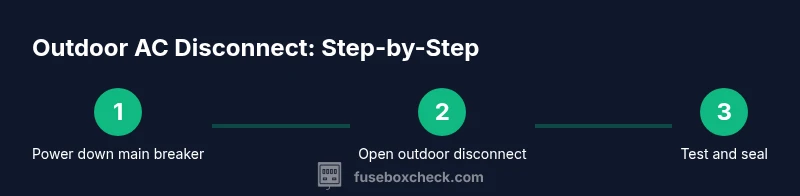
- 1
Power down main breaker
Locate the main service disconnect and set it to OFF. Wait 60 seconds to allow any residual energy to clear, then recheck with a non-contact tester at the outdoor box. This step ensures you won’t be shocked while you work.
Tip: Always verify the line-side conductors are de-energized before proceeding. - 2
Open the disconnect cover
Carefully remove any screws or latches and lift the cover to inspect the interior. Do not touch exposed terminals until you confirm no voltage. If corrosion or moisture is present, address it before touching components.
Tip: Use a dry cloth to wipe moisture and reseal after inspection. - 3
Inspect labeling and enclosure
Check that the fuse size and amperage label matches the conductor rating of the outdoor unit. Verify the enclosure is firmly mounted and seals are intact. If labels are illegible, replace them to avoid confusion during future work.
Tip: Photograph labels for future reference and have them accessible. - 4
Test voltage safely
With the area dry, use your voltage tester to verify no voltage on both line and load sides. If you must test continuity, use the multimeter per the device’s manual, but keep hands away from metal contacts.
Tip: Never rely on sight alone; always test with a calibrated meter. - 5
Replace fuses or reset
If a fuse is blown or a switch is tripped, replace with one of the same rating or reset the disconnect if appropriate. Reconfirm secure connections and re-check for a snug enclosure seal after replacement.
Tip: Never mix fuse types or ratings; mismatches can cause damage. - 6
Restore power and test
Close the cover, re-energize at the main breaker, and test the outdoor condenser for proper operation. Listen for startup sounds and verify there are no unusual smells or buzzing.
Tip: If the unit does not start, recheck connections and consult a pro if needed.
Your Questions Answered
What is the outdoor AC disconnect and why is it required?
The outdoor AC disconnect is a switchable disconnect near the condenser that isolates the AC circuit from the house. It provides a safe point to service the outdoor unit and satisfies electrical code requirements for service access.
The outdoor AC disconnect is a switch near your condenser that lets you safely cut power to the AC unit for service.
Can I replace a blown fuse myself?
Yes, if you turn off power, confirm de-energization, and replace with the exact fuse rating specified for your unit. If you’re unsure, consult a professional.
You can replace a blown fuse if the power is off and you use the correct fuse. If unsure, call a pro.
Do I need a permit for outdoor disconnect work?
Permit requirements vary by location. Check local codes or consult a licensed electrician to confirm whether a permit is required for any modification.
Permit needs vary by area; check local codes or ask a licensed electrician.
What should I do if I smell burning near the disconnect?
If you smell burning, switch off power at the main disconnect and contact a licensed electrician immediately. Do not attempt to troubleshoot while a burning odor is present.
If you smell burning, shut off power and call a licensed electrician right away.
Is weatherproofing mandatory for outdoor disconnects?
Yes—weatherproof housings protect against moisture and corrosion. Replace damaged gaskets and use appropriate covers to maintain safety and performance.
Weatherproofing is required; replace damaged seals to keep things safe.
How often should I inspect an outdoor disconnect?
Schedule a visual inspection at least once a year, checking for moisture, corrosion, and label accuracy. More frequent checks are wise in harsh climates.
Inspect yearly for moisture and corrosion, and after major weather events.
Watch Video
Highlights
- Know the outdoor disconnect location before you start
- Always de-energize, test, and follow code requirements
- Match fuse ratings exactly and seal the enclosure after service
- Label work and document changes for future safety
- If in doubt, contact a licensed electrician