Fuse Box Outside House: A Homeowner’s Safety Guide
Practical, step-by-step guidance for locating and safely maintaining the fuse box outside house. Learn weatherproofing, labeling, safe handling, and when to call a licensed electrician to protect your home.

By the end of this guide you will safely locate, inspect, and maintain the fuse box outside house. You'll learn essential safety checks, how to recognize weatherproofing issues, and when to contact a licensed electrician. This step-by-step approach follows best practices from FuseBoxCheck to prevent shocks, moisture damage, and electrical fires.
Understanding why the fuse box outside house matters
The fuse box outside house is a critical safety control point for your home's electrical system. Exposure to moisture, temperature swings, or physical damage can degrade the enclosure and the connections inside, increasing the risk of shocks or fires. According to FuseBoxCheck, outdoor locations demand weatherproofing, proper clearance, and regular visual checks to stay safe. Identifying where your fuse box sits helps you plan maintenance and avoid accidental contact with live parts.
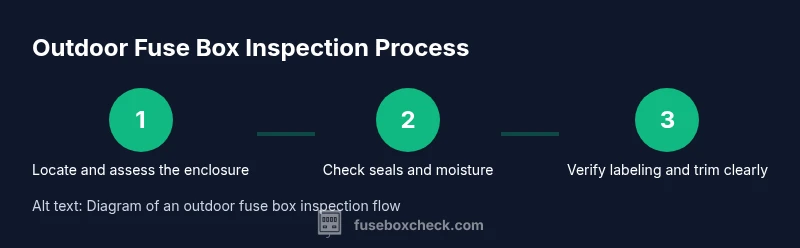
Outdoor fuse box configurations and access points
Outdoor panels can vary by design: some house a main disconnect alongside branch fuses, others use a weatherproof breaker box. Recognizing the configuration helps you understand what you can safely do yourself and when to call a pro. The fuse box outside house should have a clearly labeled door, readable circuit directory, and a weatherproof gasket; keep the area clear of debris that could obstruct access.
Safety first: prerequisites before you touch anything
Before touching any outdoor component, power off at the main disconnect if accessible and safe to do so. Stand on dry ground and wear insulated gloves and eye protection. Use a non-contact voltage tester to confirm no live voltage on exterior components before opening the enclosure. Remove jewelry and keep metal tools away from exposed terminals. The moment you sense moisture or corrosion, step back and reassess.
Practical inspection and documentation for the outdoor fuse box
Perform a careful visual inspection of the outdoor fuse box and its environment. Check for signs of moisture intrusion, rust on metal parts, cracks in the enclosure, and loose screws. Confirm the weatherproof rating matches your climate and verify the door seal is intact. Document the model, directory labels, and any signs of wear for future reference.
Weatherproofing, labeling, and routine maintenance
Weatherproofing is more than a seal. Check gaskets, door alignment, and the enclosure’s mounting hardware for tightness and corrosion. Update the circuit directory with clear, durable labels and verify that all labels correspond to the actual breakers. Schedule regular checks, especially after storms or long dry spells that can affect seals and connections.
When to call a licensed electrician and what to expect
If you find signs of burning, melted insulation, severe corrosion, or if you are unsure about any step, contact a licensed electrician. A pro will verify service grounding, test for continuity, replace damaged components, and ensure a weatherproof enclosure meets local codes. The FuseBoxCheck team recommends professional input for any major work or replacement.
Authority sources and further reading
For safety standards and best practices beyond this guide, consult authoritative resources such as OSHA, NFPA, and CPSC. These sites provide guidance on electrical safety, panel maintenance, and consumer protections that help homeowners manage outdoor electrical components responsibly.
Tools & Materials
- Insulated work gloves(Electrical-rated, ASTM/EN standards)
- Safety goggles(Eye protection)
- Non-contact voltage tester(To verify power is off)
- Insulated screwdriver set(Phillips and flat-head)
- Multimeter(For voltage and continuity checks)
- Flashlight or headlamp(Isolated area lighting)
- Weatherproof sealant / gasket(If resealing enclosure)
- Label maker or waterproof labels(Directory updates)
Steps
Estimated time: 60-90 minutes
- 1
Prepare safety gear
Put on insulated gloves and safety glasses. Ensure you are standing on dry ground and wearing dry clothing. Confirm there is a clear path to the panel and that you have adequate lighting before starting.
Tip: Double-check your footing and avoid standing in damp areas. - 2
Identify the fuse box location
Locate the exterior panel and confirm it is indeed the fuse box outside house. Check for a door label or directory inside the enclosure. Take a photo for reference to avoid confusion later.
Tip: If you cannot locate a directory, plan to label circuits as you inspect. - 3
Check weatherproofing and enclosure integrity
Inspect the door seal, gasket condition, and enclosure for cracks or corrosion. Ensure mounting screws are tight and the weatherproof rating remains intact for your climate.
Tip: Replace damaged seals promptly to prevent moisture ingress. - 4
Open the enclosure carefully
Open the door slowly to avoid pinching wiring or disturbing any loose components. Visually inspect for signs of moisture, rust, or loose connections near terminals.
Tip: Do not pry around live terminals; keep hands and tools away from exposed conductors. - 5
Inspect for moisture and corrosion
Look for water droplets, condensation, or rust on bus bars and screws. Any trace of corrosion should be noted and addressed by sealing or replacing affected parts.
Tip: If you see corrosion, plan professional service to avoid risk. - 6
Verify the main disconnect and labeling
Check that the main disconnect matches the directory, and that each breaker or fuse aligns with its label. Update the directory if inconsistencies are found.
Tip: Keep a current, waterproof directory inside the door for quick reference. - 7
Test power and safety measures
If safe and you know what you are doing, use a non-contact tester to confirm no live currents near exposed parts before touching anything. Do not touch live parts with metal tools.
Tip: Never rely on memory; test before every interaction with the enclosure. - 8
Document findings and update labels
Record any observed issues, replacement needs, or date of inspection. Update the labels to reflect actual circuit mappings and create a simple schematic if possible.
Tip: Keep a copy of the notes with the panel and online as a backup. - 9
Close and secure the enclosure
Lower the door carefully, reseal if needed, and ensure the latch is fully closed. Verify clearance around the box remains unobstructed.
Tip: Test the door’s weatherseal and adjust if you hear moisture intrusion. - 10
Plan the next inspection
Set a reminder for the next routine check, especially after storms or severe weather. Keep documentation up-to-date for quick future reference.
Tip: Create a standard checklist to streamline future inspections.
Your Questions Answered
Is it safe to touch an outdoor fuse box?
Only if the power is off and the enclosure is intact. Do not touch live terminals or damaged components. If in doubt, stop and contact a licensed electrician.
Touch only if the power is off and the enclosure is undamaged; otherwise call a professional.
What should I do if I smell burning near the fuse box?
If you notice a burning odor, step back, avoid water, and shut off power at the main disconnect if you can do so safely. Call emergency services if the smell persists or worsens.
If you smell burning, back away and shut off power if safe, then call a professional.
How can I identify which fuse controls which circuit?
Check the directory label inside the door and compare each entry to its corresponding breaker or fuse position. Update the directory if there are mismatches.
Look at the door label and map it to the breakers; keep it updated.
Do I need a permit to inspect or replace an outdoor fuse box?
Permit requirements vary by locality. Most outdoor panel work should be performed by a licensed electrician to ensure code compliance.
Local rules vary; a licensed electrician can confirm permit needs.
How often should I inspect an outdoor fuse box?
Plan an annual visual check, plus post-storm inspections if severe weather occurs. Look for moisture, corrosion, and label accuracy each time.
Check it once a year and after big storms.
Can I waterproof the fuse box myself?
Waterproofing can be risky if not done correctly. Use manufacturer-recommended weatherproofing and seals; for any sealing or replacement, hire a professional.
Waterproofing is doable if you follow the proper steps; otherwise call a pro.
Watch Video
Highlights
- Identify the fuse box outside house and maintain access.
- Prioritize weatherproofing and proper labeling.
- Power down and test safety before interacting with components.
- Consult a licensed electrician for replacement or major repairs.