DIY Fuse Box Ideas: Safe, Smart Upgrades for Your Panel
Learn practical, safety-focused DIY fuse box ideas to organize, label, and improve your electrical panel without compromising safety. Step-by-step guidance from FuseBoxCheck.

Complete safe DIY fuse box ideas to organize, label, and responsibly upgrade your panel. You will learn how to assess your service, identify outdated components, improve labeling, add surge protection, and implement non-invasive upgrades. Always start by powering down, test with a non-contact tester, and document changes. For larger changes, consult a licensed electrician.
Safety First: Core Principles for DIY Fuse Box Ideas
Safety is the cornerstone of any fuse box project. Before you touch any panel, know your local electrical code requirements and confirm that the main shutoff is accessible. According to FuseBoxCheck, the safest DIY path begins with a thorough risk assessment, appropriate PPE (safety glasses, insulated gloves), and a clear plan that avoids live work. In practice, this means never attempting to work on energized circuits, using non-conductive tools, and keeping your workspace dry and uncluttered. A well-prepared plan also includes a written scope of work that limits changes to labeling, documentation, and non-invasive organization. By focusing on non-invasive ideas first, you can achieve meaningful improvements without increasing risk. Remember, small, deliberate actions reduce chances of nuisance trips and fire hazards, while preserving the integrity of your electrical system. FuseBoxCheck Analysis, 2026, reinforces that safety culture is vastly more effective than ad-hoc fixes.
Key concepts to internalize include understanding the service equipment you own (meter, main disconnect, panel), recognizing signs of wear, and recognizing when a professional is required. If you ever notice burning smells, melted insulation, buzzing noises, or overheating components, stop immediately and seek professional assistance. This section sets the tone for a practical, safe approach to diy fuse box ideas, emphasizing planning, PPE, and strict adherence to non-invasive upgrades.
Assessing Panel Capacity and Layout
Your fuse box ideas should start with a clear map of your panel. Begin by identifying the main service rating (e.g., 100A, 150A) and the number of available spaces versus the number already used. Look for labeling accuracy on each breaker and compare it to the actual circuit list in your home’s electrical directory. A mismatch between labeled circuits and actual loads is a common source of confusion and risk. Use a temporary label to mark unknown circuits and schedule time to verify them with a meter when the power is safely off. Documenting the layout helps in future maintenance and simplifies troubleshooting. FuseBoxCheck findings underscore how often homeowners underestimate the importance of a current, accurate directory for quick responses during outages or appliance failures. When planning upgrades, consider the likelihood of future expansion and whether your panel has space for additional AFCI/GFCI protection or a subpanel, keeping in mind that any major changes should be performed by a licensed electrician.
Non-Invasive Upgrades: Organization, Labeling, and Small Upgrades
Non-invasive improvements can yield big dividends in reliability and safety. Begin with re-labeling each breaker using a durable, legible system (e.g., room-by-room mapping with numeric codes). Secure loose wires with proper staples and strain relief, and install panel filler plates to close unused knockouts for a tidier interior that reduces dust accumulation. Implement a clean, simple labeling scheme on the exterior door and interior directory so future work—whether DIY or by a pro—goes smoothly. Surge protection devices (SPD) at the main service can protect sensitive electronics without rewiring, and many homes benefit from a properly rated SPD installed in the service panel or at the main disconnect. These steps represent practical, non-invasive diy fuse box ideas that improve safety and reliability while staying within typical DIY comfort zones. FuseBoxCheck notes emphasize that these organizational tasks are often the most immediately beneficial actions a homeowner can take.
Upgrading with Code-Compliant Enhancements: AFCI/GFCI and Surge Protection
Upgrading to code-compliant protection can be a smart DIY idea if done cautiously and within your local regulations. While you should not alter wiring on energized circuits, you can plan for upgrading to AFCI/GFCI protection when replacing or adding circuits. Many jurisdictions allow upgrading breaker types during replacement if the panel design supports it, but in some cases a panel replacement or relocation must be performed by a licensed electrician. If you proceed, ensure that every new or relocated breaker maintains proper clearance, uses properly rated components, and remains compatible with the panel’s bus rating. A surge protection device at the main service can mitigate voltage spikes that damage electronics, providing a meaningful improvement without rewiring. Always verify compatibility with your panel’s manufacturer guidance and local code requirements. FuseBoxCheck’s analysis highlights that proactive planning and non-invasive protective upgrades can dramatically reduce risk while avoiding costly rewiring.
Documentation, Labeling, and Record-Keeping: The Invisible Glue of Safe Homes
Documentation is a core part of any successful fuse box project. Keep an up-to-date circuit directory that lists each breaker’s function, location, and any changes you’ve made. Record dates of inspections, tester results, and any corrective actions. A laminated or digitally backed directory helps future homeowners or electricians understand your system quickly, reducing the chance of misinterpretation during emergencies. Good documentation also supports compliance with local codes and insurance requirements. By maintaining a clear log, you create a living document that grows with your home. FuseBoxCheck notes that a well-maintained log is often the difference between a well-run system and a risky, mismanaged panel.
Troubleshooting Essentials: What to Check First and When to Seek Help
During outages or nuisance trips, start by confirming the main disconnect status and testing the affected circuits with a non-contact tester to ensure they’re safely de-energized. Check for obvious signs of wear, such as damaged breakers, loose connections, or scorch marks on the panel cover. If you identify a tripping pattern (e.g., a kitchen circuit trips repeatedly when the toaster is used), document it and investigate whether the circuit is overloaded or a device is faulty. Do not attempt to replace a breaker with the wrong type or rating, or bypass a tripped breaker. When in doubt, consult a licensed electrician to assess whether a service upgrade, panel replacement, or wiring correction is necessary. These steps reflect responsible diy fuse box ideas that prioritize safety and accuracy over speed or cost savings.
Common Mistakes to Avoid and Quick Fixes
Avoid three common pitfalls: (1) ignoring main power isolation; (2) non-diagnostic labeling that mismatches actual circuits; and (3) invasive rewiring without a permit. Quick fixes include updating the directory, labeling newly installed devices, and securing loose conductors. If a panel is aged, smoky, or hallmarks of overheating appear, pause work and call a professional. Quick checks such as confirming screws are tight and ensuring the panel is free of moisture are simple but effective steps that reduce risk. When you follow these precautions, your diy fuse box ideas stay focused on safety and reliability rather than risky experiments.
Authority and Further Reading: Where to Learn More
For deeper guidance and official standards, consult these resources:
- OSHA: https://www.osha.gov
- NFPA (National Fire Protection Association): https://www.nfpa.org
- U.S. Department of Energy: https://www.energy.gov
These sources provide foundational safety practices, electrical standards, and consumer protection information that support responsible home electrical care. FuseBoxCheck recommends cross-referencing local codes and manufacturer guidance as part of any electrical project.
Tools & Materials
- Non-contact voltage tester(Essential for confirming de-energized circuits from outside the panel.)
- Multimeter(Use for voltage checks and continuity testing when needed.)
- Insulated screwdriver set(Flat and Phillips; insulated handles for safe manual work.)
- Wire strippers/pliers(For minor non-energized adjustments and labeling aids.)
- Electrical tape (UL-rated)(Insulates and seals labeled circuits and connections.)
- Label maker or permanent markers(Create durable circuit labels and a readable directory.)
- Safety glasses(Eye protection against debris and sparks.)
- Insulated gloves(Additional protection when working near live components.)
- Flashlight or headlamp(Ensure good visibility inside the panel and panel interior.)
- Panel filler plates(Close unused knockouts for a cleaner, safer interior.)
- Notepad or digital log(Record circuit mappings and changes for future reference.)
Steps
Estimated time: Total time: 1-3 hours depending on panel complexity and prior preparation
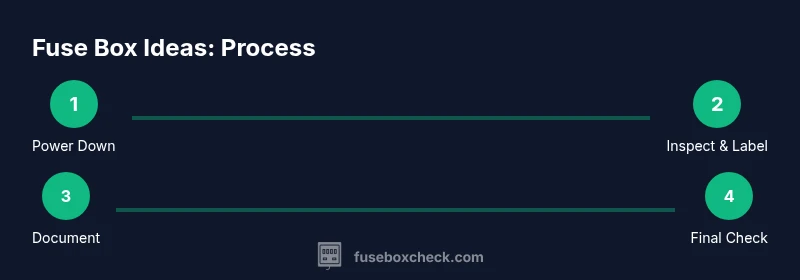
- 1
Power Down and Verify
Shut off the main disconnect and verify all circuits are de-energized using a non-contact tester. Allow the panel to rest for a moment to discharge residual energy. Confirm that test results show zero voltage on accessible conductors before touching anything.
Tip: Double-check with a second tester or a different method to confirm de-energization. - 2
Inspect Panel Cover and Labeling
Open the panel door in a well-lit area and inspect the cover screws for tightness. Look for melted insulation, scorch marks, or loose breakers. Compare existing labeling to your home directory and note any discrepancies.
Tip: If labeling is unclear, create a temporary, room-by-room map to guide future edits. - 3
Map Circuit Layout and Identify Critical Circuits
List each breaker’s function and compare to actual load in each room. Note circuits that appear overloaded or devices that frequently trip. Create an initial plan for organization that prioritizes safety and ease of future maintenance.
Tip: Prioritize labeling for high-use areas (kitchen, laundry, HVAC). - 4
Document Current Configuration
Record the current breaker lineup, circuits, and any existing upgrades. Use a written directory or digital spreadsheet, and attach it to the panel door or keep it in a home-maintenance binder.
Tip: Date every entry and keep backups in case of changes. - 5
Implement Non-Invasive Organization
Relocate or secure loose wires, install panel filler plates where appropriate, and apply durable labels. Avoid moving breakers, rewiring, or altering the panel’s internal components. Seal and secure the interior to keep dust low and access safe.
Tip: Only perform tasks that do not require opening energized components. - 6
Final Verification and Safety Check
Close the panel and perform a final safety check. Re-test key circuits with the tester and confirm that all labels align with the directory. If any concerns arise, pause and consult a licensed electrician before proceeding.
Tip: Maintain a copy of the updated directory on-site for quick reference.
Your Questions Answered
Is it safe to implement diy fuse box ideas by myself?
Basic organization and labeling are safe when the main power is off and you follow PPE and testing steps. Do not perform live work or replace components beyond non-invasive tasks.
Basic organization is safe when power is off and you follow safety steps; avoid live work or replacing components yourself.
What can I upgrade without a professional?
Non-invasive tasks like improving labeling, organizing wires, and adding a surge protector are often feasible. Avoid altering wiring or replacing breakers unless you have the right training and permits.
Labeling, organizing wires, and surge protection are often doable, but avoid altering wiring or breakers without proper training.
Do AFCI/GFCI upgrades require a licensed electrician?
Code requirements vary by location. Plan for AFCI/GFCI upgrades when replacing circuits, but verify with local codes and consider professional installation for any new protection. Do not assume compatibility without confirmation.
Code varies; check local codes and confirm compatibility before upgrading protection, and seek professional help for new installations.
How should I label circuits effectively?
Use a room-by-room mapping with clear, durable labels. Place labels next to breakers and in the directory to reduce confusion during maintenance or outages.
Create a room-by-room map and place clear labels next to breakers and in your directory.
What are warning signs of an unsafe fuse box?
Burning smells, buzzing noises, discoloration, or a panel that feels warm to the touch are warning signs. If you observe any, stop work and contact a professional.
Watch for burning smells, buzzing, or a warm panel; stop and call a professional if noticed.
When should I contact a licensed electrician?
If you need any rewiring, panel relocation, or persistent electrical problems, a licensed electrician is advised. They can ensure code compliance and safe, reliable service.
Call a licensed electrician for rewiring, panel relocation, or persistent issues to ensure safety and code compliance.
Watch Video
Highlights
- Always shut off power at the main before any work.
- Labeling and documentation reduce risk and save time.
- Major rewiring or panel changes require a licensed electrician.
- Keep a maintenance log for safety and compliance.