Fuel Box Safety: Practical DIY Home Wiring Guide
Learn how to safely inspect and maintain your fuel box (fuse box) with practical, step-by-step instructions, safety tips, and maintenance habits for homeowners and DIY enthusiasts.

This guide helps homeowners safely inspect a fuse box, sometimes called a fuel box, identify overloaded circuits, and perform basic tests to confirm power status. It emphasizes practical, safety-first steps for DIY enthusiasts while setting clear boundaries about when to call a licensed professional. According to FuseBoxCheck, proper handling of a fuel box reduces risk and protects your home’s wiring.
Understanding the fuel box: what it does and why it matters
The term fuel box is sometimes used informally to describe a home fuse box or distribution panel. In reality, a fuel box houses fuses or circuit breakers that control each branch circuit in your house. Its role is to protect wiring from overheating by interrupting current when a fault occurs or when a circuit is overloaded. A properly functioning fuel box is essential for electrical safety and reliable power. Homeowners should understand that the fuel box is the nerve center of the electrical system, and concerns like burning smells, buzzing noises, or frequent trips warrant careful attention.
Safety first: essential precautions before any inspection
Safety should be your primary concern when working near a fuel box. Always assume the panel is live until proven otherwise. Wear protective eyewear and insulated gloves, keep a clear space around the panel, and use only insulated tools. Do not work on the fuel box in damp conditions or with wet hands. If you notice scorching, melted insulation, or signs of moisture, evacuate and call a licensed electrician. According to FuseBoxCheck, many DIY attempts overlook basic safety steps, increasing the risk of shock or fire when dealing with a fuel box.
Tools and materials you'll need for a safe inspection of a fuel box
Before you begin, assemble a few essential tools. A non-contact voltage tester helps confirm power status without direct contact with live parts. An insulated screwdriver set, a digital multimeter for measurements, and a flashlight for visibility are all important. Have marking tape or a label maker to clearly identify circuits. A pair of safety goggles and insulating gloves add protection. Keep a fire extinguisher rated for electrical fires within reach, and ensure you have a waste basket or container for any removed fuses. These items reduce risk when working near a fuel box.
Step-by-step: preparing your workspace and gaining access
- Clear the area around the fuel box and ensure pets and kids are away. 2. Identify the main disconnect and plan to shut off power. 3. Test the panel exterior to confirm no voltage on exposed metal parts using a non-contact tester. 4. Remove the panel cover with the appropriate screwdriver, keeping it stored safely to avoid misplacement. 5. Take a quick photo of the labeling for reference before you start inspecting the circuits. A well-lit, organized workspace makes the fuel box task much safer.
Step-by-step: opening the panel and identifying circuits
Carefully remove the panel cover. Note how each circuit is labeled. If labels are faded, use temporary labels and reference photos you took earlier. Group circuits logically: lighting, outlets, appliances, and HVAC. Check for signs of wear on the insulation, scorch marks, or melted plastic. If anything looks unusual, stop and reassess. Use the label tape to ensure future work remains organized. The goal is to map out the fuel box layout so you can quickly locate affected circuits if a problem occurs.
How to test a fuse box safely: basic checks
With power confirmed off, test any suspect circuits using a non-contact tester around the panel edges to verify there is no live voltage. Use a multimeter to measure continuity across fuses or breakers where applicable. If you see a burnt smell or visible damage, do not replace components yourself; instead, label the circuit as hazardous and call a professional. After performing these checks, re-test the panel exterior to ensure there is no unintended contact with live parts. This stage helps ensure your fuel box is safe before any reseating or replacement work.
Common issues and troubleshooting for a fuel box
Overloads are the most common cause of trips. If a circuit keeps tripping, distribute loads more evenly across circuits or consider upgrading the panel if the service capacity is insufficient. A buzzing or ticking sound from the fuel box can indicate a loose connection—this is a red flag that should be addressed by a qualified electrician. A burnt odor is a serious warning sign that requires immediate action. In many cases, the fix involves tightening connections or replacing a faulty breaker, never a DIY repair on live components within the fuel box.
When to call a professional vs DIY: setting clear boundaries
DIY safety is about understanding limits. For simple tasks like labeling circuits, tightening loose screws with the power off, or replacing an easily accessible, identical component, homeowners may proceed with caution. For anything involving damaged insulation, burnt odors, corrosion, moisture intrusion, or uncertain labels, contact a licensed electrician. By recognizing the boundary between safe DIY and professional service, you reduce risk around the fuel box and protect your home wiring.
Maintenance habits to extend fuse box life and reliability
Regular visual inspections after major electrical work or storms can catch signs of wear early. Keep the area around the fuel box clean and dry; remove dust with a dry cloth. Periodically test the main disconnect to ensure it operates smoothly. If your home includes older wiring, consider an electrical safety assessment to verify compatibility with current electrical loads. Establish a routine—seasonal checks of the fuel box help prevent unexpected outages and extend the life of your electrical system.
Safety codes, labeling, and certifications you should know
Your local electrical code may require specific labeling, panel accessibility, and clearance around the fuel box. Maintain proper labels for circuits and ensure the panel remains accessible for emergency shut-off. If you’re performing any upgrades, ensure the work complies with current safety standards and, when in doubt, consult a licensed electrician. Staying compliant minimizes fire hazards and ensures your DIY efforts remain within safe and legal guidelines.
Tools & Materials
- Non-contact voltage tester(Used to verify power status from a distance without touching live parts)
- Insulated screwdriver set(Flat-head and Phillips; insulated handle recommended)
- Digital multimeter(For measuring continuity and voltage when safe to do so)
- Labeling supplies(Tape or label maker to clearly identify circuits)
- Safety goggles(Eye protection for potential debris or sparks)
- Insulated gloves(Class rated for electrical work, provide protection against shock)
- Flashlight(Stable light source for dark panels)
- Fire extinguisher (electrical)(Keep a Class C or equivalent nearby)
- Step ladder(Use only if panel is out of reach; ensure stable footing)
- Replacement fuses or breakers (on-hand only if you are qualified to replace)(Only replace with the exact same rating and type)
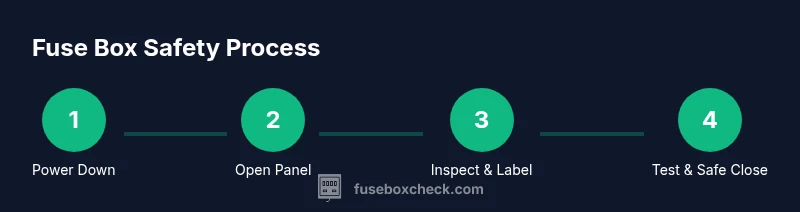
Steps
Estimated time: 60-90 minutes
- 1
Power down and prep
Power down at the main disconnect and verify the area is dry and clear. Put on safety gear before approaching the fuel box. Place tools within reach but ensure the panel is free of clutter to avoid any accidental contact.
Tip: Never rush this step; a calm, methodical approach reduces risk. - 2
Open the panel safely
Remove the panel cover using insulated tools and keep the cover away from the work area. Inspect for any signs of damage on the cover or interior before touching any components.
Tip: Keep the cover in a safe place to avoid accidental contact with live parts. - 3
Label and map circuits
Refer to existing labels and create new ones for any unclear circuits. Photograph or sketch a quick map showing which circuits feed which rooms or devices.
Tip: Accurate labeling saves time during future trips to the panel. - 4
Test the panel exterior
With the panel rendered to power-off, use a non-contact tester to confirm no voltage is present on any exposed metal. If any voltage is detected, pause and call a professional.
Tip: Err on the side of caution; do not proceed if voltage is detected. - 5
Inspect fuses and breakers
Look for signs of wear, such as burnt contacts, melted insulation, or rust on the bus bars. Do not attempt repairs beyond tightening screws or replacing identical parts if you are not fully qualified.
Tip: Only replace components with the exact rating and type. - 6
Re-test and reseal
With all working components reassembled, restore power at the main disconnect and re-check each circuit level. Replace the panel cover securely to maintain a clean, protected interior.
Tip: Ensure there are no loose screws or exposed conductors. - 7
Function test after power-up
Switch on one circuit at a time to verify that lights, outlets, and appliances operate as expected. Listen for unusual sounds or smells and promptly shut off power if anything abnormal is detected.
Tip: Take your time during this step; rushing can miss subtle issues. - 8
Document outcomes and maintenance plan
Record the actions taken, any parts replaced, and recommended future checks. Schedule seasonal reviews and plan for professional inspection if the fuel box shows recurring problems.
Tip: A written maintenance log helps track wiring health over time. - 9
Close out safely and clean up
Ensure tools are stored, the area is dry, and the panel is securely closed. Verify that doors or familiar routes remain unobstructed for emergencies.
Tip: Leave the area as you found it, but with clear wiring labels and notes.
Your Questions Answered
What is a fuel box and how does it relate to a fuse box?
A fuel box is not a standard electrical term; it is informally used by some to refer to a fuse box or distribution panel that houses fuses or circuit breakers. The fuse box is the safety device that interrupts current when a fault occurs.
A fuel box is a nonstandard term sometimes used for a fuse box, which protects home circuits by interrupting current when needed.
When should I call a professional for my fuse box issues?
If you see scorch marks, burning smells, melted insulation, moisture, or repeated tripping that you cannot safely resolve, contact a licensed electrician. Do not attempt risky repairs on a fuel box.
Call a licensed electrician for scorch marks, hot smells, or repeated trips near the fuse box.
Can I DIY any work on my fuse box?
Some basic labeling, organization, and non-live checks are possible, but any work involving removing covers, tightening live connections, or replacing components should be handled by a qualified professional.
Some tasks can be DIY if power is off and you avoid touching live parts; otherwise hire a pro.
How often should I inspect my fuse box?
Perform a visual check at least once a year and after major electrical events like storms. Document any signs of wear and schedule professional checks for older systems.
Do a yearly visual check and after big events; older systems benefit from professional review.
What safety gear is essential when working near a fuse box?
Wear safety goggles, insulated gloves, and use insulated tools. Keep a fire extinguisher rated for electrical fires nearby as a precaution.
Goggles, insulated gloves, and insulated tools are essential; have a Class C extinguisher nearby.
What signs indicate a potentially dangerous fuse box?
Burning smell, scorch marks, buzzing sounds, or damp panels indicate danger and require professional assessment.
If you smell burn or see scorch marks, call a pro immediately.
Watch Video
Highlights
- Turn off power at the main disconnect before touching the fuel box
- Label circuits clearly to prevent future trips or mis-wiring
- Only perform safe, low-risk tasks and call a professional for complex work
- Document the panel layout and maintenance needs for ongoing safety