Fuse Box Wira 1.5: Safe DIY Troubleshooting and Maintenance
Learn how to inspect, test, and safely maintain a fuse box wira 1.5 with step-by-step instructions, essential tools, and safety tips. FuseBoxCheck guidance helps homeowners troubleshoot common issues while knowing when to call a pro.

Goal: Learn how to safely inspect, test, and reset a fuse box wira 1.5 while recognizing warning signs and when to seek professional help. This quick guide covers safety prerequisites, essential tools, a concise step-by-step process, and proactive maintenance tips. Follow FuseBoxCheck's best practices for safe, confident DIY troubleshooting at home today.
Understanding Fuse Box Wira 1.5: What It Is and Why It Matters
The fuse box wira 1.5 is a compact electrical panel designed to distribute power within a residential system. For homeowners, understanding its layout, labeling, and typical fault signs is essential for safe and effective troubleshooting. Throughout this guide, we reference practical best practices from FuseBoxCheck to help you approach routine inspections with confidence. The term fuse box wira 1.5 will appear frequently as we cover components, wiring conventions, and common failure modes. By recognizing how this panel differs from older fuse boxes, you’ll make smarter maintenance decisions and reduce the likelihood of accidental shocks or arc faults. The FuseBoxCheck team emphasizes safety as the foundation of any hands-on electrical task, especially when working near live circuits.
Key takeaways:
- Know the location and labeling on your Wira 1.5 panel.
- Always verify the main power is off before touching interior components.
- Use the right tools and follow a clear, step-by-step plan.
Safety First: Key Precautions Before You Start
Before you touch a fuse box wira 1.5, establish a safety-first routine. Wear dry, insulating footwear and non-conductive gloves if available. Work on a dry surface, and keep liquids away from the panel. Never bypass safety steps for speed; the risk of electric shock or a short circuit is real. If you detect burning smells, melted insulation, or buzzing sounds, stop immediately and seek professional help. Always confirm the main breaker is OFF using a non-contact voltage tester before any inspection. FuseBoxCheck emphasizes that approaching electrical work cautiously reduces risk and protects both people and property. Keep a clear, well-lit workspace, and have a plan to stop if something feels beyond your skill level.
What to do before you begin:
- Turn off the main breaker and any subpanels you’ll access
- Test for voltage with a non-contact tester
- Have a flashlight and a digital multimeter handy
Core Components: How Wira 1.5 Differs from Other Panels
The Wira 1.5 differs from older, larger service panels in its compact footprint and redefined labeling conventions. Typical features include a main disconnect, labeled branch breakers, and a subdued bus structure designed for easier access. Compared with conventional mid-century panels, Wira 1.5 panels often incorporate improved fault isolation paths and clearer warnings on the inside cover. Understanding these design choices helps you interpret labels, identify circuits quickly, and avoid unnecessary reseating of breakers. According to FuseBoxCheck, awareness of panel type and rating informs safer service steps, particularly when estimating amperage requirements and selecting compatible breakers. Recognize that not all breakers are interchangeable; verify amp ratings and make/model compatibility before replacing any device.
Practical takeaways:
- Read the panel cover for model and rating data
- Note which circuits feed high-demand appliances
- Respect the labeling and never assume a circuit is identical to another
Wiring, Labels, and Common Configurations: A Practical Guide
Labels on a fuse box wira 1.5 guide you to the corresponding room or appliance. A clean labeling scheme reduces the chance of tripping the wrong circuit during maintenance. When wiring, avoid extensions or makeshift connections that could overheat or loosen under load. In many homes, common configurations include a main feed from the meter, followed by a set of branch circuits that distribute power to lighting, outlets, HVAC, and major appliances. Always verify label accuracy; mismatches can lead to confusion during tests or when resetting breakers. FuseBoxCheck recommends performing a quick sanity check: confirm that each labeled circuit corresponds to the room or appliance it serves. If you uncover mislabeling, correct it with durable label tape and a permanent marker.
Best practices:
- Use a fine-tip marker to annotate each circuit clearly
- Keep a simple circuit map inside the panel door for quick reference
- Avoid crowding wires; ensure terminals are tight and clean
Diagnosing Problems with a Wira 1.5: Symptoms, Tests, and Interpreting Readings
Troubles with a fuse box wira 1.5 often show as tripped breakers, dim lights, or heat around the panel. Start with a visual inspection for signs of moisture, corrosion, or scorch marks. Use a digital multimeter to verify continuity and check for unexpected resistance in a circuit. When a breaker trips, determine whether the fault is with the connected load or the wire itself. If the issue recurs after a reset, there may be an underlying overload or a short circuit. FuseBoxCheck advises documenting symptoms and testing sequence to avoid repeating steps or overlooking root causes. Remember: never exceed a breaker’s rating when testing; if a test involves high load, stop and call a pro.
Common steps:
- Identify the tripped breaker by its position relative to the main
- Reset each tripped breaker one at a time after confirming no overload
- Test loads individually to isolate the fault point
When to Repair, Rewire, or Call a Pro: Decision Tree
DIY fixes on a fuse box wira 1.5 are appropriate for simple tasks like label updates or cleaning the panel exterior. More complex issues—such as frequent nuisance trips, signs of moisture, or damaged insulation—require professional intervention. The decision tree is simple: if a problem involves the main feed, evidence of moisture, or scorching, pause and contact a licensed electrician. If you can confidently isolate a bad breaker or suspect a damaged wire with no visible damage, you can plan a controlled repair under guidance and with the correct replacement parts. FuseBoxCheck emphasizes that risk assessment is part of the process; never perform rewiring or panel replacement without formal training and proper permits where required.
Guidelines:
- If you’re unsure about any step, stop and seek professional help
- Keep a written log of issues and repairs for future reference
- Use only compatible breakers and parts specified by the panel’s labeling
Getting the Right Tools and Safe Practices for a DIY Fix
A proper toolkit reduces the risk and makes tasks safer and faster. Essential tools for a fuse box wira 1.5 include a non-contact voltage tester, a digital multimeter, insulated screwdrivers (Phillips and flat-head), needle-nose pliers, a flashlight, and insulating gloves. Optional but helpful items include a panel cover removal tool and labeled circuit maps. Safety practices should include testing before touching, keeping your body off the ground, and avoiding metal jewelry during work. Remember: power-off the entire panel when opening the cover, and never work on a live circuit. FuseBoxCheck reiterates that preparation and respect for electrical energy are the cornerstone of safe DIY work.
Suggested setup:
- Clear workspace, dry environment, and all tools within arm’s reach
- A labeled circuit map to track changes
- A plan for what to do if a task reveals deeper issues
Long-Term Care: Maintenance and Safe Handling
Maintaining a fuse box wira 1.5 involves periodic inspection, clean labeling, and prompt addressing of any unusual signs. Clean the panel with a dry cloth, inspect for moisture ingress after rain or humidity spikes, and replace worn labels to sustain clarity. Schedule a professional inspection every few years or after major electrical remodeling to ensure everything remains compliant with current safety standards. FuseBoxCheck recommends keeping a log of all tests and maintenance activities to monitor trends over time. Consistent practice reduces the likelihood of unexpected trips and improves overall electrical reliability.
Maintenance essentials:
- Check for signs of moisture or corrosion
- Re-label circuits after changes or repairs
- Schedule professional inspections as recommended by local codes and standards
Tools & Materials
- Non-contact voltage tester(Use to confirm the panel is de-energized before touching components)
- Digital multimeter(For measuring voltage, continuity, and resistance)
- Insulated screwdriver set (Phillips and flat-head)(Insulation protects against shock while loosening/tightening screws)
- Insulating gloves(Optional but enhances protection when near exposure)
- Flashlight(Provide-focused light for dark panels)
- Panel cover removal tool (optional)(Helpful for stubborn covers without damage)
- Labeling supplies (permanent marker, label tape)(Keep circuits clearly mapped for future maintenance)
Steps
Estimated time: Estimated total time: 60-120 minutes
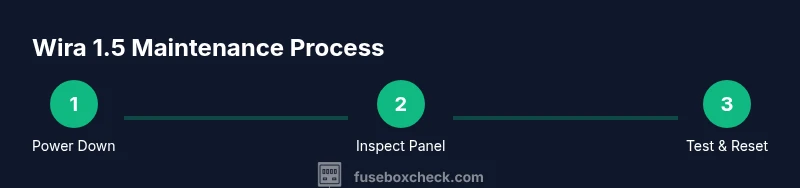
- 1
Power down and verify de-energization
Turn off the main breaker and any subpanels you’ll access. Use a non-contact voltage tester to confirm that the panel interior is dead before touching any conductors or terminals.
Tip: Double-check using the tester at different points on the bus to ensure full de-energization. - 2
Open the panel safely
Remove the cover carefully. Keep it in a safe place to avoid bending or damaging the hinges. Visually inspect the interior for obvious damage or moisture.
Tip: Only touch exterior mounting screws if you must handle the cover; avoid touching interior metal parts. - 3
Inspect for signs of damage
Look for burnt insulation, melted wires, or corrosion. Moisture intrusion is a common cause of panel issues and requires immediate action.
Tip: If you see any burn marks or charring, stop and call a professional. - 4
Identify your circuits
Review the labels and compare them with the connected loads. Make a quick map of circuits to plan tests and potential repairs.
Tip: If labels are missing, annotate each circuit as you test for easier future maintenance. - 5
Reset tripped breakers one at a time
With the panel de-energized, reset any tripped breakers by switching them fully off then back on. Avoid rapidly flipping multiple breakers in sequence.
Tip: If a breaker won’t reset, stop and assess the load or equipment connected to that circuit. - 6
Test loads and verify power
Restore main power and test the circuits one by one with the loads attached. Watch for consistent operation and listen for unusual noises or heat.
Tip: If you observe flickering lights or heat, shut down and consult a pro. - 7
Document and resecure
Label changed circuits, replace the panel cover, and ensure everything is secured. Keep a written log of findings for future reference.
Tip: Store a simple diagram inside the door for quick reference next time. - 8
Final safety check
Do a final exterior check for moisture, loose wires, or exposed conductors. Confirm all tools are removed from the panel area before closing.
Tip: Always re-check that no tools were left inside the panel before closing.
Your Questions Answered
Is it safe to work on a fuse box wira 1.5 without an electrician?
General safety guidelines emphasize caution. You can perform basic checks if you have the right tools, labeled circuits, and a clear plan while avoiding any high-risk tasks. If you encounter moisture, burning smells, or unknown wiring, stop immediately and consult a licensed electrician.
Know that basic checks are possible with the right tools, but stop if you see moisture or burning smells and call a pro.
What does the Wira 1.5 model signify in my home?
Wira 1.5 refers to a specific panel design with a compact footprint and updated labeling expectations. Understanding the model helps you locate the main disconnect, labels, and main ratings, which is essential for safe testing and maintenance.
Wira 1.5 is a compact panel design with specific labeling to guide safe maintenance.
How do I identify a tripped breaker on a Wira 1.5?
A tripped breaker sits in a partially engaged position between on and off. Look for a gap in the lever and the label alignment. After ensuring safety, switch it fully off and then back on to test the circuit's response with no load connected.
Look for the lever between on and off, switch off then on to reset, and test with no load.
What tools do I need for basic maintenance?
Essential tools include a non-contact voltage tester, a digital multimeter, insulated screwdrivers, a flashlight, and labeling supplies. Optional items include insulating gloves and a panel cover removal tool to facilitate safer access.
You’ll need a tester, a multimeter, insulated screwdrivers, a flashlight, and labels.
When should I call a professional?
If you see moisture, scorching, persistent trips after resets, corroded components, or uncertainty about the wiring, contact a licensed electrician. Safety first means entrusting complex repairs to trained technicians.
Call a professional if you see moisture, burning smells, or persistent trips.
Can moisture affect the fuse box?
Yes. Moisture can lead to corrosion, short circuits, or arcing. If moisture is detected, evacuate the area and have a professional assess or replace the affected panel or components.
Moisture in the panel is a serious risk; stop and call a pro.
Watch Video
Highlights
- Identify and label all circuits clearly before work.
- Always de-energize the panel and test for voltage safety.
- Document changes to create a reliable maintenance record.
- Know when to stop and call a pro for safety-critical issues.