How to Check If a Fuse Box Is Blown: A DIY Guide
Learn how to check if a fuse box is blown safely with a practical, step-by-step approach. Visual checks, multimeter testing, and when to call a pro.

You will learn how to check if fuse box is blown and identify tripped or blown fuses safely. This guide covers basic visual checks, using a multimeter, and steps to confirm faults while minimizing risk. Before you begin, ensure you have a flashlight, a non-contact voltage tester, and the right safety gear.
What counts as blown fuse vs. a tripped breaker
If you're wondering how to check if fuse box is blown, the simple distinction is: a blown fuse typically interrupts current flow at the fuse element itself, while a tripped breaker interrupts power at the switch lever. In older homes, fuses sit in cartridge housings and can blow when a circuit is overloaded. Breakers trip when the internal switch detects an overload or a surge. Visually, you may notice a burnt smell, discoloration, or a melted fuse in the panel. Regardless of the sign, never assume the fault without testing. To verify safely, isolate the panel, confirm no voltage on the exposed terminals, and proceed with proper testing methods.
Safety first: gear, precautions, and limitations
Before you touch any components, gear up properly and understand the limits of a DIY inspection. Wear insulated gloves and safety glasses. Work on a dry, non-conductive surface with the main power off. Use a non-contact voltage tester to verify there is no live voltage before handling screws or fuses. If you are unsure about wiring configurations or the panel is old or damaged, stop and call a licensed electrician. The goal is to reduce risk, not to prove you can complete every repair on your own.
Visual inspection steps for a fuse box
- Locate the main disconnect and the fuse panel. If your home uses cartridge fuses, inspect each fuse visually for a broken filament or a blackened, melted appearance. If you see any of these signs, do not attempt to reuse the fuse.
- Check for scorch marks, buzzing sounds, or unusual warmth around the panel. These are red flags indicating overheating.
- Ensure all labels are legible and that you understand which circuit each fuse protects. Mislabeling can lead to unsafe re-energization after maintenance.
- Confirm that the panel cover is securely in place to prevent debris from entering and to keep hands away from live parts. Replace any damaged covers before powering the system back on.
Testing with a non-contact tester and multimeter
First, switch off the main disconnect to de-energize the panel. Use a non-contact voltage tester to scan exposed conductors and confirm there is no voltage. Then, remove a suspect fuse with an insulated tool and test continuity with a multimeter set to the continuity range or ohms. A healthy fuse should show continuity (low resistance); an open circuit indicates a blown fuse and requires replacement with the correct amperage rating. Do not substitute fuses with higher ratings in an effort to bypass protection.
Interpreting results: signs and numbers to look for
If the fuse shows an open circuit on the multimeter, that is a strong indicator of a blown fuse. A reading of infinite resistance means the circuit is open. If there is still power on the circuit after removing the fuse, re-check your wiring and verify that the correct fuse rating is used. If the reading is inconsistent or you observe a flicker when re-energizing, there may be a wiring fault or a damaged panel component that warrants professional inspection.
Replacing fuses safely and resetting breakers
When replacing a fuse, ensure you choose the correct amperage rating identical to the old fuse. Insert the new fuse evenly and avoid forcing it. If your panel uses breakers instead of fuses, reset the breaker by flipping it fully to Off and then back to On. If there is repeated tripping or overheating, discontinue testing and contact a licensed electrician. Do not bypass safety features or mixed voltage sources.
Restore power and test the circuit
After replacing the fuse or resetting the breaker, restore power by flipping the main disconnect back to the on position, then re-energize individual circuits one at a time. Check the affected outlets and devices for proper operation, and monitor the panel for unusual warmth or burning smells during the initial test phase. If issues recur, have the system inspected to prevent electrical hazards in your home.
When to call a licensed electrician
If you notice burning smells, melted insulation, smoke, or signs of arc flash, stop immediately and call a professional. Old fuse boxes or panels with aluminum wiring, improper wiring, or corrosion require a licensed electrician for safe evaluation and possible upgrades. Electrical work beyond visual inspection and basic measurements should never be performed by a homeowner without training.
Tools & Materials
- Flashlight(Hands-free preferred, headlamp or magnetic base helps)
- Non-contact voltage tester(Verify no voltage before touching panel components)
- Multimeter (with continuity and volts)(Digital preferred; ensure probes are insulated)
- Insulated screwdriver set(Use tools with insulated handles for safety)
- Insulating gloves and safety glasses(Keep dry hands and proper eye protection)
- Replacement fuses or compatible spare breakers(Match the amperage rating and type from the panel label)
- Dry, non-conductive work surface(Avoid working over metal or water)
- Notepad and pen(Document fuse ratings and test results)
Steps
Estimated time: 60-90 minutes
- 1
Gather safety gear and tools
Collect the flashlight, voltage tester, multimeter, insulated gloves, safety glasses, and replacement fuses or breakers. Confirm your workspace is dry and well-lit. This preparation reduces risk and ensures you can verify results accurately.
Tip: Have a friend nearby in case you need assistance or to call for help. - 2
Shut off the main power and individual circuits
Locate the main disconnect and switch it to Off to de-energize the panel. If you are only testing a single circuit, switch off that circuit’s breaker first, then proceed. Do not touch panel components while the system is live.
Tip: If you cannot locate the main disconnect, avoid working on the panel and contact a pro. - 3
Inspect for obvious damage
Visually inspect the fuse elements and the panel for signs of damage, scorching, or melted insulation. If you notice any of these, do not attempt further testing. Seek professional evaluation to prevent electrical fires.
Tip: Never touch a suspected damaged fuse or conductor with bare hands. - 4
Test circuits with a non-contact tester
With the area dry and main off, scan exposed conductors using the non-contact tester to confirm zero voltage. This confirms it is safe to proceed with removing a fuse or testing a breaker.
Tip: Test the tester on a known live source first to confirm it works correctly. - 5
Remove the suspect fuse
Carefully extract the suspected fuse using insulated pliers or a screwdriver with insulated handles. Do not force a fuse; if it won’t come out easily, stop and call a pro. Inspect the fuse element after removal.
Tip: Label the fuse so you know which circuit it protects. - 6
Check fuse visually and with continuity
Look for a broken filament or blackened appearance. Use the multimeter in continuity mode; a continuous reading means the fuse is good, an open circuit means blown fuse.
Tip: If in doubt, replace with a fresh fuse of the same rating rather than reusing the old one. - 7
Replace fuse or reset breaker
Insert a new fuse with the exact amperage or reset the breaker by fully turning it Off, then On. Do not bypass safety protections. Record the outcome for future reference.
Tip: Always replace with the correct rating to prevent overheating or fires. - 8
Restore power and test the circuit
Turn the main disconnect back to On, then switch the circuit back on. Test the affected outlets or devices to ensure proper operation. Monitor for any signs of heat or buzzing.
Tip: If the circuit trips again immediately, stop testing and call a professional. - 9
Document results and plan next steps
Record the fuse rating, circuit details, and whether the fault recurs. Create a plan for a professional inspection if you observe repeated trips, unusual panel warmth, or any smoke.
Tip: Keep the panel cover in place when testing and replace it after the test is complete.
Your Questions Answered
What are the signs that a fuse box is blown?
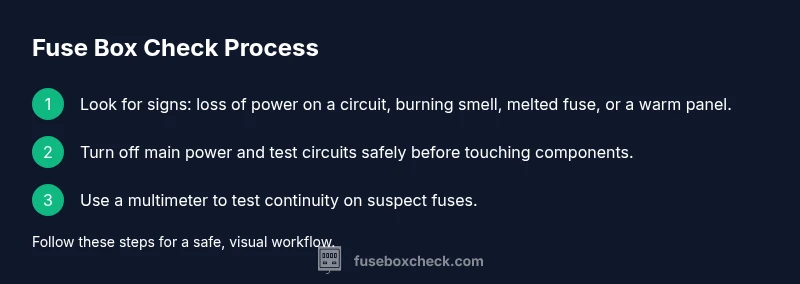
Common signs include a loss of power on a circuit, a burnt smell, a visibly blown fuse, or a warm panel. If you notice these, proceed with caution and verify with a test before replacing fuses.
Look for loss of power on a circuit, a burnt smell, or a warm panel. If you notice these, test carefully before replacing anything.
Can a blown fuse affect multiple circuits?
Typically a blown fuse affects only the circuit it protects. If multiple circuits are down, inspect nearby fuses or consider a broader panel issue that may require a professional.
Usually only the circuit protected by the blown fuse is affected, but check nearby fuses if several areas are out.
Is it safe to reset a tripped breaker?
Resetting a tripped breaker is safe if you’ve identified and resolved the underlying cause. Always inspect for overloads or short circuits before re-energizing.
Yes, but only after you’ve checked for the cause and ensured it’s safe to reset.
Do I need to replace the whole fuse box?
Not always. A single failing component or outdated wiring may require repair or upgrade by a professional rather than replacing the entire box.
Usually not the whole box, but if the panel is old or damaged, upgrade may be wise.
What tools are essential for checking a fuse box?
Essential tools include a flashlight, a non-contact voltage tester, a multimeter, insulated tools, and spare fuses or breakers of the correct rating.
You’ll need a flashlight, a voltage tester, a multimeter, insulated tools, and the right spare parts.
When should I call an electrician?
Call an electrician if you smell burning, see signs of arcing or overheating, or repeatedly trip circuits after a test. Complex wiring or aluminum conductors also require professional care.
Call a professional if you smell burning or see overheating, or if tripping repeats after testing.
Watch Video
Highlights
- Power off before inspecting the panel
- Use the correct fuse or breaker ratings
- Test with proper tools to confirm faults
- Don’t bypass safety features; call a pro if unsure