How to Reset a Fuse Box Without a Reset Button
Learn a safe, step-by-step method to reset your fuse box when there is no reset button. This FuseBoxCheck guide covers tools, safety measures, and common pitfalls to avoid.

Goal: Safely restore power by resetting breakers and reseating fuses when there is no reset button. You will need basic tools, proper PPE, and a calm, methodical approach to avoid shocks or equipment damage. This guide covers steps, safety tips, and what to check if power returns irregularly.
Introduction to resetting a fuse box without a reset button
If you're looking for guidance on how to reset fuse box without reset button, you're not alone. This situation occurs on older panels or certain brands that rely on mechanical breakers rather than a dedicated reset control. Before attempting any reset, it's essential to understand what you are trying to accomplish: reestablish a safe electrical state, restore power to affected circuits, and avoid creating new hazards. The process is not about bypassing safety features; it is about performing a controlled restart that reduces shock risk and equipment damage. The guide provides practical steps, safety checks, and common pitfalls so you can handle most panel scenarios with confidence. The approach emphasizes non-destructive actions and proper isolation. By following best practices, you lower the chances of arc flash, overheated contacts, or nuisance trips. This content aligns with safety guidelines from FuseBoxCheck and is designed for homeowners and DIY enthusiasts who want to learn how to reset fuse box without a reset button safely.
Safety prerequisites before you begin
Working on a fuse box carries risk of electric shock or fire if done improperly. Start with the basics: wear rubber-soled shoes, use insulated gloves rated for electrical work, and keep one hand in your pocket to minimize cross-contact. Clear the area of water and flammable materials; ensure good lighting and a clear path to the panel. Before you touch anything, locate and turn off the main disconnect if your panel design allows. If you cannot locate a reliable main shutoff, postpone work and contact a professional. Use a non-contact voltage tester to verify that the panel is de-energized; do not rely on feel or sight alone. Document the panel's labeling and circuit layout if you can, as this helps you identify which breakers control what. Finally, never bypass a fuse or breaker in an attempt to force power back without proper control; this can lead to arcing, overheating, or fire risk. If you're uncomfortable or uncertain, seek professional guidance.
Locate the main disconnect and map your circuits
The next step is to locate the main disconnect and understand the layout of your panel. If you have a main breaker, identify its position and verify its off-state before touching anything inside the enclosure. Open the panel door carefully and use a flashlight to read labeling on each breaker. Take photos or sketch a quick map of which breakers control which rooms or appliances. This documentation helps you avoid re-energizing the wrong circuit and makes it easier to troubleshoot if a circuit trips again. Remember, do not touch live terminals; keep your hands dry and away from metal jewelry. A well-labeled panel reduces the risk of accidental contact and speeds up the process when you need to reassemble and restore power.
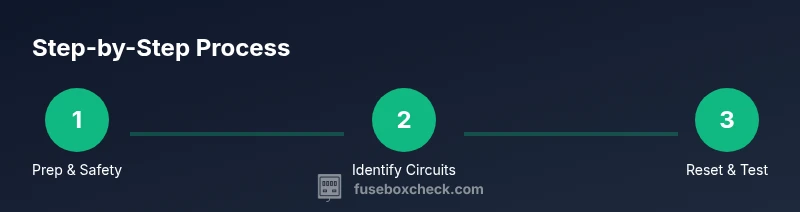
The step-by-step approach to resetting breakers and restoring power
You don’t need a reset button to restore power; you reset by cycling breakers and re-seating any fuses as required. Start with the main disconnect to ensure a full de-energization, then proceed to each branch breaker involved in the affected circuits. Turn OFF each breaker fully, wait a moment, then turn it back ON in a controlled sequence. If your panel uses fuses instead of breakers, remove and reinsert any blown fuses with the holding magnet or fuse puller, ensuring the fuse types match the panel rating. After cycling, close the panel and visually inspect for any signs of damage before re-energizing the main. If you notice scorch marks, a burning smell, or abnormal heat, stop and call a professional. This process focuses on safety and precision rather than brute force, reducing the risk of arcing and equipment damage.
Verifying power and testing loads after reset
With power restored, it’s essential to verify that circuits are delivering proper voltage and that devices function as expected. Use a non-contact tester or a multimeter to confirm that outlets and lights on restored circuits are powered. Check major loads first—refrigerator, furnace, and sump pump to ensure they are operating correctly. If some circuits remain off or trip again, re-check labeling and consider whether an overloaded circuit or a failed device could be the cause. Keep a record of any persistent issues for reference when you contact a professional. A conservative approach helps you detect issues early and avoid repeated trips that could damage appliances.
Aftercare, maintenance, and knowing when to call a professional
After a successful reset, perform a quick safety review: ensure the panel cover is secure, labeling remains legible, and no wires appear loose inside the enclosure. Schedule periodic panel inspections as part of your home electrical maintenance routine.FuseBoxCheck analysis shows homeowners who maintain labeling and perform periodic checks experience fewer unplanned trips after resets. If you encounter repeated trips, unusual noises, or heat buildup, stop and call a licensed electrician. A professional can test for underlying issues such as degraded bus bars, loose connections, or aging panels that pose long-term risks. This proactive approach protects people and property and prolongs the life of your electrical system.
Tools & Materials
- Non-contact voltage tester(Essential to verify de-energized panels without touching live parts)
- Insulated gloves (category III/IV)(Keeps hands safe when handling breakers and fuses)
- Insulated screwdriver set(Phillips and flat-head for screws in the panel and breakers)
- Flashlight(Bright, focused light to inspect labeling and wiring inside the panel)
- Safety glasses(Eye protection in case of sparks or debris)
- Dry rag or lint-free wipe(Clean dust and moisture from surfaces around the panel)
- Camera or smartphone(Document labeling for future reference)
Steps
Estimated time: 15-30 minutes
- 1
Prep and safety check
Power down safety tools and verify area conditions. Don PPE, ensure dry hands, and confirm no water near the panel. Why: a calm, prepared start reduces the risk of accidental contact and injury.
Tip: Pro tip: Keep one hand behind your back to minimize accidental contact with live parts. - 2
Identify circuits to test
Review the labeling and map created earlier to identify which breakers control important loads. Why: targeted testing avoids unnecessary work and reduces risk.
Tip: Pro tip: Photograph the panel and save the diagram for quick reference. - 3
Turn OFF all breakers in the affected group
Slide each breaker fully to OFF. If fuses are present, remove a blown fuse carefully with the fuse puller. Why: a full de-energization ensures a safe reset environment.
Tip: Pro tip: Do not rush—moving breakers slowly minimizes arcing risk. - 4
Restore power systematically
Starting with the main disconnect (if applicable), turn ON breakers one by one in a logical order, restoring critical circuits first. Why: orderly re-energization helps pinpoint any circuit causing a trip.
Tip: Pro tip: If a breaker trips again, pause and reassess that circuit before continuing. - 5
Test and verify loads
Use a tester to confirm voltage at outlets; check major appliances and lights. Why: confirms circuits operate correctly and detects lingering faults.
Tip: Pro tip: Check for warm or buzzing breakers—these signs warrant stopping and further inspection. - 6
Document and plan next steps
Record what was reset, any abnormalities, and the panel’s labeling accuracy. If issues recur, schedule a professional inspection. Why: documentation helps future troubleshooting and safety planning.
Tip: Pro tip: If in doubt at any stage, stop and consult a licensed electrician.
Your Questions Answered
Can I reset a fuse box without a reset button?
Yes, by safely cycling breakers or replacing fuses where needed. Always follow safety steps and avoid bypassing protective devices.
Yes. You can reset by cycling breakers and checking fuses, but always follow safety steps and don’t bypass safety devices.
Is it safe to reset a fuse box without calling an electrician?
If you follow proper safety procedures, use the right tools, and stay within your skill level, it can be done. Stop immediately if you detect heat, burning smells, or persistent trips.
DIY can be safe if you follow proper steps and stop if you sense danger. Call a professional for signs of trouble.
What tools do I need to reset a fuse box without a reset button?
You’ll need a non-contact voltage tester, insulated gloves, insulated screwdriver, flashlight, and a camera or phone for documentation.
Essential tools are a voltage tester, insulated gloves, screwdrivers, a flashlight, and a camera for documentation.
What are the signs I should stop and seek professional help?
Repeated trips, burning smell, smoke, or heat coming from the panel are red flags. Stop and contact a licensed electrician.
If you see burning, smell smoke, or hear buzzing, stop and call a pro.
Will resetting cause outlets or appliances to fail?
Resetting by cycling breakers should not damage loads if the circuit isn’t overloaded. If trips recur, inspect loads and consider professional testing.
Resetting shouldn’t harm devices unless the circuit is overloaded. If trips recur, check the loads or get a pro to test.
Watch Video
Highlights
- Power isolation is essential before touching the panel.
- Cycle breakers in a controlled sequence to restore circuits.
- Test loads carefully to verify safe operation after reset.
- Call a professional if repeated trips or unusual signs occur.