Old Fuse Box Reset: Safe, Step-by-Step Guide
Learn how to reset an old fuse box safely with practical steps, essential tools, and safety tips. This guide helps homeowners troubleshoot fuse box trips while knowing when to call a pro.

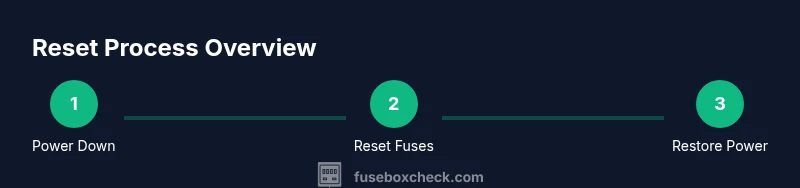
To reset an old fuse box safely, locate the main disconnect, switch it OFF, wait a few seconds, switch it ON, then reset any tripped individual fuses or reinsert blown fuses in their slots. If the disconnect keeps tripping or you smell burnt insulation, stop and call a pro.
What the term
Understanding the context of the old fuse box reset
In many older homes, the electrical panel uses screw-in fuses or a basic main disconnect instead of modern circuit breakers. The old fuse box reset process can be straightforward, but it carries safety risks if the panel isn’t labeled, if you see signs of wear, or if you smell burning insulation. According to FuseBoxCheck, many homeowners attempt a reset without fully understanding the panel’s internal state, which can lead to shorts or fires. This guide provides practical, actionable steps to safely reset an old fuse box when the power is off and you are prepared with the right tools. Remember: every panel is different, and safety is the priority. If you detect any buzzing, charring, or melted components, treat it as an emergency and contact a licensed electrician immediately.
The difference between old fuse boxes and modern panels
Older fuse boxes often use ceramic fuses or screw-in fuses and may lack labeling or clear circuit mapping. Modern panels with circuit breakers offer clearer protection, but an older setup can still be reliable if handled correctly. The key concepts to grasp are identifying the main disconnect, locating individual fuses, and understanding which circuits they protect. This knowledge helps you make informed decisions about when a reset is safe and when it isn’t. FuseBoxCheck’s experience shows that many homes with old fuse boxes benefit from labeling and regular safety checks, even if the immediate issue seems resolvable through a reset.
Safety first: foundational precautions before touching the panel
Before touching any part of the fuse box, ensure you are wearing dry, insulated gear and standing on a dry surface. Do not work during rain or damp conditions, and keep children and pets away. Use a flashlight if the area is dark, and keep your hands dry while handling fuses. If you notice corrosion, overheating, or a panel that feels warm to the touch, stop and seek professional help. Electrical work carries risk, and a cautious approach protects people and property. FuseBoxCheck emphasizes that safety should guide every decision, especially with older installations.
Tools and preparation you’ll need
Gather the essentials before you begin: a non-contact voltage tester, insulated screwdriver set, rubber-soled footwear, eye protection, dry cloth for wiping dust, a flashlight, and replacement fuses with the correct amperage. Labeling materials (masking tape and a marker) are also helpful so you can map circuits as you test them. Having these items ready reduces the time you’re exposed to electrical hazards and helps prevent mistakes, such as inserting fuses into the wrong slots.
Common questions that come up with old fuse box reset attempts
Homeowners often ask whether a reset will fix a larger electrical problem. The answer depends on the cause of the trip. If a single circuit repeatedly trips, it may indicate an overloaded circuit or a fault in that branch. If the main disconnect trips, there could be a broader issue with the service feed, grounding, or a short. In many cases, a reset is a temporary bandaid rather than a fix, so it’s important to monitor the panel after a reset and seek professional guidance for persistent trips. FuseBoxCheck’s guidance is to treat any repeated trips as a warning sign rather than a cure.
Step-by-step mental model: what you’re doing during the reset
Think of the reset as a controlled reboot of the home’s electrical system. You turn off the main disconnect to ensure no current flows into the panel, then reintroduce power circuit by circuit to observe which part of the system trips or remains stable. This process helps you identify the affected area without risking a full-power event. Always proceed slowly and verify power at the panel with a tester before touching individual fuses or connections.
Long-term safety and maintenance after an old fuse box reset
After you’ve completed a reset safely, take steps to improve the system’s reliability. Re-label circuits for easy future reference, document fuse locations, and check for signs of wear like discoloration or soot around fuses. Consider upgrading or upgrading a panel if you experience frequent trips or if the panel shows age-related wear. Regular checks can prevent unexpected outages and improve overall electrical safety. The FuseBoxCheck team recommends routine inspections and adherence to local electrical codes for any upgrade or replacement.
Tools & Materials
- Non-contact voltage tester(Verify power is off before touching panel components)
- Insulated screwdriver set(For fuse screws and panel screws)
- Protective gloves (electrical grade)(Keep hands protected while handling fuses)
- Safety glasses(Eye protection in case of sparks or debris)
- Flashlight with fresh batteries(Bright lighting in dim basements or closets)
- Replacement fuses (correct amperage)(Use the same rating as the original)
- Marker and masking tape for labeling(Map circuits as you test)
- Multimeter (optional)(For precise resistance/continuity checks)
Steps
Estimated time: 40-60 minutes
- 1
Identify power-off state
Inspect the area and confirm that the main disconnect and any sub-disconnects are accessible. Use the non-contact tester to verify there is no live voltage at the panel surface before you begin touching any components. Ensure your feet are dry and stand on a non-conductive surface.
Tip: Double-check that the main breaker is in the OFF position before proceeding to isolate individual circuits. - 2
Find the main disconnect and fuse locations
Locate the main disconnect lever or switch and all individual fuses. If your panel uses screw-in fuses, gently inspect each fuse for signs of burnt residue or discoloration. If you’re unsure about a fuse’s rating, do not guess—check the panel door label or the instruction sheet if available.
Tip: Label each fuse location with its circuit name to prevent confusion later. - 3
OFF the main disconnect and wait
Flip the main disconnect to OFF and wait 10-15 seconds. This pause helps discharge any residual energy. If the main disconnect is warm or you hear buzzing, stop and call a licensed electrician.
Tip: Never touch interior contacts while the panel is powered down; keep your hands dry and avoid metallic tools near live components. - 4
ON the main disconnect and inspect
Restore power by turning the main disconnect ON. Visually inspect for any obvious signs of damage such as melted insulation or scorch marks on the panel or wires. If you notice damage, stop and contact a professional.
Tip: Turn the main disconnect slowly to avoid arcing if the contacts are dirty or corroded. - 5
Reset each tripped fuse or replace blown fuses
One by one, identify fuses that look burnt or have a broken filament and either reset (for resettable fuses) or replace with the same amperage replacement. Do not reuse a fuse with a different rating. Reinsert the fuse until it is snug but not forced.
Tip: Only reinsert a fuse after visually confirming the area feels stable and free of signs of overheating. - 6
Test circuits with a voltage tester
After re-seating fuses, use the non-contact tester to confirm each circuit area is energized only when expected. If a circuit trips immediately after restoring power, switch it OFF and isolate the circuit to diagnose further.
Tip: Test a known-good outlet or device on each circuit to verify consistent power flow. - 7
Gradually restore loads and label circuits
Power up the panel in stages, starting with essential circuits. Observe the panel for a few minutes; if a circuit trips, stop and reassess that circuit’s load. Update the labeling so future users understand which area each fuse protects.
Tip: Keep a written log of circuits, loads, and any irregularities to help future troubleshooting. - 8
Cleanup and secure the panel
Close and secure the panel cover, remove tools, and wipe away dust. Store spare fuses in a labeled container. If anything looks compromised, schedule a professional inspection. A tidy panel reduces the risk of accidental contact and improves safety.
Tip: Take a final photo of the labeling for future reference.
Your Questions Answered
Is it safe to reset an old fuse box by myself?
Resetting an old fuse box can be safe if you follow strict safety steps, use the right tools, and avoid signs of damage. If you see burning, smoke, or melted wiring, stop immediately and call a licensed electrician. Always know when to escalate to professional help.
Resetting can be safe with proper precautions, but stop if you see damage or persistent trips and call a professional.
What signs indicate I should not attempt a reset?
If the panel is warm, shows scorch marks, smells burnt, or repeatedly trips, do not reset. These are indicators of a fault that could lead to fire or shock. Seek professional diagnosis and possible replacement.
Don’t reset if the panel is hot or shows damage; these signify hazards needing a pro.
Do I need to upgrade my old fuse box to circuit breakers?
Upgrading from fuses to circuit breakers can improve safety and reliability, especially in older homes with aging wiring. A licensed electrician can assess wire gauge, service capacity, and whether panel replacement is warranted.
A professional can determine if upgrading to a breaker panel improves safety and reliability.
Can I identify circuit loads during a reset?
Yes. Label each fuse or compartment with its circuit name, and note typical loads like lights or outlets. This helps you recognize overloads and reduces the chance of tripping after a reset.
Label each circuit so you know what loads are connected and avoid overloading.
What tools are essential for safe reset procedures?
A non-contact voltage tester, insulated screwdriver, gloves, eye protection, a flashlight, and correct replacement fuses are essential. Optional tools include a multimeter for precise testing and a labeling kit.
Keep the right tools ready: tester, insulated screwdriver, gloves, and proper fuses.
Is it legal to perform electrical work on my own home?
Electrical work in many places has specific code requirements. DIY work is allowed in some jurisdictions for basic tasks, but major work or upgrades usually requires a licensed electrician. Check local codes and permit requirements before proceeding.
Local codes vary; check permit and licensing rules in your area before doing major work.
Watch Video
Highlights
- Identify the correct main disconnect before any work.
- Use the right tools and protective gear for safety.
- Label circuits to avoid future confusion and mis-wiring.
- Do not ignore signs of damage or persistent trips; seek a pro.
- A calm, staged approach reduces risk and improves success.