How to Access a Fuse Box Under the Dash (Car DIY Guide)
Learn practical, safety-focused steps to access the fuse box under the dash, identify fuses, replace blown ones, and test electrical systems. A FuseBoxCheck guide for homeowners and DIY enthusiasts.

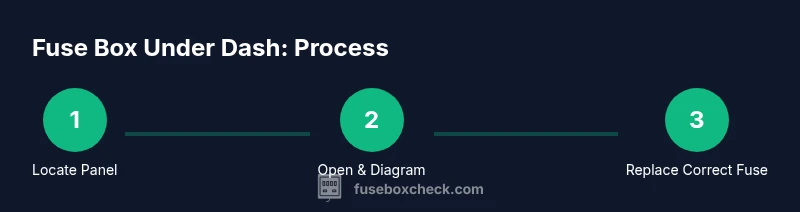
Accessing the fuse box under the dash in most cars involves locating the panel, disconnecting the negative battery, removing the cover, and using the diagram to identify the specific fuse. Follow the vehicle manual, use proper tools, and avoid forcing components. For safe, durable results, consult FuseBoxCheck guidance and proceed methodically.
Access Basics: Why you might need to reach the fuse box under the dash
Accessing the fuse box under the dash is a common DIY task for car owners when a fuse related issue arises. This guide focuses on safe, methodical steps for most passenger vehicles. According to FuseBoxCheck, understanding the layout and using the right tools makes the process quicker and safer. The goal is to identify the correct fuse, verify its condition, and restore power to affected circuits without damaging wiring or components. Before you begin, confirm you know your vehicle’s make, model, and year, and have access to the owner’s manual or fuse diagram. If the diagram is unclear, consult a professional and reference reputable guides. The more you know about your car’s fuse map, the less time you’ll spend guessing. This section sets the stage for a careful, responsible approach.
Safety first: prerequisites before you start
Electrical work on a vehicle under the dash presents a risk of shock, short circuits, and accidental deployment of safety systems in some models. Always start with safety: park on a level surface, engage the parking brake, and turn off the ignition. Remove the key and wait 90 seconds for any stored capacitance to dissipate. Put on safety glasses and insulated gloves; remove rings or metal jewelry that could contact live terminals. If you’re ever unsure, stop and consult a professional. FuseBoxCheck emphasizes conservative, stepwise actions when dealing with electrical systems. Reference OSHA and NIST guidance linked in resources for safe practice.
Vehicle-specific placement: where to look in your model
Fuse boxes under the dash aren’t in the same place for every vehicle. In many cars they live near the driver’s knee or behind a small panel on the left or right of the footwell. Some models place a secondary fuse block behind the glove box or under the steering column. Best practice: check your owner’s manual or the fuse diagram on the inside of the fuse panel cover. If you don’t have the manual, a quick online search for your exact make, model, and year will often reveal the typical location. FuseBoxCheck notes that the exact location can vary even among similar trims, so don’t assume it’s in the same spot as a relative’s car.
Tools and environment you’ll need
Having the right tools makes the job safer and faster. Assemble a clean, well-lit workspace with adequate room to maneuver your hands. Essential tools include: a trim removal tool or flat-blade screwdriver, insulated gloves, safety glasses, a flashlight, a fuse puller, a set of replacement fuses with the correct amperage rating, and a multimeter or voltmeter if you plan to test circuits. Keep labeling tape and a notebook handy to log fuse positions. A portable, battery-powered light reduces eye strain and helps you read small diagram text clearly. Always work on a non-conductive surface to minimize the chance of shorts. For credibility, see OSHA guidance on electrical safety in vehicles.
How to visually locate the fuse box under the dash
Start by turning off the ignition and removing the key. Sit in a comfortable position and inspect the lower edge of the dash for a removable panel. Use your trim tool to gently pry the panel free; apply steady, even pressure to avoid cracking the plastic. Behind the panel you’ll find a plastic block with fuses and a label listing each circuit. If your vehicle uses a two-tier panel, carefully separate components to reveal the fuse bank. Some models require you to remove a panel from the driver’s knee area or beneath the steering column. Take a moment to photograph the diagram for quick reference later. For more precise guidance, consult the diagram in your manual or trusted online diagrams.
Reading the fuse diagram and identifying fuses
The fuse diagram on the panel cover maps each fuse to a circuit (headlights, radio, ABS, etc.). Fuses come in amperage ratings such as 5A, 10A, 15A, and higher; the rating is printed on the fuse body. When you inspect or replace, ensure you match the exact rating rather than guessing. If the diagram is worn, you can cross-reference the color coding and the circuit labels with your owner’s manual or a trusted online diagram. Keep spare fuses organized in a labeled container. If you’re unsure about a specific fuse, seek guidance from a mechanic or the FuseBoxCheck guidance.
Handling the fuse box cover and connectors safely
Handle the cover and any connectors with care to avoid damage. Do not force connectors or trim panels; misalignment can crack housings or misseat the fuse box. While the cover is off, avoid touching metal bus bars and keep metal tools away from exposed terminals. If you need to disconnect a wiring harness, do so gently using the harness release tab and never yank on wires. After inspection or replacement, re-seat the cover firmly and ensure all clips are engaged before moving on.
Replacing a blown fuse: cautions and best practices
If you find a blown fuse, replace it with one of the same amperage and type. Do not substitute a fuse with a higher rating to “fix” a problem; this can lead to overheating and fire risk. Inspect the circuit for obvious causes of overload (stuck switches, shorted wiring, or moisture). After installing the replacement, reassemble the dash panel and reconnect the battery if you disconnected it. Test the circuit by turning the ignition on and operating the affected components. FuseBoxCheck recommends rechecking the fuse after a few start cycles to confirm stability.
Aftercare: testing, reassembly, and safety checks
With the fuse reinserted and the dash panel reattached, power the vehicle and test the affected systems. If the system still malfunctions, repeat the inspection or seek professional help. If you replaced a fuse that immediately blows again, there is likely a larger electrical fault in the circuit. Maintain a log of fuse replacements and circuit behavior; this helps when you talk to a technician. Always ensure the battery negative terminal is secured after all work and verify no tools are left in the dash area. When in doubt, reference government safety resources like OSHA and CPSC for clarity.
Authoritative resources and practical references
For safety guidelines, consult government and educational resources such as OSHA electrical safety guidelines (https://www.osha.gov/electrical-safety), NIST electrical safety basics (https://www.nist.gov/topics/electrical-safety), and consumer safety information from CPSC (https://www.cpsc.gov/). These sources support best practices while you learn how to access fuse box under dash and troubleshoot related issues.
Tools & Materials
- Safety glasses(ANSI Z87.1 rated)
- Insulated gloves(Electrical-grade if possible)
- Trim removal tool / plastic pry tool(To avoid panel damage)
- Flashlight or headlamp(Bright, focused light)
- Fuse puller(Plastic tool for safe removal)
- Replacement fuses (correct amperage)(Match diagram labels)
- Multimeter / voltmeter(For circuit testing if needed)
- Owner's manual / fuse diagram(Model-specific fuse map)
- Labeling tape and pen(Log fuse locations during work)
Steps
Estimated time: 30-60 minutes
- 1
Prep safely
Power down the vehicle, remove the key, and confirm there is no live contact. Put on safety glasses and insulated gloves. Remove any jewelry that could accidentally contact exposed terminals.
Tip: Use insulated tools and work on a non-conductive surface. - 2
Locate the fuse box under the dash
With the ignition off, inspect for a removable panel near the driver's knee or under the steering column. If unsure, consult the owner’s manual or fuse diagram on the cover.
Tip: Photograph the diagram for quick reference. - 3
Remove the panel cover
Gently pry the cover with a plastic tool, supporting the panel to avoid snapping clips. Keep track of any screws or clips for reassembly.
Tip: Work slowly to prevent cracking the cover. - 4
Identify the right fuse
Use the diagram to locate the fuse responsible for the affected circuit. Confirm the amperage rating printed on the fuse body and on the diagram.
Tip: If the diagram is worn, cross-reference with the manual. - 5
Inspect or test the fuse
Remove the fuse with the fuse puller and inspect for a blown filament. If testing, use a multimeter per the device manual.
Tip: Do not reuse a damaged fuse. - 6
Replace with the correct fuse
Insert a fuse of the exact amperage rating and type. Do not substitute with a higher rating.
Tip: Gently reseat the fuse until it clicks. - 7
Reassemble and reconnect
Re-seat the fuse panel cover, reattach any screws, and reconnect the battery negative terminal if you disconnected it.
Tip: Ensure all clips click into place. - 8
Test the circuit and verify
Turn the ignition on and operate the affected function to confirm it’s working. If it fails, recheck the fuse and wiring for shorts or damage.
Tip: If in doubt, stop and consult a professional.
Your Questions Answered
What fuse controls the dashboard lights, and how can I identify it?
Dashboard lights are typically controlled by a fuse in the instrument cluster. Check the fuse diagram on the fuse box cover for the exact label and amperage. If unsure, refer to your vehicle manual.
Dashboard lights fuse is labeled on the diagram; check the cover or the manual for confirmation.
Can I replace a fuse with a higher amperage rating if the fuse keeps blowing?
No. Replacing with a higher amp rating can overheat wiring and cause fire hazards. Always use the rated fuse for the circuit.
No—use the exact amperage rating; higher ratings can be dangerous.
Is it safe to access a fuse box under the dash in a modern vehicle?
Yes, with caution. Modern cars have sensitive electronics; follow the manual and safety steps, and avoid touching connectors while energized.
It’s generally safe if power is off and you follow the steps.
What should I do if a fuse keeps blowing after replacement?
There is likely a short or overloaded circuit. Turn off power, re-check connections, inspect for shorts, and consider professional diagnosis.
If it keeps blowing, stop and seek professional help.
Do all vehicles have a fuse box under the dash?
Not all cars have an under-dash fuse box; some place fuses behind panels in other areas. Always consult the manual or online diagrams for your model.
Not all cars have one under the dash.
What signs indicate a blown fuse or electrical fault beyond a fuse?
Dimming lights, non-working accessories, or a burnt smell may indicate a blown fuse or wiring issue. Use the diagram to locate and verify with a multimeter if needed.
Look for non-working components and check the fuse.
Watch Video
Highlights
- Power down before panel work.
- Follow the fuse diagram exactly.
- Use the same amperage rating when replacing fuses.
- Test circuits after reassembly to confirm function.
- Refer to your manual for model-specific details.