How to change a fuse box to circuit breakers safely
Learn how to safely change from a fuse box to a modern circuit breaker panel with a step-by-step approach, planning, permits, grounding, testing, and smart maintenance for long-term reliability.

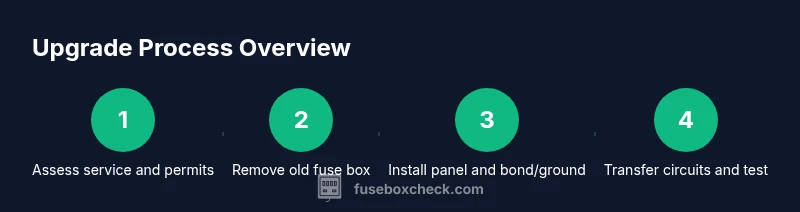
This guide helps you upgrade from a fuse box to a modern circuit breaker panel, boosting safety and reliability. You’ll plan, select a panel, obtain permits, rewire as needed, install and bond the panel, transfer circuits, and test thoroughly. Local codes may require professional installation, so verify permit requirements before you begin.
Why changing fuse box to circuit breakers matters
Changing fuse box to circuit breakers represents a major upgrade in home electrical safety and reliability. In this guide on changing fuse box to circuit breakers, you’ll learn why a modern breaker panel can deliver faster fault detection, easier resets, and improved compatibility with today’s electrical loads. According to FuseBoxCheck, many older fuse systems were not designed for today's power demands, and outdated wiring can hide safety risks. The FuseBoxCheck team found that rewiring and upgrading panels often reduces nuisance trips caused by aging fuses and provides a clear path for future expansions. This planning-focused approach emphasizes safety, compliance, and proper documentation. Remember, upgrading a fuse box to circuit breakers is not a quick weekend task for everyone; it requires careful planning, the right tools, and often a permit. By understanding the why and when, you can decide if you’re ready to tackle the upgrade or if a licensed electrician should handle the task.
Safety considerations and codes to know
Upgrading from a fuse box to circuit breakers involves high-risk work that touches the main service and potentially live conductors. Before you begin, review general safety practices and local electrical codes. Always assume that every conductor is live until proven safe. Wear rated safety gear, keep a clear working area, and maintain dry hands and a dry workspace. This transition also typically triggers permit requirements and inspections; even if you plan a DIY upgrade, you must verify code compliance and inspection steps in your area. FuseBoxCheck emphasizes that the safest path is to treat this as a regulated electrical project rather than a casual weekend task. If any part of the job seems unclear, pause and consult a professional.
Planning your upgrade: panels, service size, and permits
A successful change from a fuse box to circuit breakers begins with planning. Determine the service size of your home, the location of the existing panel, and whether the new panel will fit in the same footprint or require relocation. Check whether a main disconnect is present and whether the installation will require new grounding or bonding upgrades. Investigate permit requirements, inspection steps, and potential utility coordination. This planning stage also covers selecting a panel type (main breaker vs. main-lug), number of circuits, and compatibility with existing wiring. A well-documented plan helps prevent delays and ensures a cleaner, code-compliant upgrade.
Choosing a replacement panel and breakers
Select a panel that matches the service capacity and space constraints of your home. Look for a model that provides ample spaces for future circuits and includes clear labeling options. When choosing breakers, ensure they are compatible with the panel brand and meet your local code requirements. Consider a panel with a built-in main breaker for easier shutoff and improved safety. While higher-end panels can offer features like alternates for expansion, the simplest upgrade is often a tested, UL-listed unit installed according to the manufacturer’s instructions and electrical code. Keep in mind that some jurisdictions require a licensed electrician to perform panel upgrades; always verify with your local authority before purchasing equipment.
Wiring, grounding, and bonding essentials
Upgrading to circuit breakers often involves reconfiguring or extending feeders, neutrals, and grounds. Plan for proper neutral and grounding conductors, and ensure the grounding electrode system remains intact or is updated as needed. In many cases, you may need to route feeders using appropriate conduit and meet clearance requirements from walls, doors, and appliances. Label each circuit clearly and ensure that all splices are inside approved boxes. If you encounter damaged or corroded wiring, replace it or engage a professional. The goal is a safe, well-grounded system with isolation between line and load conductors to minimize the risk of shock and fire.
Installation steps overview
While the step-by-step section provides detailed actions, it helps to understand the general flow: remove the old fuse box, prepare the new panel, carefully install the panel into its enclosure, connect feeders and main disconnect, add branch circuits, and restore power for testing. All wiring should be done with the main service turned off and verified using a non-contact tester. Ensure that circuits are isolated during the transfer and that you follow the panel’s wiring diagram precisely. Any deviation may lead to miswired circuits or an unsafe installation.
Testing and final checks after installation
After wiring is complete and the panel is mounted, perform a systematic set of tests. Verify that the main disconnect operates, that each branch breaker trips correctly, and that neutrals and grounds are properly bonded. Use a multimeter to confirm voltages at representative outlets and check for unusual heat or buzzing near panels. Confirm labeling accuracy and document any changes for future reference. Finally, schedule a safety inspection and obtain the required approvals to ensure your upgrade meets local electrical codes.
Common mistakes to avoid when upgrading
Rushing through the project, skipping permits, or ignoring local codes are common mistakes. Overcrowding the panel with too few spaces can lead to overcrowded neutrals and trips. Neglecting proper equipment labeling can cause confusion during future maintenance. Inadequate grounding, improper bonding, or skipping a required bonding electrode can create safety hazards. Finally, using mismatched breakers or wiring not rated for the panel can compromise safety and void warranties.
Maintenance and future-proofing your panel
After completing the upgrade, maintain the panel by keeping it dry, accessible, and free from dust. Schedule periodic inspections, especially if you add new loads or appliances. Consider adding whole-house surge protection or a dedicated subpanel for high-demand circuits like HVAC. Keeping a spare breaker or two on hand speeds future repairs. By staying proactive, you reduce risk and extend the life of your electrical system.
Tools & Materials
- Non-contact voltage tester(To verify circuits are de-energized before handling conductors)
- Insulated screwdriver set(Phillips and flathead, insulated for panel work)
- Cable cutters/strippers(For clean cuts and proper stripping of conductors)
- Needle-nose pliers(Useful for manipulating wires and tightening connectors)
- Digital multimeter(For voltage measurements and continuity checks)
- Safety goggles(Eye protection at all times during panel work)
- Insulated work gloves(Minimum protection for handling live components (if present))
- Flashlight or headlamp(Better visibility inside panel enclosure)
- New circuit breaker panel(UL-listed, compatible with existing service and future expansion)
- Spares for breakers and labeling kit(Extra breakers and labeling labels for organization)
- Electrical tape and wire nuts(For secure splices and color-coding connectors)
Steps
Estimated time: 6-8 hours
- 1
Assess service suitability
Evaluate your home’s service size, panel footprint, and whether a circuit-breaker upgrade is feasible within local codes. This planning step reduces surprises later and helps determine permit needs.
Tip: Document findings with photos and notes to reference during permitting and installation. - 2
Shut off power and verify de-energization
Turn off the main disconnect and verify all conductors are de-energized using a non-contact tester before touching any wiring.
Tip: Double-check with testers at several outlets to confirm zero voltage. - 3
Remove the old fuse box and inspect wiring
Safely detach the fuse box and inspect the wiring insulation, conductor condition, and grounding path. Replace any damaged wiring as needed before panel replacement.
Tip: Do not reuse damaged conductors; plan replacements where necessary. - 4
Plan wiring routes and panel location
Choose a suitable panel location with adequate clearance and accessible wiring routes. Plan grounding upgrades if required by code and prepare conduit or cable routes accordingly.
Tip: Keep routes neat and label planned circuit paths for future maintenance. - 5
Mount the new panel and prepare feeders
Mount the circuit breaker panel, ensuring it is level and secured. Run feeders and grounds to the panel location according to the manufacturer’s instructions.
Tip: Use proper conduit, fittings, and strain relief to protect wires. - 6
Install main breaker and branch circuits
Install the main breaker, connect feeders, and begin wiring branch circuits. Follow the panel diagram and ensure correct breaker types for each circuit.
Tip: Do not mix breaker types; match amperage rating to wire size as per code. - 7
Grounding and bonding updates
Connect bonding conductors and ensure the grounding electrode system is properly bonded to the panel. Verify grounding paths meet code requirements.
Tip: Keep grounding connections clean and tight to minimize resistance. - 8
Label circuits and perform tests
Label each circuit clearly and test each breaker’s trip function. Confirm voltage at outlets and ensure no abnormal heat.
Tip: Create a labeling sheet to simplify future maintenance and troubleshooting. - 9
Power up and final checks
Restore power and perform final confirmation tests, including main disconnect operation, grounding integrity, and overall system function.
Tip: Document all changes and retain permit-related paperwork. - 10
Documentation and inspection
Submit the upgrade for inspection if required by local codes. Keep a maintenance log for future reference and safety.
Tip: Schedule periodic reviews to catch aging components early.
Your Questions Answered
Is it legal to upgrade a fuse box to a circuit breaker panel as a DIY project?
Legal requirements vary by location. Many areas require a permit and inspection, and some tasks must be performed by a licensed electrician. Check your local codes before starting.
Local codes often require a permit and licensed installation; verify with your building department.
Do I need a permit for this upgrade?
Most jurisdictions require a permit for panel upgrades to ensure compliance with electrical codes and safety standards. Obtain permission and schedule inspections as required.
Yes, a permit is commonly needed; contact your local building department to confirm.
What are common signs that my fuse box needs replacement?
Frequent fuse replacements, tripping breakers, burning smells, rusty or hot panels, or outdated wiring indicate a potential need for upgrade.
If you notice frequent trips or signs of wear, consult a professional.
Will upgrading the panel affect home insurance or fire safety?
Upgrading can improve safety and reduce risk, which may influence insurance considerations. Always inform your insurer about major electrical work.
Upgrading often improves safety; check with your insurer about any coverage changes.
How long does a typical upgrade take?
Most residential upgrades take several hours to a day, depending on the complexity, wiring conditions, and permit timeline.
Expect a multi-hour project that may stretch into a full day depending on conditions.
What safety gear should I wear during the upgrade?
Wear insulated gloves, safety goggles, and non-conductive footwear. Keep your workspace dry and free of clutter.
Put on gloves and goggles, and work in a dry area for safety.
Watch Video
Highlights
- Plan with local codes and permits before starting
- Use a compatible panel and correctly rated breakers
- Grounding and bonding are essential for safety
- Label circuits clearly for maintenance
- Test thoroughly before restoring full power