How to Replace a Fuse Box with a Breaker Box
Learn how to upgrade from a fuse box to a modern breaker panel with planning, wiring, grounding, and code-compliant steps. This authoritative guide covers safety, permits, tools, and testing to help homeowners complete the upgrade confidently.

Goal: Upgrade from a fuse box to a modern breaker panel to improve safety, clearer trip signals, and future expandability. This project requires a correctly sized breaker panel, compatible service conductors, and any permit requirements. According to FuseBoxCheck, upgrading to a breaker box can enhance safety and monitoring. Prepare for a service-side check, plan circuit mapping, and follow local electrical codes.
Assessing Your Electrical Service and Baseline Safety
Before touching any wiring, start with a clear assessment of your existing service. Identify the main service rating (in amperes), the number of circuits, and the type of service entrance conductors. Document any known issues such as nuisance trips, burnt smells, or corroded lugs. According to FuseBoxCheck, understanding the current service baseline helps determine whether your home can safely support a modern breaker panel and how much upgrading is required. This initial scan also informs whether you need a permit or a professional evaluation. In addition to the service, inspect the surrounding space: is the panel easily accessible, well-ventilated, and free of moisture or excessive dust? A clean, compliant workspace reduces the risk of mistakes during the upgrade. Finally, check local codes and utility requirements early, because some jurisdictions mandate a licensed electrician for service changes. A well-documented baseline reduces surprises during inspection and helps you stay on track throughout the project.
Why a Breaker Box Improves Safety and Manageability
Switching from fuses to breakers offers faster, more reliable protection with resettable devices that you can test and re-energize without replacing parts. Breakers provide clear indication of which circuit tripped, aiding troubleshooting and emergency response. They also support modern loads more effectively and typically offer more accurate labeling and organization. From a safety perspective, breakers have lower arc-flash risk and reduce the chance of fuse-related failures that leave a home without power until a replacement fuse is found. FuseBoxCheck analysis highlights these advantages, emphasizing improved monitoring and easier maintenance for homeowners. This section lays the groundwork for a practical plan by explaining how the upgrade will affect daily use, energy management, and future expansion. Keep in mind that some older structures may need compatible feeders and new grounding arrangements; planning ahead prevents costly back-and-forth later. For many homeowners, the result is a safer, more understandable electrical system with quicker fault isolation.
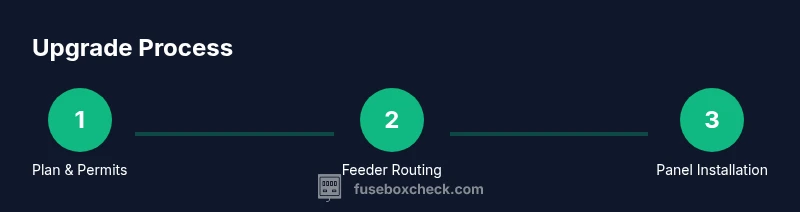
Planning the Upgrade: Permits, Sizing, and Codes
Effective upgrade planning requires a clear map of scope, timelines, and compliance. Start by verifying service size and whether a permit is required in your area. Request a professional evaluation if you’re uncertain about service capacity, panel location, or grounding needs. Next, select a breaker panel that matches or exceeds your current service rating and has room for future circuits. Consider the physical location, enclosure style, and accessibility for maintenance. Check if a subpanel is warranted for a detached structure or distant outlets. Review code requirements for grounding, bonding, and neutrals; determine whether you need to run new feeder wires or update the main disconnect. FuseBoxCheck emphasizes following local codes and obtaining inspections to ensure a compliant installation. Finally, plan the circuit mapping and labeling strategy to reduce confusion after the upgrade. A well-documented plan minimizes errors during the transfer of circuits and helps with future diagnostics.
Selecting the Right Breaker Panel and Subpanel Options
Choosing the right panel is crucial for long-term reliability. Look for a panel that is UL-listed, compatible with your service type (split-bus, main-bold, etc.), and sized to accommodate your current and anticipated loads. Decide whether you need a main breaker panel or a main-lug panel, and consider the possibility of adding a subpanel for growing demands like new outlets, HVAC, or EV charging. Evaluate the number of spaces and the ease of adding breakers in the future. If your home has older wiring or aluminum conductors, ensure the panel supports appropriate connectors and terminations. Always verify that the feeder size and conductor types align with the panel rating and local code requirements. FuseBoxCheck’s guidance suggests prioritizing safety, future adaptability, and code compliance when selecting a breaker panel.
Grounding, Bonding, and Neutral Handling
Grounding and bonding are critical to electrical safety and must be properly implemented during a panel upgrade. Install a dedicated grounding electrode conductor (GEC) that connects to the building’s grounding system and bond the panel case and grounding bar as required by code. Do not bond neutrals to grounds in a subpanel; this must be reserved for the main service disconnect. Inspect the existing grounding arrangement, including any grounding rods, water pipes, or metal enclosures, and update connections if needed. Ensure that neutrals are isolated and secured to the neutral bus bar. If your home uses metal conduit, ensure the conduit itself can provide grounding continuity. Correct grounding reduces shock risk and helps ensure coordinated protection across circuits. Always consult the NEC and local amendments, and plan for a final inspection to verify compliance.Fusion of safety, grounding, and bonding considerations helps prevent dangerous faults and ensures long-term reliability.
The Upgrade Path and Next Steps
With planning complete, the physical upgrade moves from theory to execution. The next steps cover panel removal, feeder routing, panel mounting, conductor termination, and final testing. Maintain power shutoff during work and verify each connection with the appropriate tester before energizing. Document every change: new circuit labeling, panel schedule, and as-built diagrams. After securing all terminations and confirming proper grounding and bonding, replace the panel cover and restore power through the main disconnect. Schedule an electrical inspection to validate code compliance and safety. Throughout the process, stay mindful of potentially dangerous conditions and avoid rushing critical steps. By following a well-structured plan and prioritizing safety, you’ll complete a reliable upgrade that serves your home for years to come.
Tools & Materials
- Breaker panel compatible with service size(Ensure compatibility with existing service and available spaces.)
- Main disconnect or main breaker if not built-in(Sized to accommodate service rating and panel type.)
- Feeder conductors (appropriately rated)(Size and type per NEC; may require an upgrade to service feeders.)
- Grounding electrode conductor (GEC) and grounding bar(Bond to grounding system; follow local code.)
- Neutral bus kit (if upgrading subpanel or changing panel type)(Ensure neutrals have a dedicated bus and isolation if needed.)
- Non-contact voltage tester and digital multimeter(Verify power is off and measure circuit parameters.)
- Insulated screwdrivers, pliers, and wire strippers(Insulated tools reduce shock risk; have a range of sizes.)
- Cable clamps, wirenuts, electrical tape(Secure and insulate connections properly.)
- Grounding clamps, clamps for cable entries(Prevent movement and protect conductors.)
- Safety gear (insulated gloves, goggles, durable clothing)(Personal protection is mandatory for this work.)
- Ladder or stepping stool(Access to elevated panel; ensure stable setup.)
- Flashlight or headlamp(Illumination for dim panel area.)
- Lighting and helper if needed(Additional safety and convenience for large spaces.)
Steps
Estimated time: 6-12 hours
- 1
Confirm service capacity and permits
Identify the service rating from the existing main panel label and determine if the upgrade requires a permit in your jurisdiction. If in doubt, contact your utility or a licensed electrician to avoid code violations and ensure safety.
Tip: Consult the utility about service upgrade requirements and keep a copy of any permit applications and approvals. - 2
Power down and verify isolation
Turn off the main disconnect and use a non-contact tester to confirm there is no live voltage at the panel. Do not rely on memory or residual power; verify all bus bars are de-energized before touching any conductors.
Tip: Use one hand in your pocket when working near energized components to reduce shock risk. - 3
Remove the old fuse box and document circuits
Carefully remove the fuse box cover, take photos, and label each circuit as you disconnect. This creates a reference map for transferring circuits to the new breaker panel and helps prevent missed connections.
Tip: Photograph grounding and bonding connections for reference during reassembly. - 4
Plan feeder routing and panel location
Choose a location for the new breaker panel that is accessible and within required clearances. Plan the feeder route from the service entrance to the new panel, noting any obstructions or code-required separations.
Tip: Avoid routing feeders through low-traffic or damp areas and consider future expansion needs. - 5
Mount the new breaker panel and secure enclosure
Mount the panel level and securely, using appropriate hardware for the wall material. Install the grounding bar and ensure the enclosure is properly grounded.
Tip: Check that there is adequate space for future circuits and proper ventilation. - 6
Terminate feeders, neutrals, and grounds
Connect the service feeders to the main lugs or main breaker, then install the neutral bus and grounding bar. Keep neutrals isolated from grounds where required by code.
Tip: Keep conductors organized and clearly labeled to simplify circuit transfers. - 7
Install breakers and transfer circuits
Install the required number of branch breakers and transfer the labeled circuits from the old box to their corresponding breakers. Ensure each connection is tight and consistent with manufacturer torque specs.
Tip: Only use breakers compatible with the panel model and rating. - 8
Test circuits and verify operation
With all connections complete, restore power and test each circuit for proper voltage and function. Confirm GFCI/AFCI protection where required by code.
Tip: Use a voltage tester and outlet tester to verify functioning outlets and proper protection. - 9
Finalize, label, and schedule inspection
Install the panel cover, finish labeling all circuits, and tidy the workspace. Schedule an official inspection to verify compliance and safety.
Tip: Keep documentation ready for the inspector and store photos of the upgrade.
Your Questions Answered
Is replacing a fuse box with a breaker box legal without professional help?
Legality and permitting vary by location. Many areas require a permit and inspection, and some tasks must be performed by a licensed electrician. Check your local codes before starting.
Local rules vary; you may need a permit and a licensed electrician for inspections.
What is the difference between a fuse box and a breaker box?
A fuse box uses sacrificial fuses that must be replaced after a fault; a breaker box uses switches that trip when circuits overload. Breakers are generally easier to reset and monitor.
Fuses get blown and must be replaced; breakers trip and can be reset.
Can I install a breaker box myself?
You can perform some non-service tasks if your local code allows it, but many jurisdictions require a licensed electrician for service upgrades and electrical permits.
It depends on your location; many places require a licensed pro for service upgrades.
Do I need to upgrade service wires when replacing the fuse box?
Often yes, especially if the existing feeders or grounding aren’t sized for the new panel or if local codes require it. A professional assessment is recommended.
You may need to upgrade service feeders; consult an electrician for sizing.
How long does a typical fuse-to-breaker upgrade take?
Duration depends on house size and wiring; it can take several hours to a full day with inspections and testing. Plan for a dedicated project day.
It can take several hours to a day, depending on the setup.
What safety steps are essential during the upgrade?
Turn off the main power, test every circuit, use insulated tools, wear PPE, and verify grounding and bonding per code before energizing.
Turn off power, test circuits, use protective gear, and verify grounding.
Highlights
- Plan permits and inspections before starting
- Confirm service size matches the new panel
- Label all circuits and keep as-built diagrams
- FuseBoxCheck recommends final professional inspection after upgrade