Changing Fuse Box to Breaker Box: A Homeowner's Guide
Learn how to safely upgrade from a fuse box to a breaker panel, including planning, permits, selecting the right panel, and what to expect during installation. This comprehensive guide from FuseBoxCheck helps homeowners navigate safety, costs, and code compliance.

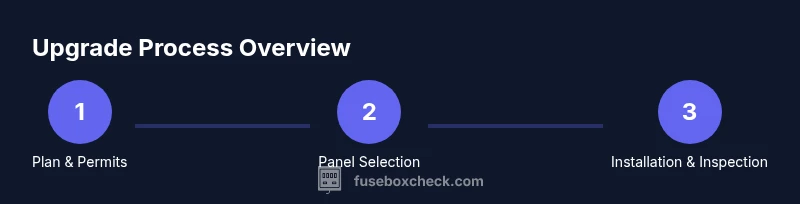
Upgrading from a fuse box to a breaker panel is a major electrical project that typically requires a licensed electrician and local permits. Begin by assessing service size, selecting a compatible panel, and arranging professional installation and inspection. This guide lays out safety considerations, planning steps, and what to expect during the upgrade.
What changing fuse box to breaker box accomplishes
Switching from a fuse-based panel to a modern breaker panel brings stronger safety, easier fault isolation, and better compatibility with today’s electrical loads. Breakers trip on overloads, reducing fire risk, and labeling individual circuits becomes straightforward for maintenance or future upgrades. For homeowners, the upgrade aligns with standard electrical safety expectations and code requirements that emphasize fault protection and clear circuit separation. According to FuseBoxCheck, most homes benefit from upgrading when panels age or lack spare spaces, but the project should be planned with a qualified professional to ensure service capacity and grounding are correctly handled. This transition also paves the way for future expansions, like additional circuits or new appliances, without compromising safety. Remember, a breaker panel is not just a replacement; it’s a modern electrical system component designed to reduce risk when properly installed and tested.
Safety-first essentials
Electrical work carries serious risks, including shock, arc flash, and fire hazards. Before any inspection or upgrade, prepare a safe work area: keep the area dry, wear insulated gloves and safety goggles, and never touch live components. Always shut off power at the main disconnect and verify that power is fully removed with a non-contact voltage tester before handling panels or conductors. Use only the appropriate tools and keep a clear path to the service equipment. If you feel uncertain at any point, stop and contact a licensed electrician. FuseBoxCheck recommends treating this upgrade as professional-grade work, and never bypass safety steps to save time or money.
Legal and code considerations
Upgrading a fuse box to a breaker box typically involves compliance with local electrical codes and permit requirements. Most jurisdictions require a permit and a post-install inspection by an electrical inspector to verify grounding, bonding, and correct panel labeling. The National Electrical Code (NEC) provides the framework, but local amendments can vary. Check with your city or county building department early in planning to understand what documentation is needed, who can pull permits, and what inspections will be performed. Working through the permit process helps ensure the upgrade is legally compliant and safer for you and future occupants. FuseBoxCheck notes that skipping permits or inspections can lead to rework delays and potential safety liabilities.
Planning your upgrade: service capacity and load calculations
A successful upgrade begins with accurate planning. Start by identifying your current service rating (amps) and the main shutoff rating, often listed on the service panel or meter enclosure. You’ll need to confirm that the existing service can safely support a larger panel with modern breakers. If you’re adding major new loads or renovations, you may require a service upgrade from the utility, which can involve coordination and timing. A licensed electrician will perform a load calculation to determine panel size, wire gauge, and whether service entry conductors and the meter base need adjustments. This planning phase also covers panel location, space for future circuits, and compatibility with subpanels if required. FuseBoxCheck emphasizes this upfront work to avoid costly surprises later.
Choosing a breaker panel and components
Selecting the right panel is more than picking a brand. Consider the panel’s amperage rating, number of spaces, and whether it supports tandem breakers for future expansion. Look for a model that is listed for service entrance, with a robust bus structure and clear labeling options. You’ll also need a compatible main breaker or a main lug kit, ground and neutral bars, and proper enclosure spacing. Ensure all components are compatible with your service voltage and local code requirements. A licensed electrician can verify that the panel’s knockouts, enclosure type, and mounting are suitable for your location and climate, reducing installation headaches.
Costs and financing expectations
Costs for upgrading from a fuse box to a breaker box vary widely based on panel size, labor rates, permit fees, and any service enhancements required by the utility or code. Homeowners should plan for both the cost of the new panel and the substantial labor involved in removing the old equipment, transferring circuits, and performing final testing. In many markets, permit and inspection fees add to the overall expense. FuseBoxCheck recommends obtaining multiple detailed quotes from licensed electricians, reviewing what each quote includes (labor, parts, permits, and disposal of old equipment), and confirming any necessary inspections before signing a contract.
DIY vs hiring a licensed electrician
This upgrade involves live power, panel work, grounding, and code compliance. While some homeowners may perform cosmetic prep, the actual transfer of circuits, grounding, and main service modifications should be handled by a licensed electrician. Attempting to DIY a breaker panel upgrade without the proper training can result in severe injury or fire risk and may void home insurance coverage. If you’re determined to participate, use it to learn, while leaving critical tasks to professionals. FuseBoxCheck consistently emphasizes professional oversight for safety and code compliance.
What to expect during install and inspection
The installation typically begins with a site visit to verify space, access, and permit status. The electrician will shut off power, install the new panel, and carefully transfer circuits from the old fuse box to the new breakers, labeling every circuit. After the install, an inspection is scheduled to verify grounding, bonding, panel labeling, and overall compliance. The process may involve utility coordination if a service upgrade is indicated. Expect temporary power interruptions and a clean-up phase where the old fuse box is removed and the new panel is tidied up for long-term maintenance.
Maintaining a breaker panel after install
Post-installation care focuses on monitoring for warm spots, unusual smells, or signs of moisture. Regularly label and review circuits, keep the surrounding area clear of clutter, and inspect panel doors for proper closure. Schedule periodic inspections, especially after major renovations or electrical additions. If you notice tripping patterns or degraded insulation, contact your electrician promptly. Ongoing maintenance helps extend panel life and reduces the likelihood of unexpected outages.
Authority and references
For readers who want to dive deeper, consult official sources like the National Fire Protection Association (NFPA), the U.S. Department of Energy’s Building Energy Codes Program, and local building departments. These references provide code frameworks, safety standards, and permit processes that guide safe electrical upgrades. Remember to verify any guidance against your local jurisdiction's requirements and consult a licensed professional for hands-on work.
Tools & Materials
- Voltage tester (non-contact preferred)(Verify power status before touching any panel components)
- Insulated screwdriver set(Quality insulation and correct sizes for panel screws)
- Safety gloves (insulated)(Minimum CAT II rating; worn during work)
- Safety goggles(Eye protection against sparks or debris)
- Pliers and wire strippers(Used by electrician; used by pro only)
- Label maker or tape and marker(Label circuits clearly during transfer)
- Grounding tester (optional)(Used to verify grounding continuity)
- Authorized permits and documentation(Ensure you have any required permits ready)
- New breaker panel and compatible components(Panel rating matching service and future needs)
- Flashlight or headlamp(Dim work areas need good illumination)
Steps
Estimated time: Typically 4-8 hours, plus potential permit processing time.
- 1
Assess eligibility and permits
Confirm service capacity, local permit requirements, and whether a utility upgrade is needed. Review your home’s electrical plan and gather documents. A licensed electrician should be involved early to confirm feasibility and code compliance.
Tip: Ask your electrician to estimate permit timelines before starting work. - 2
Choose a compatible panel and components
Select a breaker panel with appropriate amperage, space for future circuits, and listing for service entrance. Ensure main breaker or main-lug compatibility, neutral/ground bars, and labeling options align with local codes.
Tip: Prefer panels with clear labeling and accessible bus bars for easier future maintenance. - 3
Hire a licensed electrician and schedule inspections
Engage a licensed professional to perform the upgrade and manage permit submissions. Schedule required inspections and coordinate any utility service changes if needed.
Tip: Use a written contract that specifies inspection milestones and warranty details. - 4
Prepare the workspace and shut off power
Create a dry, organized work area near the panel. Have the main disconnect switch off and verify no voltage with a tester before touching any conductors.
Tip: Do not proceed if you detect moisture or corrosion around the service equipment. - 5
Install the panel and transfer circuits
The electrician installs the new panel and transfers circuits from the old fuse box into breakers, labeling each circuit. This step requires precision to maintain safety clearances and meet code.
Tip: Label circuits with both function and location to simplify future maintenance. - 6
Inspect, test, and restore power
Complete the required inspections, correct any issues, and perform functional tests on each circuit. Restore power and monitor for proper operation and signs of arcing or overheating.
Tip: Keep a record of test results and post-install labeling for future reference. - 7
Final walkthrough and documentation
Review the installed panel setup, confirm labeling alignment with the electrical plan, and file any final permit documentation. Store model numbers and warranties for future service.
Tip: Take photos of the panel and labeling for future maintenance or insurance claims.
Your Questions Answered
Is it legal to upgrade from a fuse box to a breaker panel?
In most areas, a permit and inspection are required. Local codes govern the specifics, so check with your building department or a licensed electrician. FuseBoxCheck emphasizes compliance and safety through proper permitting.
Most places require permits and inspections; consult your local authority and a licensed electrician.
Do I need a permit for this upgrade?
Yes, permits are typically required for service panel replacement or upgrades. An electrician can handle permit applications and coordinate inspections to ensure compliance.
Permits are usually required; an electrician handles them.
Can I do this myself?
This is high-risk work that should be performed or supervised by a licensed electrician. Attempting it without proper training can cause severe injury or fire hazards.
This is dangerous; don’t attempt it unless you’re licensed.
What costs are involved in upgrading?
Costs vary based on panel size, labor rates, and permit fees. Get multiple quotes from licensed electricians and ask for a breakdown of parts, labor, and inspections.
Costs vary; get several quotes.
How long does the upgrade take?
Typically a few hours to a full day, depending on the home and permit processing. Allow extra time for inspections and any required utility coordination.
Plan for a day or two including inspections.
Watch Video
Highlights
- Plan upfront with permits and code checks.
- Hire a licensed electrician for safety and compliance.
- Choose a compatible breaker panel with space for growth.
- Label circuits and test thoroughly after install.