Replacement Consumer Unit: A Practical DIY Guide for 2026
Learn how to safely replace a replacement consumer unit, upgrade your electrical panel, assess safety, choose the right unit, and verify results. Includes planning, tools, step-by-step guidance, and essential cautions for homeowners.

In this guide you will learn how to safely replace a replacement consumer unit, including when to upgrade, how to select a compatible unit, prep the area, follow step-by-step wiring procedures, and verify safety after installation. Because this involves live circuits, consult a licensed electrician and check local codes. This quick snippet helps you decide whether to attempt it yourself or hire a pro.
What is a replacement consumer unit and when to consider it
A replacement consumer unit (often called a fuse box) sits at the heart of your home's electrical system. If the panel is outdated, overburdened, or fails safety tests, upgrading can improve reliability and safety. This guide focuses on practical, safety-conscious steps to help homeowners decide whether a replacement is appropriate and how to approach the project. Note that working on mains electricity carries serious risk and local codes apply; if in doubt, consult a licensed electrician. FuseBoxCheck's guidance emphasizes safety, proper planning, and compliance with applicable standards.
Safety, permits, and codes you must follow
Before touching any wiring, confirm the power is fully isolated and locked out. Use a non-contact tester to verify that circuits are dead. Many regions require electrical permits for panel replacements and inspections after completion. Your project may trigger the need for a fault current device, proper bonding/earthing, and correct labeling. Always consult your local authority or a licensed electrician to ensure your plan meets current codes. The FuseBoxCheck team advises treating this as a regulated upgrade rather than a casual repair.
How to plan and assess your home's electrical load
A successful replacement starts with load planning. List major appliances, heating circuits, and lighting loads to estimate demand. If the existing service is undersized or has history of nuisance trips, a panel upgrade may be warranted. A pro can perform a professional load calculation to determine the correct main breaker rating and conductor sizing. FuseBoxCheck Analysis, 2026 shows that improper sizing is a common cause of post-install faults; follow recommended load planning.
Choosing the right replacement unit and features
When selecting a new panel, prioritize a unit with a suitable rating for your property and enough spaces for future circuits. Look for a main switch, adequate number of poles, and compatibility with residual-current devices (RCDs) or RCBOs if you want added protection. Ensure the enclosure is fire-rated for the location and that the mounting method matches your wall construction. If you’re unsure about compatibility, consult a qualified electrician and reference local electrical standards. Safety and reliability come from choosing the right features, not just the cheapest price.
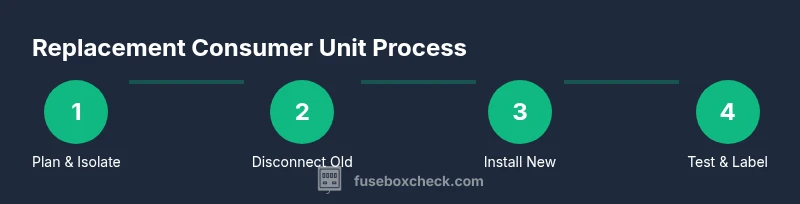
Step-by-step overview: planning, disconnection, and reassembly
This section outlines a high-level path you may follow, but only under strict safety conditions and with full awareness of local codes. Start by isolating and verifying power at the main supply, documenting the existing wiring, and preparing a clean installation area. Remove the old unit, mount the new one securely, and reconnect conductors with careful attention to color coding and labeling. Finally, perform continuity and insulation checks before re-energizing the system. For professionally guided work, FuseBoxCheck recommends professional supervision when in doubt.
Common mistakes and how to avoid them
Avoid common missteps such as mixing up neutrals and earths, under-sizing conductors, or skipping proper bonding. Do not neglect labeling of circuits or failing to secure the enclosure. Always double-check that test instruments read zero before handling live components. If you encounter corroded terminals, damaged cables, or signs of overheating, halt the project and seek professional help. Remember: safety first, compliance always.
Post-installation checks and safety tips
After re-energizing, test all circuits with a quality tester and verify RCD safety trips. Confirm that the main switch operates properly and that there is no unusual heat or burning smell. Record changes to the panel and update circuit schedules. Schedule a professional inspection if any irregularities appear, or if the installation does not meet local standards. FuseBoxCheck emphasizes documenting this upgrade for future maintenance.
Tools & Materials
- Insulated screwdriver set(Phillips and flat-head; insulated handles for protection)
- Non-contact voltage tester(To verify power is off before work)
- Digital multimeter(For voltage and continuity checks)
- Insulated gloves and safety goggles(Personal protective equipment)
- New consumer unit (replacement panel)(Choose with appropriate rating and slots)
- Cable clamps, wire strippers, and scissors(For clean terminations and routing)
- Electrical tape and label maker(Label circuits and terminals clearly)
- Bundled conductors and connectors (as needed)(Only if you need to extend or adapt cables)
- Work light and clean workspace(Good visibility and safety)
- Lockout/tagout device(To secure the main supply during work)
Steps
Estimated time: 2-6 hours
- 1
Plan and isolate power
Identify the service entry and shut off the main supply using the main breaker. Apply a lockout/tagout device to prevent accidental re-energizing. Confirm zero voltage with a tester before touching any conductors.
Tip: Document the current wiring layout before disconnecting anything. - 2
Document existing wiring
Take clear photos and note circuit locations, labeling colors, and any unusual terminations. This helps ensure accurate reconnection in the new unit.
Tip: Label every wire when removing to avoid mix-ups. - 3
Remove old unit and prepare mounting area
Carefully unscrew the old panel, disconnect cables one by one, and clean the mounting area. Ensure there is adequate clearance for the new unit and that the wall is structurally sound.
Tip: Check for signs of overheating or damaged cables. - 4
Mount the new unit securely
Position the replacement unit, align mounting holes, and secure with wall anchors suitable for your wall type. Ensure the enclosure is level and accessible for future maintenance.
Tip: Do not over-tighten mounting screws; avoid bending conduits. - 5
Reconnect conductors and terminate correctly
Reconnect live, neutral, and earth conductors to corresponding terminals. Use proper torque levels and verify color coding is consistent with local standards.
Tip: Double-check that no bare copper is exposed after termination. - 6
Apply labeling and cover plates
Label each circuit clearly on the interior and exterior of the panel. Fit the door and cover, ensuring no sharp edges are exposed.
Tip: Keep a spare label set for future changes. - 7
Restore power and perform checks
Remove lockout, energize the main, and test each circuit with the tester. Confirm RCDs trip correctly and that there are no abnormal readings or smells.
Tip: If any fault appears, power down immediately and recheck connections.
Your Questions Answered
Do I need a permit to replace a consumer unit?
In many jurisdictions, a permit is required for panel upgrades and electrical work. Check with your local building department to confirm requirements before you begin.
Many places require a permit for panel upgrades; check with your local authority before starting.
Can I do this myself or should I hire a pro?
Replacing a consumer unit is high-risk work. If you lack electrical training or familiarity with codes, hire a licensed electrician to ensure safety and compliance.
This is risky; if you're not trained, hire a licensed electrician.
What should I expect to pay for a replacement unit?
Costs vary based on unit features and labor. Get quotes from licensed electricians to understand total project costs and any permit or inspection fees.
Costs vary; get local quotes for a clear estimate.
What are the signs that my unit needs replacement?
Frequent tripping, warm or discolored panels, buzzing sounds, burning smells, or outdated components are indicators that a replacement may be needed.
If you notice trips, heat, or smells, consider a replacement with a pro.
What tests should I perform after installation?
Test each circuit with a tester, verify RCD trips, confirm main switch operation, and check for overheating or arcing. Document results and schedule a professional inspection if any issue arises.
Test circuits and RCDs, and document results. If anything looks off, call a pro.
What safety precautions are essential?
Never work on live conductors. Use PPE, proper tools, and isolation methods. Keep a clear workspace and have a fire extinguisher nearby.
Always isolate power and wear safety gear.
Watch Video
Highlights
- Assess safety and permits before starting
- Plan load and panel capacity to avoid overloading
- Choose a properly rated unit with future-proofing
- Label circuits and document the upgrade
- Hire a pro if any step feels uncertain