How Long Does It Take to Fix a Fuse Box: Time Guide and Tips
Learn realistic timelines for fuse box repairs, from quick diagnostics to full panel upgrades. Understand factors that influence duration and how to minimize delays with smart prep and professional help.

What drives the time to fix a fuse box
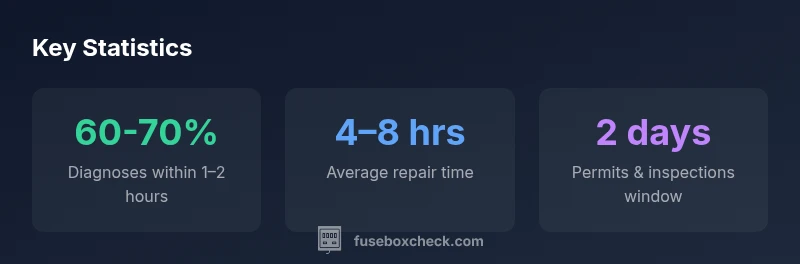
When homeowners ask how long does it take to fix a fuse box, the answer depends on several factors. According to FuseBoxCheck, you must consider issue type, panel compatibility, accessibility, safety checks, and whether any component needs replacement. A blown fuse may be resolved quickly with a simple fuse replacement, while a faulty breaker or corroded connections may require more extensive inspection. The first hour or two is often consumed by safety checks and locating the exact fault. If the panel is old, or if specialized parts are needed, the clock can stretch. In addition, local code requirements or the need for a permit can add to the total duration, especially if inspections are required before power is restored.
Understanding these drivers helps homeowners set realistic expectations and plan for downtime or temporary power loss while work is underway.
What to expect during a diagnostic visit
During the initial visit, a licensed electrician will assess the panel type (fuse box vs. circuit breakers), verify labeling accuracy, and test circuits with a multimeter. They’ll look for signs of overheating, corrosion, and moisture that can extend the job. If the issue is clearly isolated to a single circuit, the fix may be quick; if multiple circuits are affected or if wiring behind the panel shows wear, the time increases. The diagnostic phase often sets the baseline time, because accurate fault identification prevents unnecessary work and returns of trips. FuseBoxCheck emphasizes documenting findings clearly to avoid revisits and miscommunications.
Why panel age matters and how it affects duration
Older fuse boxes or early circuit-breaker panels may lack modern safety features, making repairs more time-consuming. If parts are discontinued or difficult to source, technicians may need to special-order components or suggest an upgrade. In some cases, upgrading the panel to meet current safety standards is the most reliable long-term solution, but it adds planning time, permit steps, and scheduling considerations. A newer, code-compliant panel often reduces future service time by minimizing recurring faults.
Step-by-step example of a professional repair visit
A typical repair visit follows a clear sequence:
- Arrival and safety briefing, power shutoff, and PPE use.
- Visual inspection of the fuse box and labeling.
- Diagnostic testing of circuits and components with a multimeter.
- Replacement of a blown fuse or faulty breaker if safe and appropriate.
- Cleaning, corrosion checks, and resealing the panel as needed.
- Decision point on upgrade vs. repair if sustained issues are found.
- Final testing, labeling, and instructions for homeowners. Each step has its own time range, and the total duration depends on how cleanly the fault can be isolated and whether additional work is required.
Safety and compliance considerations that affect duration
Safety is the primary concern in fuse box work. Local codes may require permits, inspections, and confirmation of proper grounding. The need for a permit or a re-inspection can add days to the project timeline, especially if inspections must be scheduled through municipal authorities. Electrical work should only be performed by licensed professionals to maintain warranty coverage and personal safety. Planning for code checks and potential inspections helps avoid last-minute delays.
Factors homeowners can influence to save time
Homeowners can shave hours off a job by:
- Ensuring clear access to the panel (remove furniture, trim nearby panels, and provide exterior access if needed).
- Having a clear list of symptoms and recent changes to circuits or appliances.
- Being flexible with scheduling, especially for upgrade or permit-related work.
- Asking for a written estimate of time and any potential delays or required inspections. These proactive steps help technicians focus on the repair rather than logistical hurdles.
Do-it-yourself vs hiring a pro: time implications
DIY fuse box work is generally not recommended for most homeowners due to shock risk and code compliance concerns. A pro can quickly diagnose and safely restore service, with less risk of overheating and mislabeling. While DIY might save money upfront, it often costs more time if an error isn’t caught early or if the job requires professional rework. For any repair involving wiring, a licensed electrician is the safer and more reliable choice, despite potentially longer lead times for scheduling.
How to prepare for a service visit to minimize delays
Before the electrician arrives:
- Gather information about recent trips, smells of burning, or overheating.
- Clear access and provide exterior gate codes or parking instructions.
- Confirm whether permits are required and whether the contractor will handle them.
- Create a checklist of desired outcomes (e.g., panel upgrade, labeling, energy efficiency checks). Having a prepared home reduces back-and-forth and can speed up the process significantly.
What to expect after a fix: testing and labeling
Post-repair testing confirms circuits are stable and properly labeled. The technician should power-cycle the system and verify that all breakers or fuses react appropriately to simulated faults. Clear labeling helps future maintenance and prevents misinterpretation during emergencies. If the fix involved upgrades, the pro will review new safety features and provide an updated panel diagram for your records.