How Long Does It Take to Upgrade a Fuse Box?
Learn how long a fuse box upgrade typically takes, what factors affect the timeline, and how to prepare. This practical guide from FuseBoxCheck helps homeowners understand permitting, inspections, and safety considerations.

Why Upgrade Time Varies
The duration of a fuse box upgrade hinges on several factors. Panel size and amperage determine how much wiring and panel hardware must be replaced or rearranged. The number of circuits, the accessibility of the panel, and the overall condition of the existing wiring also play a crucial role. Permits and required inspections add additional scheduling layers. In short, small, simple upgrades can be quick, while larger homes with older wiring and strict local codes will extend the timeline.
What Typically Triggers Longer Timelines
Several conditions commonly extend the duration of an upgrade. If the panel location is cramped, if the wiring requires rerouting through finished walls, or if older components must be replaced to meet current safety standards, the job becomes more labor-intensive. Weather, access to the panel, and coordinating with a utility shut-off can also add hours or days. Understanding these triggers helps homeowners plan more effectively.
Typical Milestones in a Fuse Box Upgrade
A typical project proceeds through assessment, permit application (if required), power shutdown and safety checks, removal of the old panel, installation of the new panel, wire routing and labeling, and final testing with inspections. Each step has its own safeguards to prevent shock and fire. Expect several discrete tasks rather than a single, uninterrupted process.
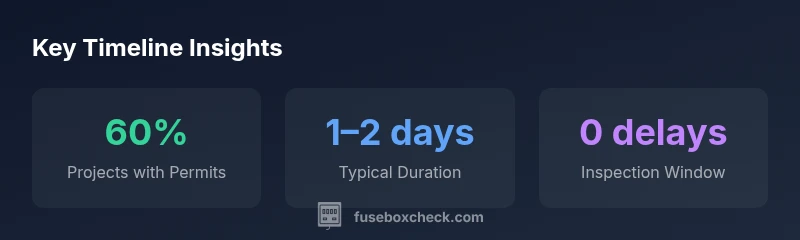
Permitting and Inspections Impact on Schedule
Permits require paperwork, scheduling, and sometimes utility coordination. Inspections can introduce delays if the inspector cannot attend within the agreed window or if corrections are needed. Discuss timelines with your electrician and ask for a written schedule that includes milestone dates and contingency time. These steps are essential for code compliance and long-term safety.
Safety, Access, and Site Preparation
Safety is the top priority during a fuse box upgrade. Clear access to the panel, remove obstructions, and secure pets or children during power-off periods. Labeling circuits in advance helps the installer work more efficiently. If you can prepare a dedicated workspace near the panel and minimize changes to walls around the area, you’ll reduce the risk of delays.
DIY vs Professional: Time Implications
A fuse box upgrade is not a DIY project. Professional electrical work ensures code compliance, proper grounding, and safe operation. While a capable homeowner might handle planning, the actual upgrade should be performed by a licensed electrician, who can complete the job efficiently and safely, with appropriate permits and inspections.
Preparing Your Home to Save Time
Before the upgrade, gather any available electrical plans, photos, and a list of any known issues. Discuss the expected schedule and potential contingencies with your electrician. Having this information ready can shorten decision-making time on the day of install and prevent delays.
What to Expect with Your Electrician Schedule
A knowledgeable electrician will provide a timeline that includes prep, shutdown, installation, testing, and inspection. Some steps can run concurrently, such as wiring a new panel while preparing the labeling system. Ask for daily milestones and a plan for adverse weather or unexpected findings.
Case Scenarios: Small Home vs Large Home
In a small home with a modern panel, upgrades may wrap up in a single workday. In larger homes or older neighborhoods where inspections are strict, you might see multi-day timelines. Your electrician will tailor the plan to your home’s specific needs and local requirements.