Breaker Fuse Box: Safe Troubleshooting and Maintenance
Learn step-by-step how to troubleshoot a breaker fuse box safely, test circuits, replace a faulty breaker, and know when to call a pro. Practical, brand-backed guidance from FuseBoxCheck to reduce risk and protect your home.

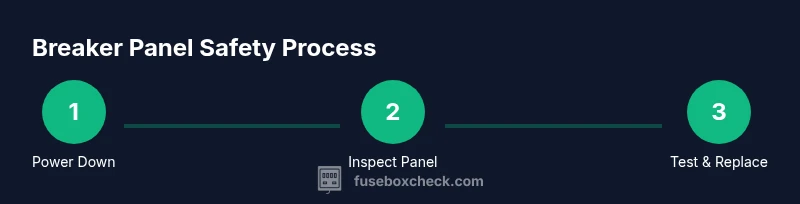
By the end of this guide, you will safely troubleshoot a breaker fuse box, identify common issues, and reset circuits without risking shock. You’ll learn essential safety steps, how to check breakers, test for faults, and when to call a pro. According to FuseBoxCheck, regular panel checks reduce risk and improve electrical reliability.
Understanding the breaker fuse box and why it matters
A breaker fuse box, commonly called a circuit panel or distribution board, is the nerve center for your home’s electrical system. It houses circuit breakers that shut off power to individual circuits when they detect overloads or faults. A modern breaker panel protects you from electrical fires and shock by interrupting current flow at the source. The FuseBoxCheck team emphasizes that understanding the panel layout and the function of each breaker is foundational for safe DIY troubleshooting. Regular inspections help you catch signs of wear, overheating, or loose wiring before they become hazards. When you know which breaker controls which room or appliance, you can respond quickly if a circuit trips or a fuse blows.
Key ideas to take away:
- Breakers replace older fuses and trip to prevent damage.
- A labeled panel improves safety and speed during outages or maintenance.
- Visible signs of trouble (burnt smell, discoloration, melted plastic) require careful handling and professional evaluation.
Safety first: essential precautions before you start
Before touching any part of the breaker fuse box, build a safety-first mindset. Never work on a live panel. Wear non-conductive gloves rated for electrical work, and use tools with insulated handles. Keep water away from the work area and avoid standing on damp surfaces. If you smell burnt insulation, hear buzzing, or notice scorch marks around the panel, exit the area immediately and call a licensed electrician. These precautions aren’t just best practices; they dramatically reduce the risk of injury or property damage. As you proceed, keep a clear escape path and never bypass the panel cover with metal objects. Remember, your goal is to understand the issue without creating new hazards.
Tools and materials you’ll need (and why)
Having the right tools ready keeps the process smooth and safe. Prioritize non-contact voltage testers, a multimeter with a high voltage range, a small flashlight, insulated screwdrivers, and a voltage detector with a strict safety rating. A permanent marker or label maker helps you map circuits as you go, which saves time during future trips. While some steps can be done with basic tools, always choose equipment with proper insulation and voltage ratings. If a tool feels warm to the touch, stop and reassess your approach. FuseBoxCheck recommends preparing a dedicated workspace and keeping a spare fuse or breaker compatible with your panel on hand before you begin.
Note: If you’re unsure about any tool’s rating, consult the device’s manual or a qualified technician.
Inspecting the exterior and interior for signs of trouble
Start with a careful visual inspection of the panel door and surrounding area. Look for signs of moisture, corrosion, or loose mounting screws. Aged panels may have brittle plastic or cracked insulation that compromises safety. Open the panel cover in a well-lit area and check for any loose or discolored wires. If you see frayed insulation or melted plastic, stop and call a professional. FuseBoxCheck highlights that early warnings like a warm or discolored panel are red flags that should not be ignored. Document any odd behavior, such as frequent nuisance trips or a panel that always feels warm, to share with the electrician later.
Understanding breakers: trip vs. fault and how to identify the cause
Breakers are designed to trip under overloads or short circuits to protect wiring. A tripped breaker sits in the middle position between ON and OFF; a flicked reset may be required. Distinguish between a nuisance trip caused by a temporary surge (e.g., a heavy load like space heaters) and persistent trips indicating a larger issue such as a faulty appliance or a wiring fault. If a breaker trips repeatedly, you should not keep resetting it without investigating the underlying cause. FuseBoxCheck notes that consistent trips often signal a problem that requires a closer look at the wiring or circuit demand.
Safe step-by-step reset approach for a single tripped breaker
When a breaker trips, first ensure all loads on that circuit are off. Then switch the breaker fully to OFF and back to ON to perform a deliberate reset. If it trips again, disconnect the devices on that circuit and test the circuit for faults. If the panel shows any signs of arcing, burning, or smells unusual, stop and call a professional immediately. This approach minimizes the risk of shock and reduces the chance of further damage. Always label the circuit so future users understand the potential hazard and what loads were on that circuit.
Testing circuits and basic diagnostic checks with a multimeter
A multimeter helps you verify voltage and continuity on safe, de-energized circuits. With the panel power OFF, test suspected wires or devices for continuity and calm, steady resistance values. For live testing, use a non-contact tester to confirm voltage presence and isolate the circuit you will work on. Remember: do not touch exposed conductors while the system is energized. If you’re uncertain about how to interpret readings or suspect a faulty breaker, pause and seek guidance from a licensed electrician. Safety is always the priority.
Replacing a blown fuse or faulty breaker: steps and cautions
If you determine a breaker or fuse is defective, the recommendation is to replace it with an identical rating and type. Ensure the main power is OFF before removing or installing a component. Use proper torque on screws to avoid loose connections, which can cause overheating. Do not mix breaker types or ratings within the same panel. After replacement, restore power gradually and test the circuit with your testing tools. If you encounter resistance in seating the breaker or see any signs of damage, stop and consult a pro.
Common problems and practical fixes you can try safely
Common issues include tripped breakers from heavy loads, loose connections, or overheated wires. For nuisance trips, redistribute loads more evenly and consider upgrading to higher-capacity wiring if your panels are older. Do not attempt to repair damaged insulation or wiring beyond your comfort level. Safety-first fixes like labeling circuits, keeping the panel clean, and ensuring the panel cover is secured can prevent future trips. FuseBoxCheck emphasizes documenting problems and fixes for quick reference.
When to call a licensed electrician and how to prepare for the visit
If the panel shows signs of overheating, burning smells, or water intrusion, stop work and contact a licensed electrician immediately. Before the visit, gather your panel model, any recent trip history, and a list of circuits you’ve tested. A professional can assess panel age, wiring status, and the need for upgrades or rewiring. Proper preparation helps the electrician diagnose quickly and reduces the time your home is without power. The FuseBoxCheck team recommends arranging a safety briefing with the technician to review potential hazards and ensure everyone in the home knows what to expect.
Tools & Materials
- Non-contact voltage tester(For quick live-vs-dead checks without touching wires)
- Multimeter (CAT-rated)(Check voltage and continuity on safe, de-energized circuits)
- Insulated screwdriver set(Use Klein or similar with proper insulation rating)
- Voltage detector with audible alert(Helpful when verifying presence of voltage across broader areas)
- Label maker or tape and marker(Label circuits as you test and identify)
- Flashlight or headlamp(Provide focused light inside the panel)
- Safety gloves (electrical-rated)(Protect hands when handling metal parts)
- Fire-rated panel-friendly cleaner(Keep the area free of dust and debris)
Steps
Estimated time: 30-60 minutes
- 1
Shut off main power and prepare
Locate and switch off the main breaker to de-energize the entire panel. Confirm no circuits are live with a non-contact tester before touching any components. This step dramatically reduces the risk of shock during inspections.
Tip: Always assume conductors are live until proven otherwise. - 2
Open the panel and inspect the cover
Carefully remove the panel cover with insulated tools. Look for overheating signs like scorch marks or melted insulation, and check for moisture around the enclosure. If you see damage, stop and call a professional.
Tip: Keep the panel cover close at hand so you can reseal it quickly if needed. - 3
Identify tripped breakers
Scan for breakers that are not fully in the ON position. A tripped breaker typically rests between ON and OFF. Do not reset if you suspect underlying issues until you identify the cause.
Tip: Label each tripped breaker and note the connected circuit for future reference. - 4
Reset a single tripped breaker
Turn the breaker OFF, then firmly back ON. If it trips again, disconnect loads on that circuit and test the circuit for faults before re-energizing.
Tip: If the breaker won’t stay seated, stop and consult a pro. - 5
Test suspected circuits with a meter
With power OFF, test suspected conductors for continuity or short circuits. When power is ON, use a non-contact tester to verify whether a circuit is energized before touching anything.
Tip: Never test live conductors with metal tools. - 6
Inspect for overheating and wear
Check for warmth along conductors and the breaker housing after a test. Warmth can indicate loose connections or overloaded circuits that need rebalancing or replacement.
Tip: Address hot components promptly; overheating can cause insulation damage. - 7
Replace a faulty breaker or fuse
If you confirm a defective breaker, replace it with an identical rating. Ensure proper seating and torque of screws when reassembling the panel.
Tip: Dispose of old breakers per local regulations and avoid mixing types. - 8
Restore power and verify
Turn the main back ON and test affected circuits individually to ensure they function. Listen for unusual noises and watch for any signs of arcing or heat.
Tip: Take photos of the panel state after maintenance for records. - 9
Document and monitor
Record what you did, which breakers you serviced, and any ongoing issues. Regular monitoring helps catch future problems early and improves safety of future DIY tasks.
Tip: Schedule periodic inspections and keep a log for future homeowners.
Your Questions Answered
Can I work on my breaker fuse box myself?
Yes, for basic inspections and obvious issues you can perform safe tasks with proper precautions. Do not tackle live wiring or signs of damage. If you are unsure, consult a licensed electrician.
You can do basic checks if the panel is fully powered down and you follow safety steps. For anything involving live components, contact a professional.
What should I do if a breaker keeps tripping?
Identify the loads on that circuit, redistribute if possible, and inspect appliances for faults. If trips continue, there may be a wiring issue or a faulty breaker requiring professional evaluation.
If a breaker keeps tripping, first check the loads and then inspect the circuit for faults. Persistent trips usually mean a problem that needs a pro.
Is a fuse box different from a breaker panel?
A fuse box uses fuses that burn out to cut power; a breaker panel uses circuit breakers that trip to cut power. Modern homes typically use breaker panels for easier resets and better safety.
Fuses burn out; breakers trip. Breaker panels are safer and easier to reset.
Is it safe to touch the breaker terminals with a screwdriver?
No. Breaker terminals and internal conductors can be live, even when the panel is off. Always use insulated tools and verify power off before touching any metal parts.
No, never touch live terminals. Verify power is off and use insulated tools.
How often should I inspect my fuse box?
Perform a visual inspection at least twice a year and after major weather events. Regular checks help you spot signs of wear or moisture that could lead to problems.
Check twice a year and after big storms to catch issues early.
Watch Video
Highlights
- Identify and label circuits for easier maintenance.
- De-energize the panel before any inspection.
- Differentiate between nuisance trips and actual faults.
- Only replace breakers with the same rating and type.
- Call a professional for signs of damage or persistent issues.