DIY Fuse Box Replacement: Safe Home Electrical Guide
Learn how to assess, plan, and safely perform a fuse box replacement with practical steps, tool lists, safety tips, and when to hire a licensed electrician.

With this guide, you’ll safely determine whether a fuse box replacement is feasible for a homeowner and execute a controlled DIY approach. You’ll learn when to stop and hire a licensed electrician, what tools you’ll need, and the critical safety steps before starting. Always verify service disconnect and follow local code requirements.
Understanding fuse boxes and why replacement matters
A fuse box is the central hub of your home’s electrical system, distributing power to circuits through fuses that protect wires from overheating. As panels age, corrosion, worn insulation, or brittle wiring can develop, increasing the risk of electrical fires, nuisance trips, or unreliable service. Replacing an aging fuse box is a substantial project that touches live conductors, grounding systems, and overcurrent protection. For homeowners, recognizing the signs—frequent blown fuses, burning smells, hot panels, or arc flashes—is crucial. According to FuseBoxCheck, many DIY attempts fail to address code compliance or main service disconnect safety adequately, underscoring the importance of careful planning and strict adherence to safety rules. This section provides a framework to decide whether a DIY replacement is appropriate or if it’s wiser to consult a licensed electrician.
Key takeaways:
- Replacements should prioritize safety, grounding, and correct overcurrent protection.
- Code compliance is essential to prevent hazards and insurance issues.
- When in doubt, seek professional evaluation before proceeding.
Safety first: when DIY is appropriate and when to call a pro
Electrical work is inherently hazardous. A fuse box replacement involves the service disconnect, neutral and ground connections, and multiple branch circuits. For a DIY attempt to be prudent, you must have the right training, the ability to de-energize safely, and a plan for testing. Always confirm your local electrical code requirements and permit requirements before starting. If your panel is not clearly labeled, if you notice scorch marks, or if the service disconnect is difficult to access, stop and call a licensed electrician. The FuseBoxCheck team highlights that major panel work typically requires professional handling due to the risk of shock, arc flash, and improper grounding. Always use insulated tools, wear PPE, and never work on a live panel. If you smell burning, hear buzzing, or see melted insulation, evacuate and contact emergency services as needed.
Planning your fuse box replacement: codes, permits, and choosing a panel
A well-planned replacement starts with selecting a panel rated for your home’s load and future needs. Common modern options include a main service disconnect and a distribution panel with adequate spaces for circuits, expansion, and proper labeling. Check that the panel is physically compatible with your service rating and that the enclosure clearance meets manufacturer specs and local codes. Permits are often required for any panel replacement, and inspections verify safety features like proper grounding, bonding, and correct wiring methods. Consider accessibility, panel location, and whether to move the box to a more centralized or code-compliant spot. This planning phase reduces surprises during installation and supports safer, long-term operation.
Tools and materials you will need
Having the right tools minimizes risk and keeps the project organized. A well-prepared toolbox should include insulated screwdrivers, a multimeter or non-contact voltage tester, a voltage tester, a torque screwdriver, wire strippers, and proper personal protective equipment (PPE) such as safety glasses and insulated gloves. You’ll also need a lockout/tagout device to secure the main power while you work, a replacement fuse box or panel kit that matches your service rating, grounding and bonding conductors as required, and a detailed circuit labeling plan. Gather compatible wire nuts, electrical tape, and a meter to verify continuity and resistance after connections. Planning your tool list ahead of time helps you avoid mid-project trips to the hardware store and keeps you focused on safe, incremental progress.
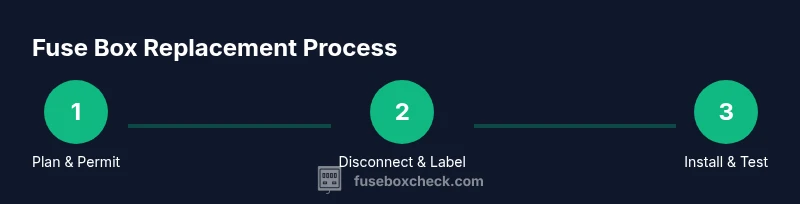
The replacement process at a high level (without step-by-step details)
At a high level, a fuse box replacement involves verifying power is off at the main service disconnect, removing the old panel cover, and labeling existing circuits. You’ll transfer circuits to the new panel carefully, ensuring correct phasing and neutral/ground separation. The main service disconnect, meter-side wiring, and service conductors must be maintained in accordance with electrical code. Grounding and bonding connections must be correctly re-established, and all connections tightened to manufacturer torque specs. After wiring is complete, the panel is mounted in its new location, the cover is installed, circuits are re-labeled, and power is restored in a controlled fashion with careful testing of each circuit for proper operation. Throughout, follow your local code requirements and safety protocols. The aim is a safe, reliable panel that protects wiring and occupants from electrical hazards while meeting current standards.
Testing and commissioning after installation
Testing should be performed with the main disconnect off, then progressively energized while monitoring for unusual signs. Verify each circuit trips appropriately with load testing where permitted, confirm grounding and bonding resistance readings are within acceptable ranges, and ensure the neutral bus is correctly isolated from the ground in subpanels. Use a calibrated multimeter to check voltage levels at the main lugs and at a representative sample of branch circuits. If any abnormal readings occur, recheck connections, torque, and labeling. Document findings and keep a copy of the panel labeling and inspection results. FuseBoxCheck emphasizes documenting changes for future maintenance and safety.
Maintenance and future-proofing for your panel
To maximize safety and reliability, establish a routine: keep the panel area clear of dust and moisture, perform periodic visual checks for signs of corrosion or overheating, and replace aging fuses or breakers when needed. Label circuits clearly and maintain a current home electrical plan for quick reference during future repairs or expansions. Consider upgrades to higher-capacity panels if your home’s electrical load grows due to additional appliances or renovations. Regular professional inspections can identify aging components before a failure occurs, reducing the risk of fire and electrical damage.
Common mistakes and how to avoid them
Rushing the process, failing to de-energize the system properly, or mixing neutrals and grounds in incorrect configurations can create dangerous conditions. Mislabeling circuits leads to confusion during maintenance and emergencies. Skipping permits or inspections can violate codes and void insurance coverage. Always follow manufacturer torque specs, ensure solid protective enclosures, and double-check all connections before restoring power. If you encounter unusual smells, heat, or signs of damage, abort and contact a licensed electrician rather than guessing.
When to hire a licensed electrician and what to expect
Full fuse box replacement often falls under professional scope due to the complexity and safety risks involved. A licensed electrician can assess service size, plan the replacement to meet current codes, obtain permits, and perform the work with proper equipment and testing. Expect a formal assessment of load calculations, grounding requirements, and labeling, followed by a post-installation inspection. This professional route helps ensure safety, code compliance, and long-term reliability. FuseBoxCheck’s verdict is that for most homeowners, enlisting a qualified electrician for the actual replacement yields the safest outcome, with DIY steps limited to planning, labeling, and testing of non-live components under supervision where allowed by local codes.
Getting the right help & next steps
If you decide DIY is feasible for planning and non-urgent preparation, document every step, verify power-off procedures, and keep a ready list of questions for your electrician. When in doubt about any project step or local permit requirements, consult a professional before proceeding. This approach minimizes risk and helps you gain a credible, code-compliant solution without compromising safety. FuseBoxCheck recommends starting with a professional assessment to determine scope, timelines, and required approvals before purchasing a panel or making major changes.
Tools & Materials
- Non-contact voltage tester(For quickly confirming power in a non-contact manner)
- Multimeter(For measuring voltage, resistance, and continuity)
- Insulated screwdriver set(To prevent conductor contact; ensure insulated handles)
- Lockout/tagout kit(To secure the main power during work)
- Electrical tape and wire nuts(For safe, compliant splices and securing conductors)
- Grounding/bonding conductors and clamps(To restore proper grounding after replacement)
- Replacement fuse box/panel kit (UL-listed)(Ensure rating matches service and local code)
- Torque screwdriver(To tighten lugs to manufacturer specs)
- Safety goggles and insulated gloves(Personal protective equipment)
- Flashlight or headlamp(For dim work areas)
- Fire extinguisher (Class C or ABC)(Electrical fire capability as precaution)
Steps
Estimated time: 2-6 hours depending on layout, panel type, and accessibility
- 1
Identify and secure power
Locate the main service disconnect and shut it off. Use your lockout/tagout kit to secure the switch and prevent accidental re-energization during the work. Confirm no voltage on the panel using a voltage tester before touching any conductors.
Tip: Double-check main disconnect visibility and ensure you can access the switch quickly in an emergency. - 2
Verify power is truly off
Test representative circuits and the main lugs with a multi-meter. Look for zero voltage readings across line-to-neutral to confirm de-energization. If the tester shows any voltage, re-check the shutoff and wait a few minutes before re-testing.
Tip: If unsure, pause and consult a licensed electrician. - 3
Remove panel cover and label circuits
Carefully remove the old panel cover, taking note of how wires are connected. Label each circuit with its function to help transfer labels to the new panel. Photograph the wiring for reference before detaching any conductors.
Tip: Keep conductors organized and avoid mixing neutrals and grounds. - 4
Prepare the new panel location
Mount the new panel in a code-approved location with proper clearance. Ensure mounting surface is solid and the enclosure matches the service rating. Verify the new panel is accessible and that the conductors can reach without strain.
Tip: Check local codes for required distances to walls, doors, and other equipment. - 5
Transfer circuits and main conductors
Move circuits in an orderly fashion to the corresponding spaces in the new panel, maintaining correct phase and labeling. Keep neutrals and grounds in their proper buses and secure lugs to manufacturer torque specs. Do not mix circuits or bypass safety features.
Tip: Work slowly and verify each connection as you go. - 6
Reconnect grounding and bonding
Ensure the ground bus is correctly bonded to the panel enclosure and that conductors are bonded as required by code. Confirm the equipment grounding conductor size matches the panel rating and that any older grounding paths remain intact.
Tip: Improper grounding is a leading cause of shock hazards and equipment damage. - 7
Install the cover and label everything
Reattach the panel cover and complete a comprehensive circuit labeling scheme. Verify all labels reflect actual connections and circuits. Ensure that the panel interior is clean and free of debris that could compromise connections.
Tip: Label clearly with permanent markers or printed labels for long-term clarity. - 8
Restore power and perform a test
Remove the lockout tag, energize the main disconnect, and test each circuit. Look for abnormal heat, listen for unusual noises, and observe the panel for arcing or smells. If issues arise, de-energize and re-check connections or call a professional.
Tip: Document results and keep a record of any anomalies for future work.
Your Questions Answered
Is it safe to replace a fuse box by myself?
DIY replacement can be risky and is often not recommended for the main service panel. Always de-energize the system, follow code requirements, and consider hiring a licensed electrician for the actual replacement. Use this guide for planning, labeling, and testing.
DIY fuse box replacement carries significant risk; consult local codes and consider a professional for the main work, using this guide for planning and safety steps.
What permits are typically required for a panel replacement?
Permits vary by locality but are commonly required for panel upgrades to ensure compliance with electrical codes and safety standards. Check with your local building department before starting.
Most places require a permit for panel work; check with your local building department to confirm.
Can I move the fuse box to a new location?
Relocating a fuse box is a high-skill job that may require rerouting service conductors and ensuring proper clearance. It’s generally best left to a licensed electrician and will require permits.
Relocating panels is complex; professionals handle it with permits and safety checks.
What are signs a panel needs replacement beyond aging?
Frequent tripping, overheating, buzzing sounds, burning smells, or melted insulation indicate a panel problem that may require replacement or professional evaluation.
If you notice burning smells or overheating, stop and call a pro.
What safety equipment should I use during replacement?
Wear insulated gloves, safety glasses, and use insulated tools. Ensure the workspace is dry and free from water exposure to minimize shock risk.
Wear proper PPE and keep the area dry while you work.
Should I test circuits after replacing the panel myself?
Yes. After installation, verify each circuit functions correctly with a multimeter and by performing basic load checks. If anything seems off, pause and consult a professional.
Test each circuit after installation and consult a pro if anything seems off.
Highlights
- Plan thoroughly and obtain permits when required.
- Prioritize safety and correct grounding in all steps.
- Label circuits clearly and document changes for future maintenance.
- Know when to stop and hire a licensed electrician for the actual replacement.