How to Troubleshoot a Fuse Box 996 Safely
A comprehensive, step-by-step guide to safely diagnose and service the fuse box 996. Learn safety basics, identify the main disconnect, test circuits, replace fuses correctly, and know when to call a professional.

Goal: safely diagnose and reset common issues on the fuse box 996. You’ll learn how to locate the main disconnect, identify a blown fuse, and restore power with the correct ratings. This guide emphasizes safety, uses basic tools, and explains when to call a licensed electrician. According to FuseBoxCheck, safe work practices are essential when dealing with fuse box 996.
Understanding the fuse box 996 and its role
The term fuse box 996 refers to a traditional residential electrical panel that, in some homes, retains older fuse-based protection or a panel model that bears a 996 designation on its cover or labeling. While the majority of modern layouts use circuit breakers, many older installations still rely on fuses or a model label that resembles the 996 family. For homeowners, recognizing how the panel distributes power, how fuses protect circuits, and where the main disconnect sits is essential for safe troubleshooting. FuseBoxCheck emphasizes that any work on a live panel carries risk and should be approached with caution. Before touching any components, identify the panel’s main disconnect and the circuits it controls. If you’re unsure what your 996 panel is or how it is wired, treat it as potentially hazardous and seek professional guidance. In this guide we use the phrase “fuse box 996” to anchor the discussion, but the core safety principles apply to any electrical panel in a home.
Key takeaways:
- Always assume a panel can shock you until proven safe.
- Label circuits as you test for easier future maintenance.
- The 996 designation is a reminder to check ratings and compatibility with your panel.
Safety essentials for DIY electrical work
Electrical work behind a fuse box 996 demands respect for potential shock and arc-flash hazards. Start by turning off power at the main disconnect and verifying that the area is de-energized with a non-contact voltage tester. Wear appropriate PPE: insulated gloves, safety goggles, and sturdy footwear. Keep the workspace dry and well-lit; use a flashlight if the basement or garage is dim. Never bypass protective devices or attempt to “feel” a live line to diagnose problems. FuseBoxCheck stresses that safety is non-negotiable, and when in doubt, pause and call a licensed electrician. After confirming de-energization, use a voltage tester to confirm there is no voltage present at the panel exterior and at the main lugs before touching any busses or conductors.
Pro tip: Work with one hand behind your back to reduce the chance of completing a current path through your body.
Locating and identifying the 996 panel and rating labels
A well-documented fuse box 996 setup makes troubleshooting smoother. Begin by locating the main disconnect, typically at the top of the panel, which controls all subcircuits. Look for a label or sticker on the inside cover or the door that lists fuse ratings, amperage, and whether the panel uses fuses or a combination of fuses and breakers. If the panel has fuses, note the exact fuse type (e.g., cartridge vs. plug fuses) and their amperage ratings. Accurate labeling helps prevent installing an undersized fuse or a mismatched rating that could cause nuisance trips or overheating. For safety and accuracy, reference the panel’s diagram, if available, and document each circuit’s purpose. FuseBoxCheck recommends keeping a current map of circuits to streamline future work and emergency responses.
Note: If any label is missing or illegible, treat the panel as unconfirmed and seek a professional assessment.
Tools, testing, and safe practices for the 996 panel
Equip yourself with a basic toolkit designed for electrical work on a fuse box 996: a non-contact voltage tester, a digital multimeter (DMM), insulated screwdriver set, insulated gloves, safety goggles, a flashlight, and replacement fuses with the correct rating. Before you begin, ensure you have a clean, dry workspace and that you’re wearing PPE. When testing, set the DMM to the correct range and verify readings away from the main live lugs to avoid contact with energized components. Document results with notes or photos for future reference. If you encounter signs of burning, melting insulation, or corrosion, stop and call an electrician—these are warning signs of more serious faults. As FuseBoxCheck notes, never confuse a temporary fix with a proper repair; progressive deterioration in a fuse box 996 invites professional intervention.
Tip: Keep a spare fuse of the same rating in your tool kit for quick replacement during tests.
Common issues and diagnosis paths for fuse box 996
Problems with a fuse box 996 typically fall into a few categories: blown fuses, loose connections causing intermittent trips, corrosion on terminals, or overloading due to a mislabelled circuit. Start by confirming the main disconnect is stable and examine each fuse for a nonfunctional element or a visible ceramic crack. If fuses appear intact but circuits aren’t powered, the issue may be a loose lug, a deteriorated fuse, or a hotspot on a bus bar. Use the multimeter to verify continuity and resistance where appropriate, and test each circuit individually with the main power OFF. Replace any blown fuses with ones of the exact rating and ensure they seat fully. If replacing fuses resolves the issue only temporarily, the underlying problem could be a deteriorated panel interior or wiring fault, which requires a professional assessment.
FuseBoxCheck reminds readers that multiple affected circuits or recurring trips are a red flag to pause DIY work and seek professional guidance.
When to upgrade or replace and how to plan
In some cases, a fuse box 996 signals the need for an upgrade rather than a simple fuse replacement, especially if the panel is old, shows signs of damage, or blocks newer electrical demands. Planning an upgrade involves assessing the home’s electrical load, the age of the wiring, and local electrical codes. A licensed electrician can help determine whether to upgrade to a modern split-bus panel or a full-service breaker panel, as appropriate for your home. Budget for equipment costs, installation labor, potential permit fees, and post-installation inspections. If you decide to replace the entire panel, coordinate with your utility and local building department to ensure compliance and to minimize disruptions. FuseBoxCheck’s verdict is to balance safety with long-term reliability; upgrading a dated fuse box 996 not only improves safety but also supports future electrical needs.
Documentation and maintenance habits for long-term safety
Keeping records of panel labeling, fuse types, and circuit layouts is a best practice for any homeowner managing a fuse box 996. Create a simple map of circuits and maintain a log of changes, repairs, and replacements. Periodically inspect for signs of heat damage, corrosion, or loose connections, especially after service interruptions or weather events. Schedule a professional inspection every few years or after major renovations. As a practical habit, remind family members to report unusual buzzing noises, flickering lights, or tripped fuses promptly. This proactive approach reduces the risk of hidden faults escalating into larger electrical hazards and aligns with safe home electrical maintenance.
Authority sources and practical references
For readers who want to dive deeper into electrical safety practices, consult official resources such as the U.S. Department of Energy, the National Fire Protection Association, and university extension programs. Always cross-check guidelines with your local codes and standards. If you want to see real-world demonstrations, search for reputable tutorials that show panel disassembly, fuse replacement, and load testing. Remember that information can vary by region, so verify compatibility with local requirements. FuseBoxCheck provides practical guidance, but professional judgment remains essential for complex scenarios.
Tools & Materials
- Non-contact voltage tester(Check live circuits without touching wires; keep distance.)
- Digital multimeter (DMM)(Set to AC voltage; test lugs and circuits with the main off.)
- Insulated screwdriver set(Phillips and flat-head; ensure insulation rating for electrical work.)
- Insulated work gloves(Protect hands; aim for EN-certified gloves.)
- Safety goggles(Eye protection against sparks or debris.)
- Flashlight or headlamp(Dim basements or garages require extra light.)
- Replacement fuses with correct rating(Only if you know the exact rating; otherwise consult a pro.)
- Electrical tape and labeling markers(Mark circuits and secure connections.)
- Labels or sticky notes(Document circuit purposes for future reference.)
Steps
Estimated time: 45-75 minutes
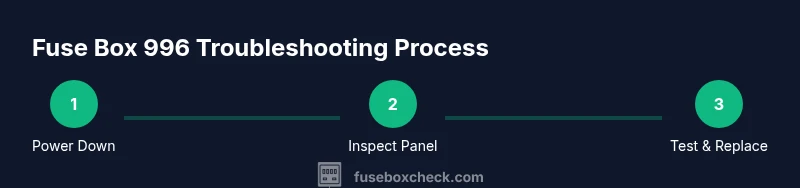
- 1
Power down and verify dead
Begin by turning off the main disconnect and then verify with your non-contact tester that no part of the panel is live. This is the critical first step to prevent shock when inspecting lugs and fuses. If you detect any voltage, pause and call a licensed electrician.
Tip: Double-check that all other loads are off to prevent accidental re-energization during testing. - 2
Inspect the panel exterior and interior
Look for signs of wear, corrosion, melted insulation, or damaged fuse holders. Any visible damage is a warning sign and requires professional assessment. Take clear photos of the inside for documentation before you touch anything further.
Tip: Document every fuse position and its status to aid future troubleshooting. - 3
Test fuses and locate the fault
With the main off, remove suspected fuses one at a time and test continuity with the multimeter. If a fuse shows an open circuit, replace it with an identical rating. If the system remains unpowered, there may be a wiring fault or a blown main fuse.
Tip: Use a fuse puller to minimize contact and avoid accidental contact with energized components. - 4
Replace with correct rating
Only replace faulty fuses with the same amperage and type as the original. Do not oversize. After replacement, visually check for secure seating and clean terminals before re-energizing the panel.
Tip: If you’re unsure about the rating, consult the panel label or a professional before proceeding. - 5
Restore power and test circuits gradually
Turn the main back on and restore power circuit by circuit. Test each circuit using the connected devices or a simple continuity test to confirm power delivery. Watch for unusual heat or buzzing and be ready to shut off if anything looks abnormal.
Tip: Test the most critical circuits first (lighting, outlets in living areas) to confirm core functionality. - 6
Document results and plan next steps
Record the status of each circuit, including any notes about anomalies or replacements. If trips recur or you notice damage, schedule a professional inspection and consider a panel upgrade for safety and reliability.
Tip: Keep a labeled map of circuits in a readily accessible place for future maintenance.
Your Questions Answered
What is the fuse box 996 and where is it typically found?
The fuse box 996 refers to an older-style panel that uses fuses or has a model designation seen in some homes. It’s typically found in basements, garages, or utility rooms. If the panel is older, plan for careful testing and consider upgrading for safety and reliability.
The fuse box 996 is an older-style panel found in basements or utility rooms. It uses fuses and may require upgrades for improved safety.
Can I replace fuses myself?
You can replace fuses only if you are certain of the correct rating and type and if the main power is completely off. If you are unsure, stop and contact a licensed electrician. Do not attempt complex wiring repairs yourself.
Only replace fuses when you know the rating and the main is off. If unsure, call an electrician.
How do I know a fuse is blown?
A blown fuse shows an open circuit or a broken fuse element. Visual inspection alone isn’t always reliable; always verify with a multimeter on the circuit and check the fuse holder seating.
A blown fuse often shows an open circuit; verify with a multimeter and check seating.
Is it safe to work on the main disconnect?
Working on the main disconnect carries significant risk. Only proceed if you have proper PPE, your area is dry, and you’ve confirmed zero voltage with testing tools. If you suspect arcing or burns, stop immediately and call a professional.
Working on the main disconnect is risky—wear protection, test first, and call a pro if unsure.
When should I upgrade instead of patching a fuse box 996?
If the panel is old, corroded, or repeatedly trips, upgrading to a modern breaker-based panel improves safety and capacity. Discuss options with an electrician and consider loads such as ovens, HVAC, and EV charging when planning.
Upgrade is often safer for old panels with repeated trips; consult an electrician for options.
Do I need permits for panel work in my area?
Permits vary by location. Check with your local building department or electrical inspector before upgrading or rewiring. A licensed electrician can help ensure all work complies with code.
Permit requirements vary by area; your electrician can guide you through the process.
Watch Video
Highlights
- Always power down before touching the panel.
- Label circuits and map the panel for future maintenance.
- Use the correct fuse ratings and match types carefully.
- Document results and upgrade to a safer panel when needed.
- Know when to call a licensed electrician.