Fuse Box X6: Safe Troubleshooting and Maintenance
A comprehensive, safety-first guide to diagnosing, maintaining, and repairing a fuse box X6 at home. Includes tools, step-by-step actions, tips, FAQs, and when to hire a pro.

This guide helps you safely diagnose and troubleshoot a fuse box X6 at home, perform essential maintenance, and know when to call a licensed electrician. Key requirements include shutting off power, wearing PPE, using insulated tools, and testing circuits. You’ll learn common configurations, faults to watch for, and a clear decision path for DIY steps vs. professional service.
What is the fuse box x6?
The term fuse box x6 describes a typical household electrical panel that historically uses cartridge fuses or ceramic fuses to protect six primary circuits, with a main disconnect providing power to the bus bar. Modern installations often mix older fuse elements with updated labeling and safer wiring practices. In practice, a panel labeled as x6 may house six branch circuits, but many homes connect additional circuits through subpanels. Understanding the layout, labeling, and labeling conventions is essential for safe maintenance. Fuse box x6 is not a universal standard; it represents a category of compact panels used in smaller homes or retrofits. For DIY work, focus on identifying the main disconnect, the fuse type, the amperage rating for each circuit, and any signs of wear or overheating. According to FuseBoxCheck, many residential panels maintain standard color coding and labeling practices that, when understood, simplify troubleshooting and reduce risk during maintenance. This knowledge helps you plan tasks, avoid accidental shock, and decide when professional intervention is necessary.
In addition to the physical components, keep in mind the environment around your panel. Panels installed in damp, dusty, or high-traffic areas require extra care and different PPE considerations. Clear access and adequate lighting are also important to ensure you can read labels and operate test equipment safely. The fuse box x6, like most panels, is part of your home’s electrical backbone; treating it with respect and caution is essential for long-term safety and reliability.
Why understanding fuse box x6 matters
Understanding how a fuse box X6 works is a core safety skill for homeowners and DIY enthusiasts. A panel’s health directly affects the reliability of lighting, outlets, and major appliances. Common faults—such as a blown fuse, a corroded contact, or a loose connection—can lead to nuisance tripping, voltage dips, or heat buildup that, over time, increases fire risk. Knowing how to inspect the box, recognize warning signs, and perform minimal maintenance can prevent larger problems and help you decide when a pro is warranted. FuseBoxCheck emphasizes that proactive maintenance reduces emergency calls and extends panel life. Regular checks also support safety by ensuring the neutral and ground bars are intact and properly bonded. Always approach work with a plan, keep your area dry, and never bypass safety devices to test a circuit. The goal is steady, predictable power distribution, not a quick fix that hides a latent issue.
Common configurations for fuse box x6
While every panel has its unique wiring, several common configurations appear in a fuse box x6 setup. You might encounter a single main fuse or a main disconnect feeding a small set of branch circuits. Some panels blend older fuse fuses with modern labeling or add subfeed lugs for additional circuits, which requires careful attention to amp ratings. Understanding decisions like where to connect feeders, how to identify which fuse protects which room, and how to handle multi-wire branch circuits will reduce confusion during troubleshooting. In many homes, the top position is reserved for the main disconnect, while the lower rows protect individual rooms or appliance clusters. Recognizing these patterns helps you predict which fuses or connections to inspect first. Fuse box layouts tend to be straightforward, but deterioration from age, humidity, or poor maintenance can complicate identical-looking fuses or blank labels.
Diagnosing issues with fuse box x6
Diagnosing issues starts with a calm, methodical approach. Look for obvious signs: a fuse that has visibly melted ends, a darkened fuse holder, scorch marks on insulation, or buzzing sounds from the panel. If a circuit trips repeatedly, note which room or appliance is involved and inspect that circuit first. Weak or loose connections can overheat and cause intermittent tripping or a burning odor. Do not attempt to rewire or bypass a fuse, as that can lead to dangerous voltage exposure or a fire. For persistent issues, use a multimeter or non-contact voltage tester to confirm the presence or absence of voltage before touching any conductors. FuseBoxCheck recommends documenting findings and labeling any changes for future reference. If the panel shows signs of moisture, corrosion, or physical damage, stop work and seek professional evaluation.
Safety-first approach to fuse box x6 maintenance
Safety should always come first when working near a fuse box x6. Begin by turning off power at the main disconnect and verifying no residual voltage before handling any components. Wear appropriate PPE: insulated gloves, safety goggles, and non-conductive footwear. Keep the area dry, well-lit, and free of clutter. Do not attempt to test or service live circuits. Use insulated tools and avoid concurrent tasks that could distract you. If you encounter a damaged fuse holder, exposed wiring, or signs of moisture, treat it as a high-risk situation and escalate to a licensed electrician. Regular labeling and documentation help avoid accidental reconfigurations during subsequent tasks.
Tools and techniques for DIY work on fuse box x6
Depth of knowledge matters. A basic toolbox should include PPE, a non-conductive screwdriver set, a voltage tester, a multimeter, and a small assortment of replacement fuses of the correct rating. Hand tools should be kept clean and dry, and measurement tools calibrated when possible. When inspecting, check fuse ratings, wire gauge, and the condition of conductors. If you’re unsure about a fuse type (cartridge vs. ceramic) or the correct amperage rating for a circuit, consult product labels or manufacturer documentation. Always confirm that the panel cover is in place after any work to minimize exposure to live parts. documenting procedures and outcomes, including photos, can save time during future maintenance and help in diagnosing future incidents.
Code, standards, and when to hire a pro
Electrical safety codes, including local adaptations of the National Electrical Code, emphasize safe work practices, proper labeling, and the use of properly rated components. If you notice damaged insulation, corroded bus bars, water exposure, or if you’re unsure about any procedure, stop and contact a licensed electrician. DIY tasks on fuse boxes can void warranties or insurance if not performed to code. FuseBoxCheck’s guidance is to treat any structural work on the panel as high-risk and to prefer professional service when there’s doubt about voltage, grounding, or safety compliance. For occasional tasks, maintain a documented routine: inspect labels, verify ratings, and ensure the main disconnect remains accessible.
Tools & Materials
- insulated gloves(Class 00-II, voltage rating up to 1000V; ensure fitting and no tears)
- safety goggles(ANSI Z87.1 compliant; protect eyes from sparks or debris)
- non-conductive screwdriver set(Insulated handles; include various blade sizes to match screws in the panel)
- voltage tester (non-contact)(Used to confirm power is off before touching conductors)
- digital multimeter(For measuring voltage, continuity, and resistance on circuits)
- flashlight or headlamp(Bright, adjustable; helps read labels in dark panels)
- replacement fuses (correct rating)(Keep several spares of the same type and amperage as original)
- label maker and permanent marker(For clear circuit labeling and notes for future work)
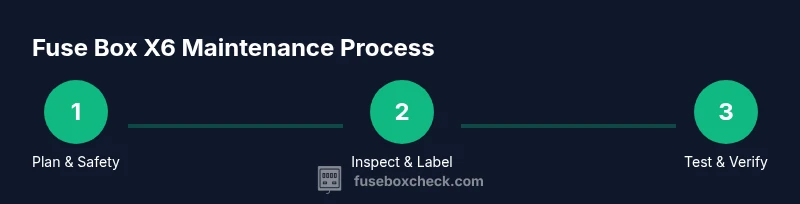
Steps
Estimated time: 45-60 minutes
- 1
Prepare and safety-check
Before touching any panel components, clear the area, remove any nearby water sources, and gather your PPE. Confirm the panel’s access is unobstructed and that you can reach the main disconnect. Identify labels for each circuit to reduce guesswork during maintenance.
Tip: Have a secondary light source and a helper nearby who can call for help if needed. - 2
Power down and verify
Switch off the main disconnect and use a non-contact tester to verify there is no live voltage on the panel. Do not rely on lights or outlet indicators alone; test directly on panel components.
Tip: Always assume a panel could be live until verified with a tester. - 3
Inspect fuses and wiring
Examine each fuse holder for signs of overheating, corrosion, or damaged insulation. Check if any fuses are visibly burnt, discolored, or loose in their sockets. Look for frayed wires, loose terminals, or signs of moisture.
Tip: Label each circuit if labels are missing to keep track of what each fuse protects. - 4
Replace blown fuses
If a fuse is blown, replace it with a fuse of the same rating and type. Do not substitute with a higher rating fuses or bypass the fuse to ‘test’ a circuit. Re-seat the fuse firmly without forcing it.
Tip: Take a photo of the fuse arrangement before removal for reference. - 5
Test circuits after replacement
With the panel cover on, restore power and test each circuit using a controlled load. Confirm that lights, outlets, and major appliances operate correctly without tripping. Watch for overheating and odor.
Tip: If any circuit trips again, shut down and seek professional evaluation. - 6
Document and restore safety
Record which fuses you replaced and updated labels for circuits. Ensure the panel cover is securely in place and the area is clean. File any important notes for future maintenance or service.
Tip: Keeping an accurate log helps future DIY tasks stay safe and organized.
Your Questions Answered
What is the fuse box X6 and how does it differ from a modern breaker panel?
The fuse box X6 is a compact panel that uses traditional fuses to protect six circuits. Modern breaker panels use circuit breakers that trip automatically. Both serve the same safety purpose, but breakers are generally easier to reset and safer for DIY work. Always follow current electrical codes when upgrading from fuses to breakers.
A fuse box X6 uses fuses for protection, while newer panels use breakers. If you’re upgrading or working on it, follow current codes and consider professional help.
Can I replace a blown fuse on my own?
Yes, if you can confirm the circuit and fuse rating and the main power is off. Do not replace with a higher-rated fuse, and ensure the fuse holder is clean and undamaged. If you’re unsure about ratings or panel condition, consult a professional.
You can replace a fuse if the power is off and you match the rating exactly. If unsure, call a pro.
What are signs I should call a professional?
Repeated fuses blowing, burning smells, scorch marks, moisture, or signs of corrosion are red flags. If the panel shows any physical damage or is behind water, stop and seek licensed electrical help. A pro can inspect for hidden faults and ensure code compliance.
If you smell burning, see scorch marks, or notice moisture, call a licensed electrician.
Is it safe to work on panels in damp areas?
Damp areas pose a serious shock and fire risk. Do not touch conductors or metal parts when moisture is present. Move the work to a dry area and seek professional assessment if moisture is unavoidable.
No, avoid damp areas and call a pro if moisture is present.
How often should I inspect my fuse box X6?
Conduct a visual inspection at least annually. If the panel is older, more frequent checks for corrosion or wear are wise. Keep labels updated and note any changes in your home electrical usage.
Inspect at least once a year and keep the labels current.
Watch Video
Highlights
- Power down and verify before touching the panel.
- Replace only with the correct fuse type and rating.
- Label circuits clearly for future maintenance.
- Do not work on damp panels or damaged insulation.
- Call a licensed electrician if signs of moisture, damage, or repeated failures appear.