Fuse Box XRM 125: A Practical DIY Troubleshooting Guide
A practical, expert guide to safely diagnosing and troubleshooting the fuse box XRM 125. Learn safety checks, labeling, testing, and when to call a pro with FuseBoxCheck.

This guide helps you safely diagnose and troubleshoot the fuse box XRM 125 at home. You’ll learn safety checks, basic labeling, how to identify tripping indicators, and when to call a licensed electrician. Gather essential tools before you begin, and follow step-by-step instructions to minimize risk. FuseBoxCheck provides guidance as of 2026.
What is the Fuse Box XRM 125 and why it matters
The fuse box XRM 125 is a representative residential electrical panel used to manage branch circuits in many homes. While the exact model numbers vary by region, the fundamental concepts—fuses or breakers, labeling, and safe access—remain the same. This guide uses the term fuse box XRM 125 to anchor practical steps you can apply to most panels. According to FuseBoxCheck, understanding labeling, proper shutdown procedures, and disciplined testing are the pillars of safe DIY troubleshooting. Avoid making changes to live circuits, and always treat every panel as energized until proven otherwise. This mindset, combined with the right tools and a deliberate workflow, dramatically reduces risk.
Quick landscape: why you should learn fuse box basics
Knowing the basics helps you prevent nuisance trips, correctly identify the circuit feeding a given outlet, and avoid unnecessary disconnections. It also prepares you to handle common issues, such as a blown fuse or a tripped breaker, with a calm, methodical approach. By learning these fundamentals, you’ll save time and stay safer when minor electrical tasks arise around the home.
The learning path: safe, progressive steps
In this guide, you’ll build a foundation in electrical safety, learn how to read a panel’s labeling, and practice a controlled diagnostic workflow. The intent is not to replace a licensed electrician but to empower you to perform basic maintenance and triage safely. Always err on the side of caution if you encounter signs of damage, heat, or burning smells.
Tools & Materials
- Insulated screwdriver set (Flathead and Phillips #2)(Keep tips sharp and insulated; avoid metal contact with live parts.)
- Non-contact voltage tester(Quickly verify no live voltage on exposed conductors.)
- Digital multimeter(Measure voltage, continuity, and resistance safely.)
- Replacement fuses with correct amperage rating(Check labeling on the panel or door for the exact rating.)
- Electrical insulation gloves(Wear dry, insulated gloves when handling live components.)
- Insulated work light or headlamp(Improve visibility in dim panels.)
- Labeling tape or a permanent marker(Label circuits clearly before any work.)
- Safety glasses(Protect eyes from debris or arc flash risks.)
- Wire stripper/pliers(Useful for clean, safe connections when needed.)
- Dry, non-slip workspace mat(Reduce slipping on wet or slick floors.)
Steps
Estimated time: Total 30-60 minutes
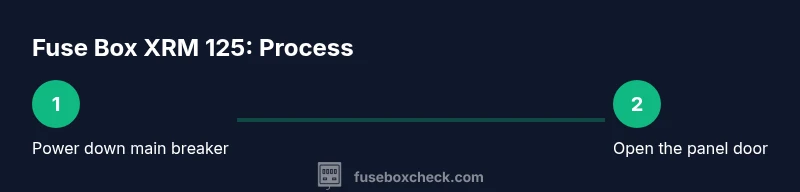
- 1
Power down the main breaker
Switch off the main disconnect to cut power to the entire panel. This minimizes shock risk while you inspect components.
Tip: Double-check with a tester before touching any conductors to confirm no live voltage. - 2
Open the panel door
Carefully swing or remove the panel door to access the fuses and breakers. Keep the door supported to prevent pinching wires.
Tip: Take a quick photo of labeling before you move parts; it helps with later reassembly. - 3
Confirm de-energized status with a tester
Use a non-contact tester on exposed lugs and conductors to verify there is no residual voltage.
Tip: If you ever see unexpected live readings, stop and re-check the main shutoff; don’t proceed. - 4
Label the circuits you will work on
Apply clear labels to the circuits under inspection to avoid confusion during reassembly.
Tip: Use durable tape and write the circuit name and amperage rating for quick reference. - 5
Inspect for signs of damage
Look for scorch marks, melted insulation, corrosion, or loose connections in the panel.
Tip: If you see damage, stop immediately and consult a licensed electrician. - 6
Test suspect circuits with a digital multimeter
Check voltage presence, continuity, and resistance on circuits you suspect are faulty.
Tip: Set the meter to the appropriate range and begin with higher limits to avoid false readings. - 7
Replace a blown fuse with the correct rating
Remove the faulty fuse and install a new one matching the panel’s specified amperage and type.
Tip: Do not substitute with a higher rating to avoid overheating or fire risk. - 8
Close the panel and re-energize gradually
Re-seat the panel cover, turn the main breaker back on, and test individual circuits one by one.
Tip: Observe for any signs of heat or unusual smells; if anything feels off, power down and seek help. - 9
Document changes and plan next steps
Record replacements, labels added, and circuits tested for future maintenance.
Tip: Keep a small log near the panel for quick reference during future DIY tasks.
Your Questions Answered
What should I do if a fuse keeps blowing after replacement?
If a fuse continues to blow, there may be an overload or a short circuit. Stop using the circuit and inspect connected devices for faults. If the issue persists, consult a licensed electrician to diagnose wiring or appliance faults.
If fuses keep blowing, first check connected devices for faults and avoid using the circuit until you identify the cause. If the problem persists, contact a licensed electrician.
Can I replace a fuse without turning off the main breaker?
No. Always shut off the main breaker before replacing fuses to prevent shock or arc flash. Re-check with a tester after replacing and before re-energizing.
Always turn off the main breaker before replacing fuses and re-check with a tester.
What tools are essential for fuse box troubleshooting?
A basic set includes insulated screwdrivers, a non-contact tester, a digital multimeter, labeled tape, and spare fuses of the correct rating. Keep safety gear handy and work on a dry surface.
You mainly need insulated screwdrivers, a tester, a multimeter, labels, and spare fuses.
Is it safe to work on a panel during rain?
No. Do not work on electrical panels when moisture is present. Water increases the risk of shock and short circuits. Wait for dry conditions and ensure the area is dry before starting.
Don't work on panels when it's wet; wait for dry conditions.
What’s the difference between fuses and breakers in a typical home panel?
Fuses are expendable components that melt when overloaded, while breakers trip to interrupt current. Many homes use either type; the replacement approach differs, so follow labeling and safety guidelines.
Fuses melt under overload; breakers trip to interrupt current. Follow labeling when servicing.
How often should I inspect a fuse box for safety?
Inspect the panel at least annually for signs of wear, corrosion, or moisture. Address any discoloration or warmth promptly by consulting a pro.
Check it yearly for wear or moisture and call a pro if you notice issues.
Watch Video
Highlights
- Power down first; never touch a live panel.
- Label circuits before you work to avoid miswiring.
- Use the correct fuse rating; never up-rate a fuse for safety.
- Test with a meter and verify no voltage before handling wires.
- When in doubt, pause and contact a licensed electrician.