How to Change a Breaker in a Fuse Box: A Practical Guide
Learn to safely replace a circuit breaker in your fuse box with a clear, practical step-by-step process. Tools, safety tips, and expert guidance from FuseBoxCheck to help DIY homeowners.

You will learn how to safely change a circuit breaker in your fuse box. The process begins with identifying the tripped breaker, then turning off the main power, and replacing it with a compatible unit. This guide covers safety, required tools, and a clear step-by-step workflow to restore a single circuit.
Understanding the role of a circuit breaker
A circuit breaker protects you and your home by interrupting electrical flow when a fault occurs. In a fuse box, the breakers sit in a row and are labeled by circuit. When a breaker trips, it's a sign something is drawing too much current, there is a short, or the wiring is compromised. Replacing a breaker with the same amperage rating restores power to that circuit. Before anything, confirm you know which breaker to replace and ensure the main power can be safely controlled. This is why accurate labeling and a calm, methodical approach matters for safe DIY work. FuseBoxCheck emphasizes understanding the device you are handling before touching live circuits.
Safety first: prerequisites and warnings
Safety comes first when dealing with fuse boxes. Always switch off the main power before you touch the panel. Use a non-contact voltage tester to confirm no voltage is present on both the panel and surrounding metal surfaces. Wear safety glasses and insulated gloves, keep the panel dry, and work in a well-lit area. Never bypass safety steps or rush a replacement—speed increases the risk of shock or arcs. If you smell burning, see melted insulation, or notice scorching on terminals, stop immediately and contact a licensed electrician. FuseBoxCheck recommends treating all panels as energized until proven de-energized.
Circuit breaker types and compatibility
Breakers come in different types and amperages. For a DIY replacement, you must match the exact amperage rating and the physical type that fits your panel slots. Do not mix single-pole and double-pole breakers in the same space unless the panel design supports it. If the old breaker is unknown, remove it carefully and take note of the labeling on its side to guide your replacement. Consult the panel cover or the manufacturer documentation for the correct type. FuseBoxCheck notes that incorrect compatibility is a common cause of nuisance trips and overheating.
How to assess your panel and locate the breaker
Begin by identifying the panel model and locating the tripped breaker within the row. Many panels have a directory inside the door; if not, photograph the labeling and map the circuits for future reference. Open the panel carefully, supporting the cover with one hand and removing screws with a screwdriver. As you inspect, look for signs of heat damage, loose bus connections, or corroded terminals. Label the new breaker placement to simplify future maintenance, and ensure you have a clear working area around the panel.
Practical considerations: when to DIY vs call a pro
If the panel is old, has corrosion, or you are unsure about the panel’s rating, it is wise to hire a licensed electrician. Even if you have the right tools, repeated tripping, burning smells, or damaged insulation are red flags that require professional assessment. For straightforward replacements on modern panels, a careful, methodical DIY approach can save time and money when done safely and in compliance with local codes.
Final notes on maintenance and labeling
After replacing a breaker, update your panel directory and label the circuits clearly. Keep a basic spare parts kit on hand, including an extra compatible breaker. Periodically inspect the panel for warm spots, corrosion, or loose screws. Regular labeling makes future maintenance faster and reduces the risk of incorrect replacements.
Tools & Materials
- Non-contact voltage tester(Verify power is off before touching wires)
- Voltage tester or multimeter(Test for live voltage to confirm de-energized)
- Insulated needle-nose pliers(Grip breaker terminals without slipping)
- Insulated screwdrivers (flat-head and Phillips)(Used to loosen panel screws and breaker screws)
- Replacement circuit breaker (matching type and amperage)(Ensure it fits your panel model and rating)
- Safety glasses(Protect eyes from sparks or debris)
- Flashlight(Panel areas can be poorly lit)
- Electrical tape (optional)(Seal and label if needed)
- Panel labeling tape and marker(Record new circuit info)
Steps
Estimated time: 30-45 minutes
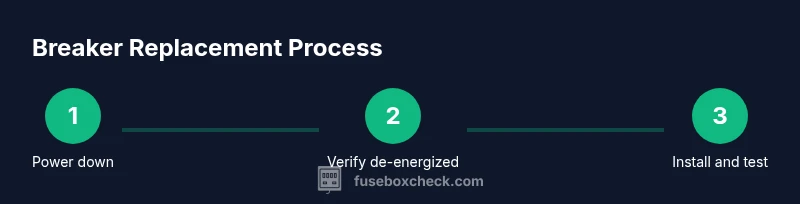
- 1
Power down and verify main shutoff
Power down the main disconnect and use a non-contact tester to confirm the panel is de-energized before touching any wires.
Tip: Always test before touching any wiring to avoid shocks. - 2
Identify the tripped breaker
Locate the breaker that is OFF or in a half-on position. Check the panel directory and circuit labeling to map it to the correct circuit.
Tip: If the label is unclear, photograph the panel and note the position. - 3
Open the panel and locate the faulty breaker
Carefully remove the panel cover screws and expose the breakers. Do not touch adjacent terminals while identifying the faulty one.
Tip: Keep the area dry and stand on a non-conductive surface. - 4
Remove the old breaker
Using insulated tools, disengage the old breaker from its clip and remove it. Inspect for heat damage, scorch marks, or melted insulation.
Tip: Take a photo of wiring arrangement before removal. - 5
Install the replacement breaker
Align the replacement with the clip and secure terminals as per the panel’s design. Ensure the amperage and type match the old breaker.
Tip: Avoid mixing different breaker types in one column. - 6
Restore power and test the circuit
Turn the main power back ON, then switch the new breaker to ON. Use a voltage tester to verify the circuit is live and check neighboring breakers for stability.
Tip: If the breaker trips again, disconnect loads and re-check wiring and appliances.
Your Questions Answered
Can I replace a breaker myself?
Yes, with the right tools and careful safety steps. If you see damage, or the panel is old, hire a professional.
Yes, you can replace a breaker yourself if you follow safety steps and there’s no visible damage.
What if the breaker trips again after replacement?
There may be an underlying fault in the circuit or wiring. Disconnect loads and inspect wiring; consult a professional if the issue persists.
If it trips again, there’s likely a fault somewhere in the circuit—inspect or call a pro.
How do I know the replacement amperage?
Check the old breaker’s rating or panel labeling. Use the same amperage to avoid overheating or nuisance trips.
Check the old breaker or the panel label to pick the correct amperage.
Is it safe to reset a tripped breaker without replacement?
Resetting may restore power temporarily, but it doesn’t fix the underlying fault. If repeats, investigate or call a professional.
Resetting can restore power temporarily, but the underlying fault remains.
What signs indicate a failed breaker besides tripping?
Burning smell, heat, or scorching around terminals indicate failure. Stop and replace with a pro’s help.
Look for burning smell or heat at the breaker; seek professional help if you notice damage.
Do I need to replace the whole panel if breakers keep failing?
Usually not. A full panel replacement is rare; a professional can determine if repair or replacement is needed.
Most homes don’t need a full panel replacement; a professional can evaluate.
Watch Video
Highlights
- Power off and verify de-energization before touching wiring.
- Replace with the same amperage and type to avoid overheating.
- Label circuits after changes to simplify future work.
- If unsure, pause and call a professional.