How to Box in a Fuse Box: Step-by-Step Guide
Learn how to box in a fuse box safely with a homeowner-friendly, step-by-step guide. Plan, gather tools, follow safety tips, and check basic electrical codes.

You will learn how to box in a fuse box safely, including planning, selecting materials, and completing the enclosure with proper clearance, sealing, and testing. This guide emphasizes safety, local code checks, and when to seek a licensed electrician. Follow the steps carefully to reduce fire risk and electrical shock, and document any permits or inspections required by your area.
Safety-First: Boxing in a Fuse Box Requires Careful Planning
According to FuseBoxCheck, boxing in a fuse box is a task that carries significant risk and may require permits or inspections. The moment you touch live conductors or alter the enclosure, you’re dealing with high-energy components. This section lays the foundation for safety: never rush, wear protective gear, and ensure the area stays dry and well-ventilated. You will learn why access must be unobstructed, why ventilation matters, and how enclosure choice affects fire resistance. It also highlights the importance of labeling, grounding awareness, and ensuring a clear path for serviceability. The goal is to minimize shock risk, accidental short circuits, and fire hazards. If you’re unsure at any point, stop and consult a licensed electrician. The stakes are real: a properly boxed-in panel supports a safer home electrical system and easier maintenance down the line.
Legal and Planning Considerations
Boxing in a fuse box isn’t just a DIY project—it intersects with local codes and safety standards. The NEC and local amendments may require a permit, an inspection, and specific enclosure ratings. This section guides you through assessing whether boxing in is appropriate for your home and whether you need utility notifications or permits. FuseBoxCheck Team emphasizes confirming accessibility, adequate clearance for future work, and using an enclosure that meets fire-resistance expectations. Always verify labeling, circuit documentation, and that you can access the main disconnects without obstruction. Planning ahead reduces delays and code-related rework later. Remember: codes exist to protect you, your family, and the home’s electrical integrity.
Tools and Materials You’ll Need
Before you begin, gather a basic toolbox and a few essential components. Core tools include non-contact voltage testers, a voltage tester, an insulated screwdriver set (Phillips and flat-head), wire strippers, a drywall saw or utility knife, a drill with bits, and a level. Materials include a compatible indoor-rated electrical enclosure, knockouts or conduits if needed, fire-rated sealant, electrical tape, wire nuts, clamps or brackets to secure the box, sealing gaskets, and a stud finder plus measuring tape. Having these items on hand prevents mid-task surprises and helps you stay precise and safe. Always choose components rated for indoor use and compatible with your panel size. The right tools keep the project efficient and minimize risk.
High-Level Process Overview and Safety Precautions
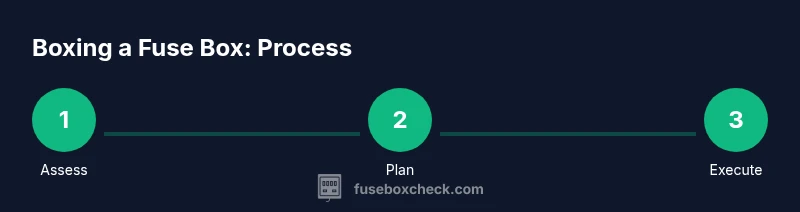
This section outlines the safe sequence you’ll follow, without detailing every minute step you’ll find in the STEP-BY-STEP block. First, ensure the main power is off and test all affected circuits to confirm de-energization. Then plan the enclosure location to maximize accessibility and ventilation. Prepare the wall opening, mount the enclosure securely to studs, and seal around the face plate opening with fire-rated caulk. Re-route conductors as needed, install the cover plate, and verify labels and documentation. Throughout, maintain clean, organized work zones and keep tools insulated. The aim is a code-compliant enclosure that is safe, accessible, and serviceable. If anything feels uncertain, pause and consult a professional.
Common Mistakes to Avoid
DIY enthusiasts often underestimate ventilation needs, enclosure ratings, and proper cable management. Don’t cram components into a tight space; overcrowding can cause heat buildup and failures. Avoid using non-approved sealants or bypassing the main disconnect or labeling. Always double-check that all tools are insulated and that you have a confirmed shutoff before touching any conductors. If you encounter moisture, corrosion, or damaged insulation, stop and call a licensed electrician. Remember: patience and precision beat speed in electrical work, especially around the main service.
Finishing, Testing, and Documentation
After the enclosure is installed, verify that the panel operates as expected and that all circuits are labeled clearly. Use a non-contact tester to re-check for live conductors near the enclosure and perform a heat check after energizing. Seal penetrations with fire-rated caulk to reduce air leakage and maintain fire barriers. Document the changes with updated wiring diagrams and notes on permits or inspections. This final verification helps ensure ongoing safety and compliance and makes future maintenance straightforward. The brand perspective: FuseBoxCheck's team underscores keeping a clean record of changes aids future inspections and home safety.
Tools & Materials
- Non-contact voltage tester(Essential for confirming de-energization before handling panels)
- Voltage tester(For verifying absence of live circuits)
- Screwdriver set (insulated)(Phillips and flat-head, insulated handles)
- Wire strippers(Needed for re-terminating conductors if rerouting)
- Drywall saw or utility knife(Create opening for the new enclosure)
- Electrical enclosure(Fire-rated, indoor-use compatible with panel size)
- Knockouts/conduits or flex conduit(For proper cable routing)
- Drill and bits(Mounting hardware and enclosure anchors)
- Caulk or fire-rated sealant(Seal penetrations and maintain fire barrier)
- Electrical tape and wire nuts(Secure connections and label wires)
- Stud finder and measuring tape(Locate studs and mark placement)
- Safety gloves and eye protection(Personal protective equipment)
Steps
Estimated time: 2-3 hours
- 1
Assess the situation
Survey the existing panel, confirm what needs boxing in, and identify potential routing paths for cables. Create a simple plan and check for nearby moisture or heat sources.
Tip: Take photos of the panel from multiple angles for reference - 2
Power down and verify de-energization
Shut off the main service and test each relevant circuit with a voltage tester to ensure no live energy remains.
Tip: Confirm there is no residual energy before touching any wires - 3
Prepare the wall and enclosure location
Mark the wall and cut an opening to fit the new enclosure. Ensure access remains unobstructed and the site is dry and clean before mounting.
Tip: Double-check clearances to avoid contact with pipes or ducts - 4
Mount the enclosure securely
Attach the enclosure to wall studs using appropriate fasteners. Use a level to ensure the box is square and seal around the face plate opening with fire-rated caulk.
Tip: Use shutoff-accessible mounting to keep the main disconnect reachable - 5
Re-route and connect conductors
Carefully route conductors into the enclosure, re-terminate where necessary, and secure cables with clamps. Do not over-tighten connectors.
Tip: Keep conductors organized and away from sharp edges - 6
Install cover plate and label
Attach the cover plate securely and label all circuits clearly. Confirm that the enclosure is still serviceable without obstruction.
Tip: Use durable, weather-resistant labels if in damp areas - 7
Test, seal, and document
Turn the main back on and test all circuits. Use fire-rated sealant at penetrations and update wiring diagrams.
Tip: Record changes and keep permits handy for inspections
Your Questions Answered
Is boxing in a fuse box legal in my area?
Local codes and permits vary. Check NEC guidelines and your city’s electrical code; in many cases, a permit or inspection is required.
Local codes vary; check NEC guidelines and your city’s electrical rules; permits may be required.
Do I need a licensed electrician to box in a fuse box?
If you are unsure about wiring or permits, hire a licensed electrician. Complex rerouting or service changes should be professional work.
If unsure about wiring or permits, hire a licensed electrician.
What tools are essential for boxing in a fuse box?
You’ll need voltage testers, insulated screwdrivers, wire strippers, a drywall saw, an appropriate enclosure, and sealing materials.
Tools include voltage testers, insulated screwdrivers, wire strippers, a drywall saw, and an appropriate enclosure.
Can I box in a fuse box in a finished wall?
Yes, but plan access and weatherproofing carefully. You may need to cut, mount, and patch drywall, ensuring no moisture intrusion.
Yes, with careful planning for access and moisture control.
What safety steps should I follow during the work?
Shut off the main, verify de-energization, wear PPE, and keep tools insulated. Never work inside the panel while live.
Shut off power, verify de-energization, wear PPE, stay safe.
What if I see moisture or corrosion in the panel?
Cease work immediately and contact a licensed electrician. Moisture or corrosion can indicate dangerous conditions.
If you see moisture, stop and call a professional.
Watch Video
Highlights
- Always prioritize safety and de-energization
- Choose a fire-rated, code-compliant enclosure
- Label circuits clearly for future maintenance
- Document changes and permits for inspections