Innova Fuse Box Guide: Safe DIY Inspection and Maintenance
Learn to safely inspect and maintain an innova fuse box with a clear, step-by-step guide from FuseBoxCheck. Practical DIY tips, essential tools, safety warnings, and guidance on when to call a pro.

With this guide, you will learn to safely inspect an innova fuse box, identify common warning signs, and perform basic maintenance or know when to call a professional. Gather PPE, a multimeter, insulated tools, and a flashlight. Always power down the main disconnect and verify zero voltage before touching the panel.
What is an Innova fuse box? Understanding the basics
An Innova fuse box is a type of electrical distribution panel used to protect home circuits with fuses or protective devices. In many homes, especially older ones, the Innova panel sits in the basement, garage, or utility closet and connects to the service entrance via a main disconnect. The panel houses a bus bar and individual fuses or breakers that interrupt current when a fault occurs. While newer homes may use circuit breakers in standardized panels, the Innova fuse box model you’re working with will share most safety principles: identify circuits, know the main disconnect, and avoid touching live terminals. Before you attempt any hands-on work, recognize that electrical components can carry dangerous voltages, even when the main breaker is off. The goal of this guide is not to encourage expensive modifications but to help homeowners understand the basic layout and common-sense precautions. According to FuseBoxCheck, understanding the layout of an innova fuse box is essential for safe DIY work. With the right approach, you can document wiring, test basic functions, and determine if a professional should handle further repairs. The rest of this article expands on those fundamentals with practical steps, tools, and safety reminders.
Safety first: PPE and hazard assessment
Safety begins long before you touch a fuse box. Always treat any electrical panel as live until you have confirmed it is completely de-energized. Wear appropriate PPE: insulated gloves, eye protection, and sturdy footwear. Work on a dry, non-conductive surface and avoid standing water or damp conditions. If you notice burning smells, melted insulation, or scorch marks, stop immediately and seek professional help. The Innova fuse box is a component of your home’s electrical system, and improper handling can lead to serious injury. Establish a safe working zone, disable other nearby power sources if possible, and keep children and pets away. This approach aligns withFuseBoxCheck guidance on basic safety protocols and risk assessment when dealing with residential electrical panels.
Preparing your workspace and choosing the right tools
Create a clean, well-lit workspace with adequate ventilation. Clear the area around the Innova fuse box and place a non-conductive mat beneath it. Gather tools in a insulated pouch: a digital multimeter, a non-contact voltage tester, insulated screwdrivers (phillips and flathead), a flashlight, a cordless drill with insulated bits, and labeled zip bags for screws and small parts. Have a camera or notebook ready to document wiring configurations and any anomalies. Avoid metal jewelry and loose clothing that could snag on the panel. By organizing before you begin, you reduce delays and improve safety while working on the innova fuse box.
Step-by-step: inspecting the innova fuse box (visual check)
- Power down the main service disconnect and verify zero voltage before any inspection. 2) Remove the fuse box cover carefully, keeping track of screws. 3) Visually inspect for burnt insulation, signs of overheating, corrosion, or loose terminals. 4) Look for water intrusion or dampness around the panel. 5) Photograph each circuit label and terminal arrangement for reference. 6) Note any unusual discoloration or melted components; these indicate compromised parts needing replacement. 7) If you see a loose neutral or ground, stop and reassess with caution. 8) Reassemble the cover loosely to test the system later if no damage is found. Safety reminder: never bypass fuses or devices to restore power. Innova fuse box maintenance should never compromise protective features.
Step-by-step: testing fuses and circuits
Begin by confirming the main disconnect is off and the area is dry. Use a non-contact voltage tester to verify absence of live voltage at exposed conductors. With the panel open, set a multimeter to the appropriate AC range and test continuity across suspected fuses or breakers. Do not touch live components while testing. If a fuse shows open circuit when tested, replace only with the same rated device. Document each test result for future reference. After testing, ensure all tools are removed from the panel area and reclose the box securely.
Troubleshooting common issues: trips, buzzing, smells, discoloration
Frequent tripping often signals an overloaded circuit or a loose connection; redistribute loads or remove unnecessary devices. A buzzing sound can indicate a loose terminal—tighten connections with proper tools after power is restored and risk is verified. A burning smell or scorch marks suggest overheated insulation or arcing; this is a serious hazard and should trigger a professional assessment. Discoloration or melted insulation around fuses or wires indicates degraded components that require replacement. In all cases, document findings, avoid improvising with higher-rated components, and seek professional help if you are unsure.
Maintenance, cleaning, and tightening connections
Dust and debris reduce cooling efficiency inside a fuse box. Gently vacuum or brush away surface dust without disturbing wiring. Wipe down surfaces with a dry cloth; never use liquids near live parts. Check for loose screws on bus bars and breakers; tighten to manufacturer-recommended torque with the panel powered off and verified zero voltage. Keep a spare set of labeled fuses or breakers on hand and replace worn components promptly. Regular checks every 1–2 years can help prevent unexpected failures.
Safety standards, codes, and when to call a pro
Residential electrical work is subject to local codes and safety standards. Always verify you have the proper permits if required, and follow the NEC or your local equivalents. If you notice corrosion, moisture intrusion, significant corrosion, or outdated components, consult a licensed electrician. The Innova fuse box often requires professional evaluation when substantial rewiring, panel replacement, or service upgrades are needed. This approach aligns with safety and compliance recommendations from industry authorities to protect your home.
Documenting your work and planning upgrades
Create a detailed log of what you inspected, what you tested, and what parts were replaced. Label circuits clearly and update the panel diagram. If your innova fuse box is aging or repeatedly experiences issues, plan a modern upgrade with a licensed electrician. Document a maintenance schedule and set reminders for periodic checks, particularly after weather events or major electrical loads. This proactive approach reduces risk and helps you track long-term improvements for home electrical safety.
Tools & Materials
- Insulated rubber gloves(Minimum category 3 for extra protection)
- Voltage tester / multimeter(Set to appropriate AC voltage range)
- Non-contact voltage tester(For zero-volt verification)
- Screwdrivers (insulated 1000V)(Flathead and Phillips)
- Pocket flashlight or headlamp(Bright, handheld)
- Duct tape / insulating tape(Optional for secure panel wrap)
- Face shield or safety glasses(Eye protection)
- Replacement fuses or breakers(Only if you identify a faulty component)
Steps
Estimated time: 60-90 minutes
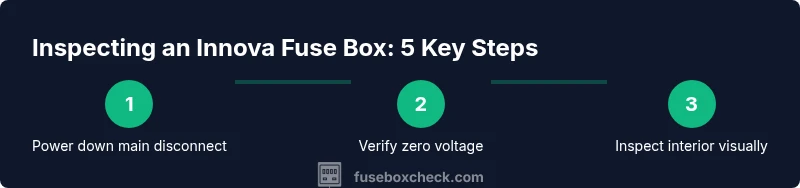
- 1
Power down main service disconnect
Locate the main service disconnect and switch it to the off position. Wait 60 seconds to ensure any stored energy dissipates. This first action minimizes the risk of shock while you prepare to inspect the innova fuse box.
Tip: Always verify zero voltage with a tester before touching any terminals. - 2
Verify zero voltage at the panel
Use a non-contact tester to confirm no live voltage at exposed conductors. If voltage is present, do not proceed and seek professional guidance. This step confirms your workspace is safe before you remove the cover.
Tip: Keep hands dry and stand on a non-conductive mat during verification. - 3
Open the fuse box cover
Remove screws carefully and set the cover aside. Inspect the interior for obvious damage, loose wires, or signs of overheating without displacing components. Photograph the arrangement for reference before making any changes.
Tip: Handle wires gently to avoid introducing further damage. - 4
Inspect for damage or wear
Look for burnt insulation, corrosion, melted insulation, moisture intrusion, or discoloration around terminals. If you see any of these, do not attempt a DIY repair beyond documentation; arrange professional service.
Tip: Record findings with notes and photos to guide repairs. - 5
Test circuits and fuses with a meter
With the panel off and energy verified, test each fuse or breaker for continuity and correct operation. Replace any fuse with the same rating and ensure no signs of arcing or heat damage.
Tip: Use manufacturer-rated components; never override ratings. - 6
Address identified issues
Tighten loose connections to the recommended torque, replace damaged components, and recheck for secure seating. If a panel shows chronic issues, plan a replacement rather than patching it up.
Tip: Avoid forcing parts or bypassing protective devices. - 7
Reassemble and test power
Securely replace the panel cover and restore the main disconnect. Test a few circuits individually to confirm normal operation and that there are no abnormal readings or smells.
Tip: Monitor for any immediate signs of distress after restoring power. - 8
Document and label
Update circuit labeling, panel diagram, and maintenance log. Note dates of inspections, parts replaced, and any future upgrade plans. This documentation helps future diagnostics and safety checks.
Tip: Keep the log with the home’s electrical records. - 9
Know when to call a pro
If you encounter persistent problems, signs of moisture, significant corrosion, or a panel that looks outdated, consult a licensed electrician. Complex upgrades or replacements should be performed by a professional.
Tip: When in doubt, prioritize safety and professional assessment.
Your Questions Answered
What is an innova fuse box and how does it differ from other panels?
An innova fuse box is a residential electrical distribution panel that uses fuses or protective devices to guard circuits. Like other panels, it serves as the hub for power distribution but may have different fuse types or layouts. Always treat any fuse box as potentially live and follow safe practices.
An innova fuse box is a home electrical panel with fuses or protective devices that distribute power to circuits. Treat it with caution and follow safe steps.
Is it safe to DIY fuse box maintenance?
DIY maintenance can be safe if you follow strict safety steps: power down, verify no voltage, wear PPE, and avoid touching live parts. For signs of damage, overheating, or moisture, seek professional help.
DIY can be safe if you shut things down and verify there’s no voltage, but if you see damage, get a pro.
Which tools do I really need for basic inspection?
Essential tools include insulated screwdrivers, a multimeter, a non-contact tester, a flashlight, and PPE. They help you inspect, test, and document without risking shock.
You’ll need insulated tools, a multimeter, a voltage tester, and proper eye protection to safely inspect the panel.
When should I replace the fuse box rather than repair?
If the panel is old, corroded, repeatedly overheats, or shows frequent failures, replacement is safer and more reliable than ongoing repairs.
If the panel is aging or showing persistent problems, replacement is usually the safer option.
Are there legal requirements or permits for fuse box work?
Local codes often require permits for significant electrical work and panel replacement. Check with your local building department and consider hiring a licensed electrician for code-compliant installations.
Check local codes and permits; big jobs like panel replacement usually need a licensed pro.
What are common signs of a dangerous fuse box condition?
Common signs include burning smells, scorch marks, buzzing sounds, loose components, or frequent tripping that cannot be easily resolved. Stop work and seek professional help if you encounter these.
Watch for smoke, a strong burn smell, or buzzing—these mean a serious risk and you should call a pro.
Can I upgrade my Innova fuse box to support more circuits?
Upgrading usually involves panel replacement and possibly service upgrades. It should be planned with safety in mind and may require professional inspection and permits.
Upgrading often means replacing the panel and ensuring the service can handle more circuits; a pro can assess this.
How often should I inspect my fuse box?
A basic inspection every 1–2 years is a good practice, with more frequent checks after severe weather or if you’ve added major electrical loads.
Check every year or two, and after storms or big electrical changes.
Watch Video
Highlights
- Power down and verify zero voltage before touching any components
- Document wiring and labeling to guide future maintenance
- Tighten connections and replace damaged parts only with correct-rated components
- Avoid DIY repairs when signs of moisture, burning, or corrosion appear
- The FuseBoxCheck guidance emphasizes safety first and professional help when needed