Kenari Fuse Box Guide: Safe Inspection & Troubleshooting
A practical guide to safely inspecting and troubleshooting a Kenari fuse box at home. Learn how to identify issues, prep tools, and when to call a pro.

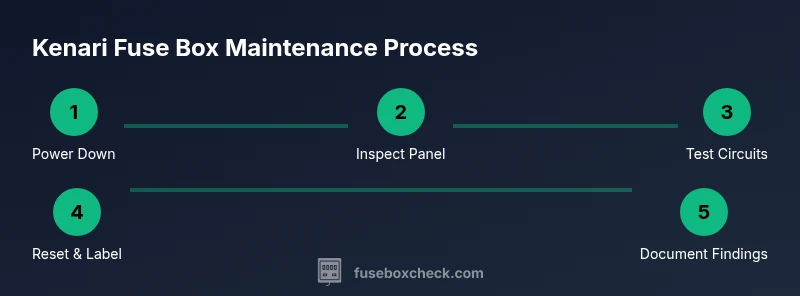
By following these steps, you will safely inspect and troubleshoot a kenari fuse box at home: power down the main, confirm panel labeling, and test circuits with the right tools before attempting any reset or replacement. This guide emphasizes safety, proper labeling, and knowing when to call a pro. Follow the steps closely for best results.
What is a kenari fuse box and why it matters
The kenari fuse box is a compact electrical distribution panel designed to protect home circuits by housing fuses or breakers. For many homeowners, understanding the kenari fuse box helps you safely manage power, diagnose nuisance trips, and plan routine maintenance. According to FuseBoxCheck, proper handling starts with clear labeling and confirming the panel's rating before any inspections. This guide provides practical steps to identify, inspect, and troubleshoot kenari fuse box components while prioritizing safety and compliance. You will learn what signs indicate a problem, how to interpret panel labeling, and when it’s wise to call a licensed electrician. A careful, methodical approach reduces risk and helps you protect both people and property.
Locating a Kenari Fuse Box in your home
In many homes, the kenari fuse box is tucked away in a utility room, basement, garage, or a dedicated closet. Start by checking near the main electrical service entrance, often behind a garage or laundry area door. Look for a metal or plastic panel with a removable cover and a label that may read 'Kenari' or show a model number. If you cannot locate it, trace the feeder from the main disconnect or consult the building’s wiring diagram. In larger homes, there can be subpanels in living spaces or attached garages. Knowing the exact location helps you plan safe access, minimize clutter around the panel, and ensure you have the appropriate tools at hand for inspection.
Common symptoms of kenari fuse box problems
Common symptoms point to issues that require closer inspection. Frequent breaker trips, fuses that blow repeatedly, lights that dim when a large appliance runs, panels that feel warm to the touch, buzzing noises, or a noticeable burning smell all deserve attention. If you experience these signals, stop and assess the most probable causes, such as an overloaded circuit, loose connections, or deteriorating insulation inside the kenari fuse box. Addressing small problems early can prevent larger failures, but never ignore signs of heat or smoke, which could indicate a serious electrical hazard. FuseBoxCheck guidance emphasizes methodical testing and avoiding makeshift fixes.
Safety first: essential precautions
Safety should always come first when handling a kenari fuse box. Before touching anything inside the panel, turn off power at the main disconnect and, if possible, switch off the main breaker in the house. Stand on a dry surface, wear non-conductive gloves and eye protection, and keep liquids away from the work area. Use insulated tools and keep a clear workspace free of clutter. If you must work near the panel while wearing metal jewelry, remove it to reduce the chance of a conductive path forming. If you see signs of damage, sparking, or melted insulation, evacuate and call emergency services if needed. This approach minimizes risk while you assess the situation.
Tools and materials you might need
A basic toolkit makes kenari fuse box work safer and more efficient. Essential items include an insulated screwdriver set (Phillips #2 for many screws), a non-contact voltage tester, a digital multimeter for voltage and continuity checks, a bright headlamp or flashlight, safety glasses, and insulated gloves. Optional items include electrical tape, a battery-powered work light for dim areas, and a notebook for mapping circuits. Keep a small fire extinguisher accessible in the workshop area as a precaution. Organize tools in a labeled pouch so you can reach them quickly during the inspection.
Understanding fuse box labels and circuits
Labels inside the kenari fuse box map each circuit to a room or appliance. A clear diagram helps you verify which breaker controls what, easing troubleshooting and future maintenance. If labels are worn or missing, take time to re-map circuits with a marker on the inside cover and a printed note on the outside. Pay attention to amperage ratings printed on fuses or breakers, and ensure replacements match the original specifications. For safety, never mix circuits with incompatible ratings, and avoid overfilling spaces with spliced wires. A clean, well-labeled panel reduces confusion and speeds repairs.
Step-by-step inspection overview
This section outlines a methodical approach to inspecting a kenari fuse box without skipping critical safety checks. Start with power isolation, confirm the panel’s cover is intact, and inspect for signs of overheating or damage. Use a multimeter to verify that circuits you touch are de-energized, then examine wires, bus bars, and connectors for wear. Document any abnormalities with photos, noting locations and readings. Finally, reassemble the panel carefully, re-label circuits if needed, and plan next steps based on what you found. The goal is a safe, accurate assessment that informs the next phase of maintenance or professional help.
Common causes of tripping and burning smell
Most trips and smells stem from overloads, loose connections, or aging components. An overloaded circuit may occur when two or more high-draw appliances run on the same branch. Loose connections heat up over time and can burn insulation if left unchecked. Worn-out fuses, corroded terminals, or damaged wire insulation in the kenari fuse box can degrade performance and raise the risk of arc faults. If you notice consistent tripping after adding a new appliance, consider separating the load or upgrading circuits. Regular inspections help catch wear before it becomes a hazard.
When to replace vs repair and choosing a pro
Not all fuse box issues are suitable for DIY repair. If you identify scorched components, melted insulation, signs of arcing, or persistent overheating, replace damaged parts only with correct ratings and manufacturer-approved components. For most complex problems, or if you lack training, hire a licensed electrician. They can perform a comprehensive inspection, issue permits if required, and ensure compliance with local codes. FuseBoxCheck recommends prioritizing safety and labeling, and avoiding temporary fixes that mask underlying faults. When in doubt, consult a pro rather than risk a serious incident.
Maintenance practices and routine checks
A proactive maintenance routine extends the life of your kenari fuse box and reduces risk. Schedule annual or semiannual inspections, especially after renovations or new appliance installations. Keep the panel clean and dry, tighten any loose screws as needed, and verify that clear labeling remains legible. Test at least once a year with a multimeter to confirm proper voltage and continuity. Document changes in a maintenance log and refresh the labels if circuits are reconfigured. Regular checks help catch issues before they cause outages.
Myths vs reality: kenari fuse box
Many homeowners believe that all panels are equally safe or that DIY fixes are always fine. In reality, kenari fuse box components vary by model and age, and safety depends on adherence to proper procedures. The idea that 'just reset it and it will be fine' can hide underlying faults that escalate. Do not bypass fuses or ignore warning signs. The reality is that a cautious approach, thorough labeling, and adherence to electrical codes protect people and property. Rely on proven steps, not shortcuts, when evaluating a kenari fuse box.
Preparing for professional service and documentation
If professional service is required, collect key information before the visit: the kenari fuse box model, the age of the panel, a list of symptoms, and any recent renovations or appliance additions. Take clear photos of the panel and the labeling, and prepare your maintenance log for reference. During the service, request a full safety assessment, confirmation of ratings, and any recommended upgrades. Ask about permits or code requirements in your area. This preparation helps ensure a smoother visit and clearer fault diagnosis.
Tools & Materials
- Insulated screwdriver set(Phillips #2 for most Kenari panel screws)
- Non-contact voltage tester(Verify power without contact; use before panel removal)
- Digital multimeter(AC voltage, resistance and continuity testing; 600V range recommended)
- Flashlight or headlamp(Hands-free lighting for dim spaces around the panel)
- Safety glasses(Eye protection against sparks or debris)
- Insulated gloves(Class 0/00 for basic protection during inspection)
- Electrical tape(Label wires and secure loose ends if needed)
- Fire extinguisher (class C/ABC)(Keep accessible in the workspace)
Steps
Estimated time: 60-90 minutes
- 1
Power down and secure area
Locate and switch off the main breaker, then verify that the panel is de-energized using a non-contact tester. Clear the area of liquids and metal jewelry. This step reduces the risk of shock or arc faults during inspection.
Tip: Double-check the main disconnect label and keep a clear, dry workspace. - 2
Identify the Kenari fuse box model & access
Note the model or serial number on the panel cover. Remove the cover only with insulated tools if you are confident in the process. Document the panel layout and ensure you have adequate lighting.
Tip: If you can’t identify the model, stop and consult the documentation before proceeding. - 3
Check for obvious signs of damage
Visually inspect for scorch marks, melted insulation, loose terminals, or corrosion. Do not touch any suspect components. If you see damage, avoid lifting the cover further and consider calling a pro.
Tip: Take photos for reference and insurance records. - 4
Test circuits with proper tools
With the area de-energized, use a multimeter to confirm continuity where appropriate and verify no voltage is present on accessible conductors. Use the non-contact tester to double-check that the panel interior remains non-energized.
Tip: Never rely on a single test; verify readings from multiple points. - 5
Reset or replace fuses/breakers safely
If a fuse or breaker tripped due to overload, replace with the same rating and verify connections are secure. Do not bypass fuses or use incorrect ratings. If you observe heat or damage, escalate to a professional.
Tip: Keep a record of the circuit affected and any part numbers used. - 6
Restore power and test circuits individually
Re-energize the main and bring circuits online one at a time, testing function in each area before proceeding. Listen for unusual sounds or smells as you re-energize.
Tip: If a circuit trips again, isolate that load and reassess surrounding wiring. - 7
Document findings and label circuits
Label each circuit clearly on the panel cover and in your notes. Update diagrams if needed and prepare a plan for maintenance or professional service if issues persist.
Tip: Maintain an up-to-date log so future work is efficient.
Your Questions Answered
What is a Kenari fuse box?
A Kenari fuse box is a residential electrical panel housing fuses or breakers that protect circuits. It serves as the primary distribution point for home electricity and requires proper labeling and safe handling.
A Kenari fuse box is a home electrical panel with fuses or breakers used to protect circuits. It requires careful labeling and safe handling.
Can I fix a Kenari fuse box myself?
Basic safety checks like power isolation and labeling can be done by confident homeowners. More complex repairs or signs of damage should be handled by a licensed electrician.
You can do basic safety checks, but call a pro for complex repairs or signs of damage.
What safety steps should I take before inspecting?
Always shut off power at the main, test for absence of voltage, wear PPE, and keep liquids away from the panel. Do not touch live components.
Turn off power, verify no voltage, wear PPE, and keep liquids away before you start.
What are common signs of a failing fuse box?
Frequent trips, burning smells, warmth from the panel, buzzing sounds, or scorch marks indicate risk and should be evaluated promptly.
Frequent trips or a burning smell are red flags that need attention.
Do I need a permit to work on my fuse box?
Most areas require a licensed electrician for panel work. Check local codes and obtain permits if needed.
Check local codes; many places require a licensed electrician for panel work.
How often should I inspect the fuse box?
Perform an annual check and after major renovations or appliance additions. Keep a log of trips and changes.
Do an annual check and after any major electrical work.
Watch Video
Highlights
- Power down before touching the panel
- Label and map circuits for clarity
- Use proper tools for testing and avoid shortcuts
- Call a pro for signs of heat, damage, or uncertainty
- Maintain a maintenance log and update after changes