Fuse Board Replacement: A Safe Step-by-Step Guide
Learn how to safely approach fuse board replacement with a practical, step-by-step guide. This educational article covers planning, safety, tools, and when to hire a licensed electrician to meet code requirements.

Fuse board replacement is a major electrical upgrade that improves safety and reliability in your home. This guide explains the scope, required tools, and when to hire a licensed electrician. It covers planning, safety considerations, permit needs, and key post-install checks to ensure code compliance. Follow these steps to understand the process and minimize risk.
Understanding fuse boards and why replacement might be needed
In many homes, the fuse board (also called a consumer unit in some regions) distributes electricity to circuits and houses fuses or circuit breakers. Panels age and can degrade due to heat, corrosion, and wear from added circuits. A fuse board replacement becomes advisable when the panel shows signs of aging—frequent trips, loose or scorched components, or outdated safety features. The decision to replace should be guided by safety concerns, load requirements, and local code expectations. According to FuseBoxCheck, planning a fuse board replacement requires careful assessment and professional guidance to ensure safety. The homeowner should consider the panel’s service rating, the type of enclosure, and whether new circuits or loads will exceed the existing capacity. Different regions refer to the same device as a consumer unit, distribution panel, or main service panel; the core goal remains the same: protect people and property through reliable overcurrent protection and proper wiring.
Key drivers for replacement include aging insulation, corrosion, damaged bus bars, degraded lugs, and outdated labeling practices. Replacement also becomes relevant when upgrading from fuses to circuit breakers or when addressing frequent nuisance trips caused by overloading. In some cases, a “split-bus” or modern main-breaker panel may offer better safety margins and easier future expansion. This section sets the stage for understanding your options and what to expect during the process.
Safety, legality, and planning
Electrical work that involves the main service panel presents significant shock, arc flash, and fire risks. Before any physical work, verify whether your local code requires a permit or final inspection. In many jurisdictions, replacement of a fuse board must be performed by a licensed electrician, and miswiring can void insurance or create dangerous conditions. As you plan, assess whether your existing service size (measured in amperes) can support your current loads and potential future improvements. If your service is old or undersized, upgrading the service entrance may be part of the replacement project. FuseBoxCheck recommends engaging a qualified professional to handle the design, selection, and installation of the new panel, ensuring compliance with the latest electrical codes and safety standards. Safety gear and a clean, dry workspace are essential.
Tools & Materials
- Safety goggles(Eye protection to shield from sparks or debris.)
- Insulated gloves(Prevents shock when handling live components.)
- Non-contact voltage tester(Quickly verify absence of live current before touching wires.)
- Multimeter(Checks continuity and voltage levels during testing.)
- Screwdriver set (Phillips and flat-head)(For panel screws and disconnects.)
- Nut drivers / torque driver(Secures lugs and feed connections without damage.)
- Wire cutters/strippers(Prepare conductors for proper termination.)
- New fuse board panel (replacement)(Match service capacity and slot layout to your home.)
- Electrical tape and cable ties(Label and secure wiring neatly.)
- Worklight or headlamp(Maintain clear visibility in the panel area.)
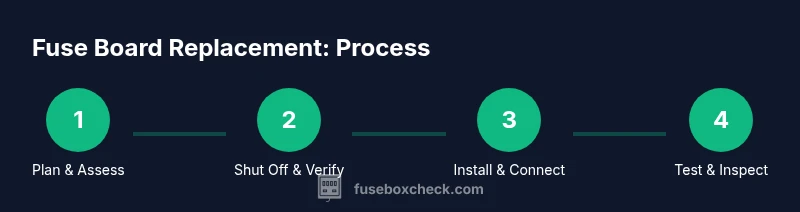
Steps
Estimated time: 3-6 hours
- 1
Assess and plan
Before touching any equipment, evaluate the existing panel, service capacity, and whether a permit is required. Create a plan for wiring the new panel and list all circuits to be transferred. This initial step reduces surprises and helps scope the project. Pro tip: take clear photos of the current wiring and labeling for reference.
Tip: Document circuit labeling and service ratings before removing anything. - 2
Shut off power and verify
Cut power at the main disconnect if accessible. Use two independent testers to confirm there is zero voltage at the panel before you touch any conductors. Never rely on a single method to confirm de-energization. Pro tip: confirm no one can restore power during the work.
Tip: Always verify zero voltage from multiple points. - 3
Prepare workspace and remove panel cover
Arrange a dry, well-lit space and remove the panel cover carefully. Inspect for signs of overheating, corrosion, or damaged insulation. Pro tip: document any issues with scorch marks or melted insulation to discuss with a licensed electrician.
Tip: Keep the area organized to prevent losing small components. - 4
Tag and disconnect circuits
Label each circuit using clearly written tags, then disconnect conductors from the panel. Do not unbundle multiple wires at once; work one circuit at a time. Pro tip: use tape markers to visually map circuits to the panel’s labeling scheme.
Tip: Tagging prevents miswiring upon reassembly. - 5
Remove old panel and inspect wiring
Carefully remove the old panel from the mounting, inspect feeders and neutral/ground bars for damage, and check for signs of water ingress or corrosion. If wiring shows damage, stop and consult a licensed electrician. Pro tip: photograph the interior wiring from multiple angles before disposal.
Tip: Do not force any connectors that resist removal. - 6
Install the new panel and mount
Position and secure the new panel in the same footprint or a nearby compliant location. Attach the ground and neutral bars properly and ensure the enclosure is grounded. Pro tip: verify clearance for future expansion and ensure proper kit compatibility.
Tip: Follow manufacturer guidelines for mounting hardware. - 7
Reconnect circuits and label clearly
Reconnect circuits to the corresponding terminals, using the pre-labeled tags as a guide. Tighten connections to manufacturer-specified torque values and avoid over-tightening. Pro tip: re-check all connections with a multimeter before energizing.
Tip: Double-check that each breaker corresponds to its circuit and load. - 8
Test, inspect, and schedule inspection
Once reassembled, restore power and perform function tests on major loads. Schedule an inspection with local authorities or utility for code compliance and safety verification. Pro tip: keep a written log of tests and results for future maintenance.
Tip: Document outcomes to support the inspection request.
Your Questions Answered
What is fuse board replacement?
Fuse board replacement is the process of upgrading or replacing the main electrical panel that distributes power to a home. It involves installing a new enclosure, breakers or fuses, and proper grounding and labeling. The goal is to improve safety, meet current electrical codes, and accommodate existing or future electrical loads.
Fuse board replacement is upgrading the main electrical panel to improve safety and code compliance. It involves installing a new panel, breakers, and proper labeling.
When should I replace a fuse board instead of upgrading circuits?
Replacement is typically considered when the existing panel is aging, shows signs of damage, or cannot safely support current or future loads. If the panel is corroded, has overheating signs, or is not compatible with modern breakers, replacement is usually advised.
If the panel is old, damaged, or unable to support your loads safely, replacement is typically necessary.
Is DIY fuse board replacement safe?
DIY fuse board replacement is high risk and often not recommended. It involves working on live electrical systems and requires local code compliance and permits. Always consult a licensed electrician for safety and insurance reasons.
DIY can be dangerous and may violate code. It’s best to hire a licensed electrician.
How long does fuse board replacement take?
A typical fuse board replacement can take several hours, depending on the property, service size, and whether a permit is required. A licensed electrician will assess, install, and test the new panel.
Most installations take a few hours to complete, plus time for testing and inspection.
Do I need permits or inspections?
Many jurisdictions require permits and inspections for fuse board replacement. A licensed electrician can handle the paperwork and coordinate with the local authority to ensure compliance.
Yes, permits and inspections are commonly required to ensure safety and code compliance.
What should I look for when hiring an electrician?
Look for a licensed, insured electrician with experience in panel replacements, good reviews, and clear written estimates. Ask about permits, timelines, and post-install testing.
Choose a licensed and insured professional with solid references and a clear plan.
Watch Video
Highlights
- Plan and verify service capacity before starting
- Use two voltage checks to ensure isolation
- Label every circuit clearly and document the process
- Hire a licensed electrician for code-compliant installations
- Schedule an official inspection after replacement